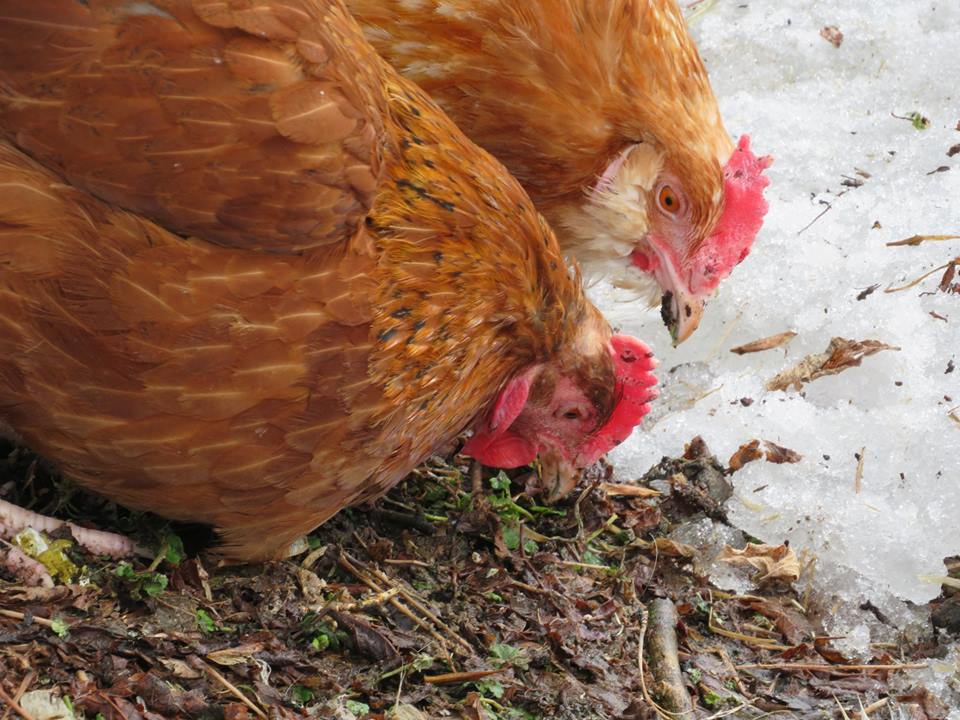
I have been struggling with this photo, winter has been hanging on in such a hard way.. I kept looking for new ways to show the start of new life..
Today I had to choose a photo.. I decided on this one.. I think the story of new life coming is pretty easy to find.. Winter is slowly moving out, baring the soil to the sun and new life (those tiny bits of green) are starting..
What I found interesting in this photo for me is how intent the hens are, they are so focused on that special edge of in between.
Despite the snow, we bundled up and headed out to prune the cherry trees on sunday. The little trees need almost no pruning get. However the big producing tree needed a good prune to honest.
I have three large branches in water in a five gallon bucket in the tub to force the blooms as I want to use them in the kitchen. After blooming they will be prepared to future use in regards to smoking.
The tiny twigs were all trimmed off the rest and are laying out flat drying out and will be used in small smoking at a later date. The branches about the size of my pinky were peeled and the bark dried.
If you do not or can not watch the little under a minute video, here is a tip, use a veggie peeler instead of a paring knife to peel off the bark and under layer of the bark.
While a lot of people would want these for short term use to make a cherry bark cough tea, I am more interested in having it in the herbal cupboard for
a) going in the herbal wound wash blend to make into a tea
b) to be used in very small amounts in a blend for worming
c) using to strengthen my hair in a herbal rinse
I do not use it a lot so a little will go a long way in my herbal cupboard. It will continue to dry in a cool dark cupboard until crispy, then into storage and I will only grind fresh as needed.
Do you make money?
Ya but what did it cost you to raise that chicken?
But if you had to buy it, what would it be worth?
What do you spend to have what you have?
But it does not cost that much to keep those critters?
Why does it cost you so much to raise that lamb?
Why do you spend so much on seeds?
Its got to be cheaper to just buy it in the stores.
Ok folks.. I am going to break a unspoken homesteading rule.. I am going to talk numbers! AHHHHHH.. run for the hills.. stats, data.. hard costs.. Hauling costs, Butcher costs and more.
LOL, no really, now that I am done poking fun at things, lets get to the meat of things.
Those are honestly real questions I have been asked over and over again.
So the first thing we have to do is get a full grasp on what I have on the farm as of Feb 2019 (if you want to see the list for
3 dogs (two farm/house dogs and one adorable house dog)
6 cats (mix of outside farm cats only and indoor/outdoor farm cats)
2 Geese (bonded)
1 turkey hen
21 Adult chickens (breeding pen of four purebred) the rest mixed breed
12 adult ducks
2 adult breeding rabbits
10 Grow out rabbit kits
3 goats – Two Does and One Buck
1 pig
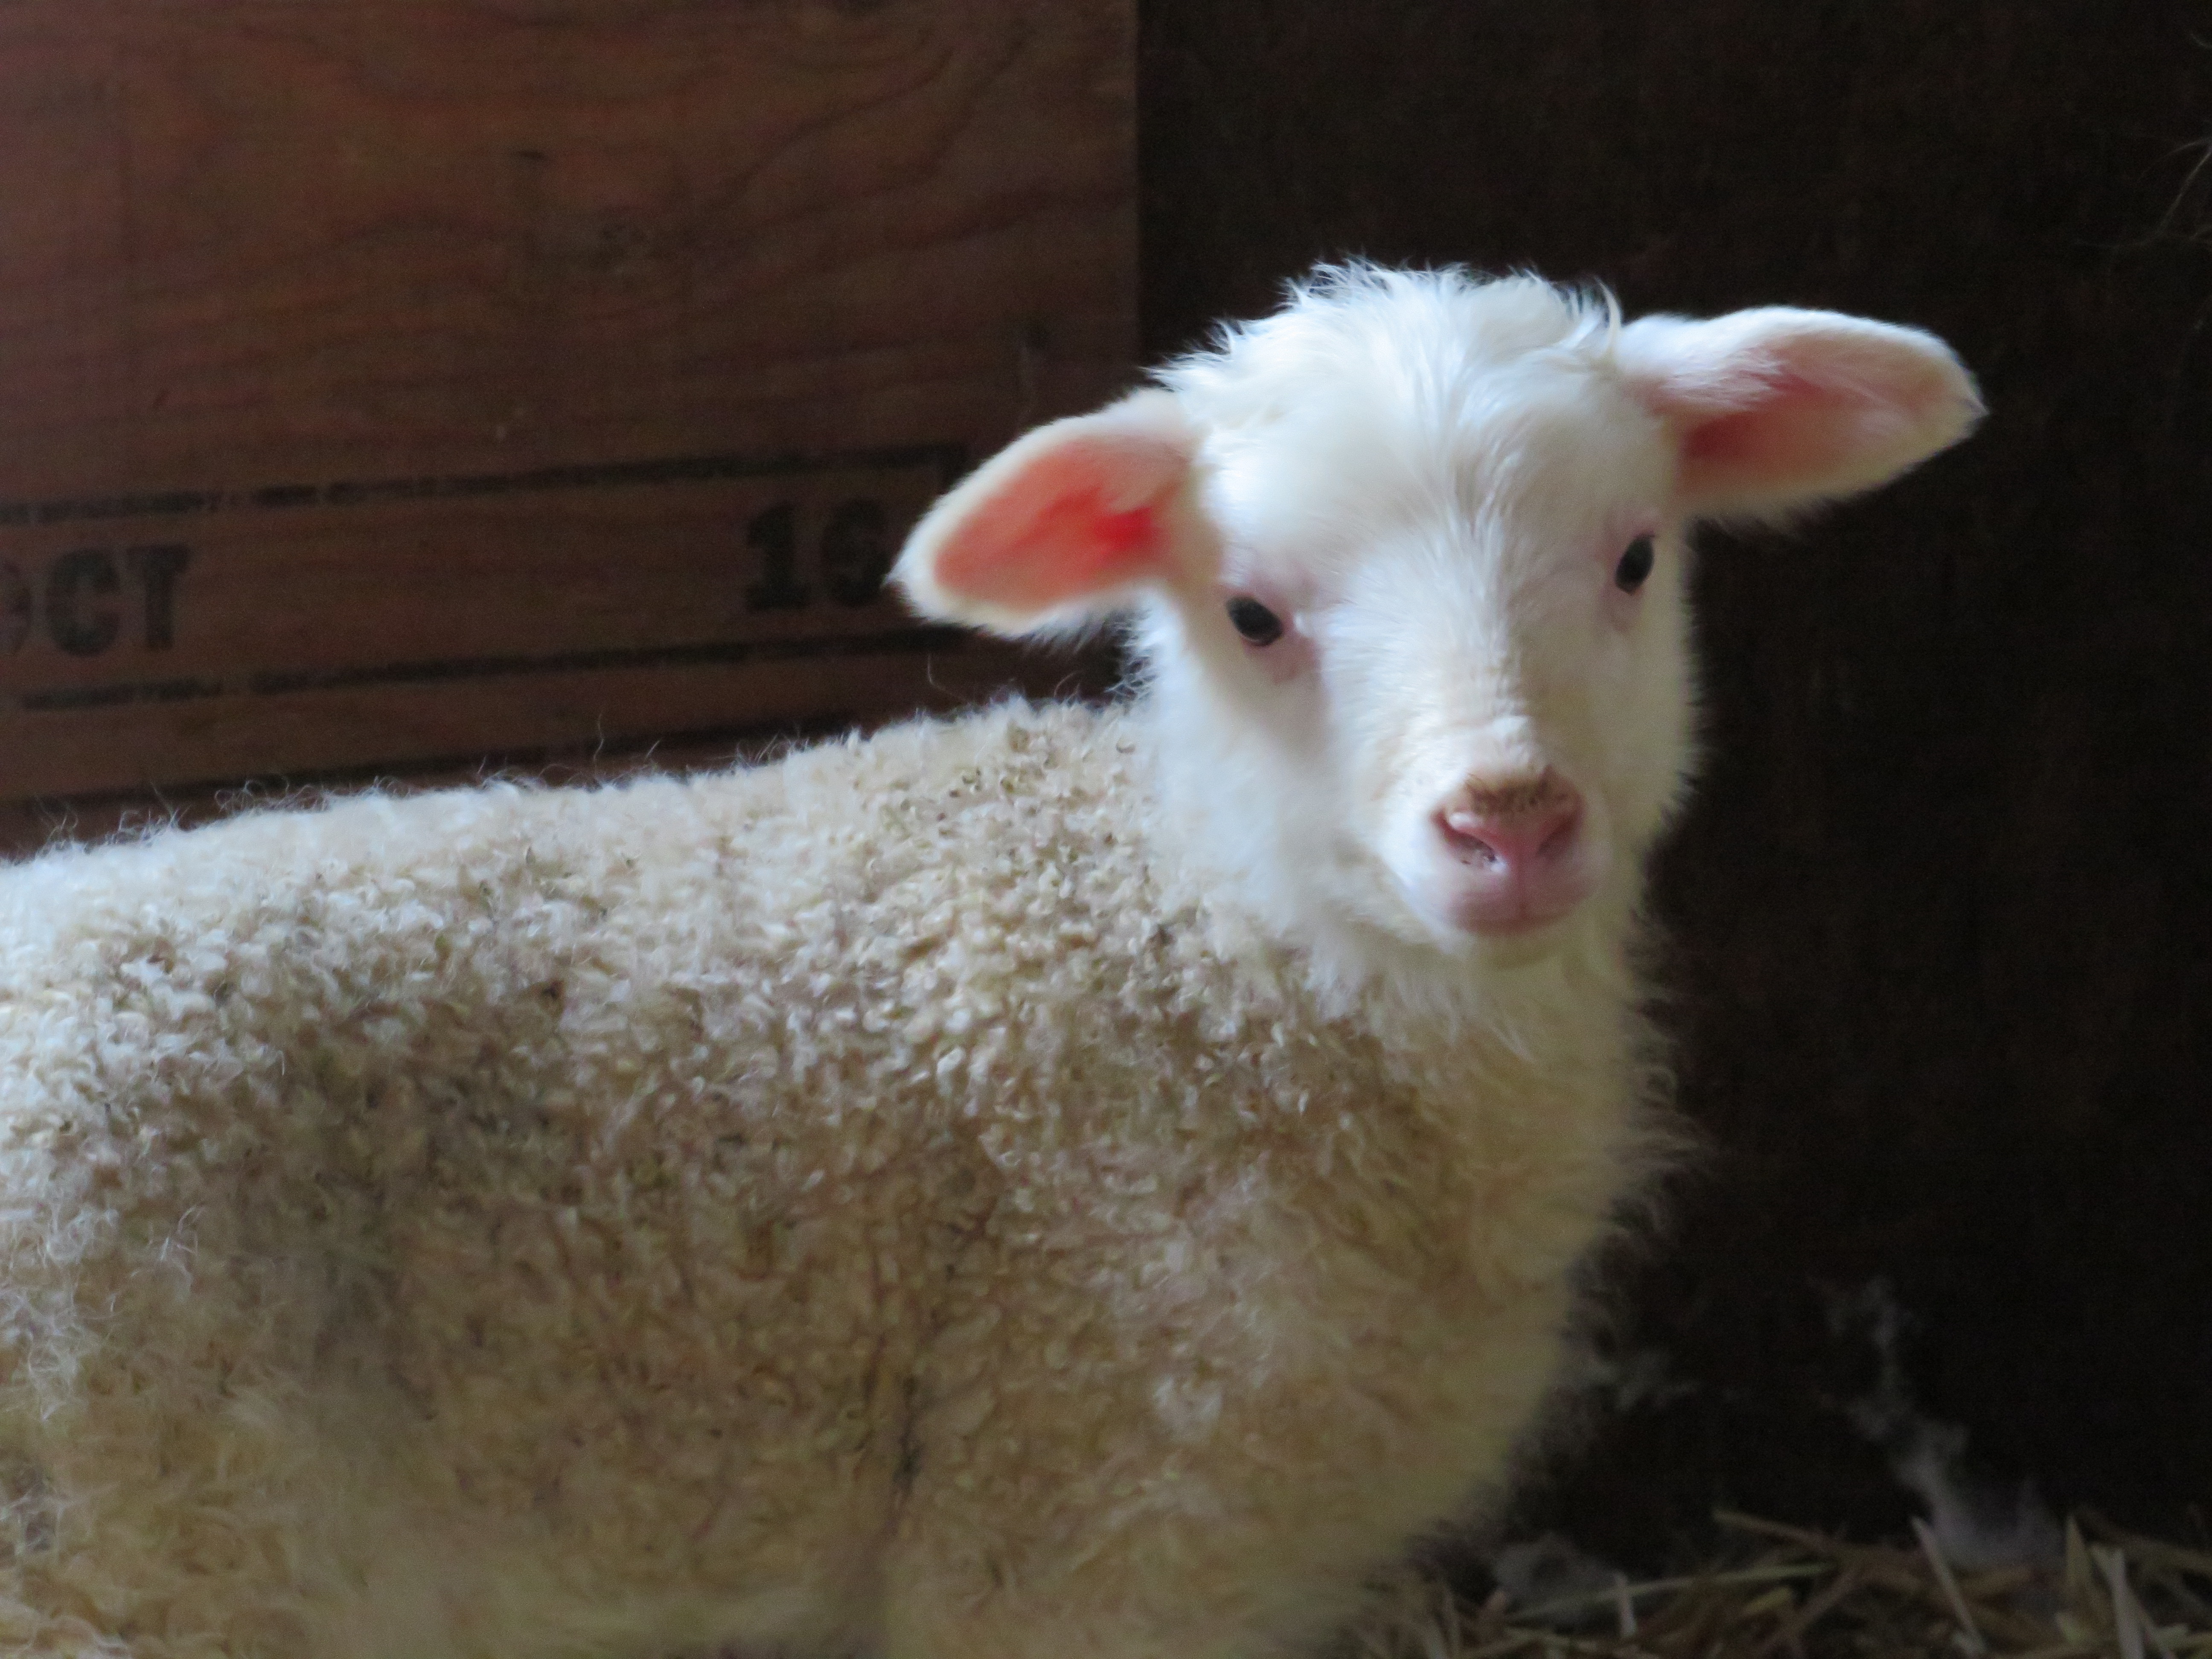
13 sheep
14 new lambs on the farm, 16 born, 2 passed. (Lambing is now done)
2 horse’s
Ok, so to make things a little easier to see, anything that changed from month to month or is new is in the slant.
Pastures
Gardens
Hard Fruit Tree’s
Cane Fruit Garden’s
Soft Fruit Bushes
390 dollars spent this month plugs/plants for the big yard replant.. these will be delivered to the farm at the proper time to ship them in May. This includes shipping and tax fees.
Total spent so far on the above $980
Training or Education Cost 2019
130 -Eco Farm Days (early bird cost for savings) for two full days
Pruning Workshop – 90 dollars (both hubby and myself)
10 dollars -Sheep Training Day for Zone 10 (both hubby and myself)
Total Spent to date 230.00
This is my first year that I am totally pulling back on raising extra farm gate meat for sale.. the meat raised on the farm is for our own farm use only. If this changes, I will make notes on that. This will change, we have more lambs born this year then we will need for our own freezers but I have not decided on how many will go for farmgate sales.
Eggs however are open for farm gate sales.
All milk/milk products are for on farm use only!
Seeds/plants and plant productions are open to a point for use in farm gate sales
Photo sales directly related to the farm or farm critters will count towards farm income, however photography sessions and or sales not related to the farm or the farm critters does not count towards it.
The first thing to go will be the yearling sheep now that they are getting nice and big, they are ready to be done.. as I was growing them for my own use I prefer them to be larger/older then the “average” lamb. I very much like hoggart (over one year in age, but not older then two years of age)
The pig is ready for butcher as well.. its on the list but the weather must get better.
The intend is to grow less meat overall, but a wider kind of types and increase the amount of fruit/veggies/herbs we are growing. I can raise livestock at a rate on the farm out pace’s our own needs very easily. This is something that I need to pull back on!
So the out costs this month are in
Ok so here is our numbers for Feb
Hay Costs – $375
Straw 75
Feed Costs – $346
Vet Costs- 620.00 (Shots/Spay for Leeloo and required Flea/Tick meds for six months for the farm dogs and 1 month flea/tick/etc meds for the farm cats)
Ferrier Costs- 100.00
Returns
*14 lambs, they are not returns until they are either keep back replacement value in stock for the herd or until they are sold as farmgate or until they are farm butchered and return yield to the farm in terms of filling the freezer or pantry. so while they arrived this month, they can’t count on this month. If I could count them.. they would run around 200 each to replace per what I am seeing on Kijji at the moment.. would it not be lovely to have that 2800 bump to my final numbers but that would be the lowest return rate I could get for them, and that would not be a good thing for the bottom line in the end!
24 dozen Eggs (at 5 dollars a dozen, which is the average cost for farm gate eggs Mix of chicken/duck eggs) – $120.00
Milk- Sheep- Very limited milking yet as we are waiting for the lambs to get old enough for share milking. I also need to re-check what fluid sheep milk is worth this year but I am going to rough it out at 100 in milk for the past month.
Jan income $105
Feb income $95
March income $220
In the Red by $4,168
Honestly I am not worried, I know that the farm “saves” us money and that we get a yield back on our investment in a big way, plus we know how the animals are raised, the food grown and the processed.
I have tried to do a hard track year but things keep getting in the way.. the last time I did a full hard track year and was successful at doing so ALL year long was a while go.. I need to do so this year and get a firm grasp on where we were, and where we are.
However having said that, in many ways we are starting a lot of the yard/gardens over again because of what happened last year. This will means many things will be up in the air in regards to what can and will get done.
Throw in the fact that we are in for a wild weather ride and we will see..
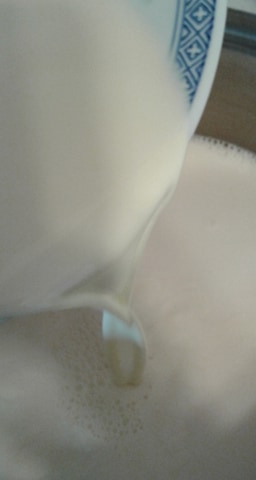
2 pints [20 ounces] new milk
1 cup [8 ounces] Beestings Milk * Colostrum (1st day if possible but can use up to day 3)
Combine the two milks together.
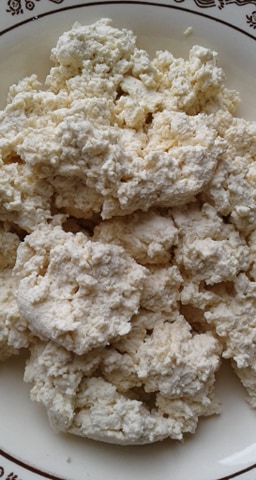
In a large heavy flat-bottomed ideally steel pan bring quickly to just under a boil.. traditionally, you would stop at this point, take off the heat, let it sit till it curds up and eat fresh as is (this cheese would need to be chilled in the fridge and eaten within 2 days)
However I went a little more modern, I added in 1/4th cup of lemon juice to add acid to the mix and I will sprinkle in 1/2 a tsp of salt into the cheese itself. I will still chill it in the fridge and I am quite sure it will be used up within a day or two.
please note, you should use steel spoons and tools when possible, I just gave my wooden a good salt scrub before I used it.. Its one of those do as I say, not as I do 🙂 moments here on the blog!
I am greatly looking forward to putting this lovely fresh sheep to use in the kitchen.. This recipe could be used for first freshened cow milk, goat milk or sheep milk.
Good Morning, Come in, Come in.. it rain most of the night so stay to the paths when possible. Its still drizzling, I know.. we can see melting around tree’s, fence posts and around rocks.. Coffee’s on..
It is so nice that we can just stand a moment on the deck and look out but lets not get to wet before we head in.. so much to do out there.. Here let me hang up your coat, they say that it will turn to snow later this afternoon and snow all night and that the storm might even go into Sunday
March is going out like a lion! I have a course on Saturday but its nice and close by so I should be able to make it. However if they are right, there goes my plans on the weekend to get to the pruning.
Yes the house does smell nice, its the cedar being dried. I am working on putting up a years worth of Dried Cedar. Half of it is going into oil in the cold process for the next four weeks and the other half is being prepared. Some of it will be done into a soaking tea for your feet and the rest will be put up for if I need to make more salve in the future.
The Prepared Cedar oil will be used to make one of my coming tree based salves in my spring salve collection. I am both excited and a bit nervous to tell the truth but I will be for the first time offering my different salves for sale this year.
I have a number of different sizes.. I will have all six of the spring collection in the smaller silver tin and in the travel size. Farmgal’s Green Salve will be in the Big Gold Tin (it will also be available in the travel size)
The other sizes are to give people as much choice as possible. I am looking forward to this spring so much in regards to foraging, collecting, processing and creating my salves.
I will also be offering salve making classes for those that would like to learn how to do it themselves if you are local.
In a way its been a good thing that the weather didn’t work for the garden/butcher this month because it allowed me a lot of extra time to work on the Spring Salve and Soap line.
Of course I say that now LOL however the coming month means that if the weather works for me, that I will be harder pushed but that’s ok.. it will all come together.. One step at a time. It all adds up.
The red wing black birds have arrived on the farm.. Its a sure sign of spring.. I love hearing their sweet voices. I had a flock of six come though but only two males have claimed the farm, which sounds about right!
I have been seeing great strides in regards to my physio and I can see where I am so much stronger, I also realized that if I “baby” one thing that I can get so much more done when I have not pushed that area so much.
Squatting is a killer for me, I can only do it for so many times, its not the going down or being down that is that much of a issue, its getting back up that is the issue lol. I decided to take the bull by the horns and got myself a kneeling pad with lift arms, it gives you a padded area to kneel on and then helps give you that ability to use upper body, instead of just legs and core.
I will keep doing my work but I needed to find a meet in the middle so that I can go longer each day without wearing out.. I think it will greatly help when I need to go up and down dozens of times in a row working on things.
I am so excited to see spring really start, so many folks are already planting gardens down south in the states and you all are giving me a mild case of garden fever.. but everything in its own time.
While there has been flooding in the area, so far my own farm is melting out in a very controlled way, I could not be happier with how its going. The Pond is acting as a great collection point in the front yard, I am interested in if and when? it will overflow into the rain garden collection point behind it.
Only time will give me the answer. The different channels we cut into the snow are working just as planned, they are nicely directing the melt water as it moves. This is a very good thing indeed.. (thanks Phil for the idea)
On other news Hubby finished his first draft of his first novel (he is published as both a short story multiple times and as a novella) but this is his first full length. Proud of him and also really glad that the big writing push is done and that he is on to the edit stage.
He was really “in” it and I was hoping it could get done before I needed to pull him away and focus on the farm now that spring has sprung!
I finally got Instagram on my phone and I am learning slowly how to make it work. If you would like to follow me, I will follow back 🙂
Right now I am still figuring things out but I promise to add a good amount of extra photos on it in the coming and goings of the day. While I expect that there will a good amount of farm stuff on it, I hope to use it just as much for short off farm trips.
Well, I had better get off the computer and on with the doing.. Everyone have a good day, hard to believe that somehow its the last Friday of March! Where did the month go!
Well, I have found the company I want to work with, I am just waiting back on word on if I can get it ordered in by our local Home Hardware or if they are going to send me to somewhere else.
I am doing a massive re-seeding of Corner Pasture and Front Pasture. We got the new fence line in last summer to create the Front Pasture, splitting the “big” pasture pretty much in half.
These two area’s are getting a full re-work.. on the Front Pasture, I will be adding in small Swale’s to help with drainage and to increase the land space, each side of the swale will be planted and overall, it should give a total of an increase of about 20 percent.. crazy how that can work but so be it.
The corner pasture has only ever had light frost seeding happen to it and its odd little pasture, it has a natural self made mini pond/large swale.. it fills and holds on all rains.. It’s a bit tricky because I will have to make a short entry way into its backside because they horse’s will need access to the their walk in lean too.
Otherwise, I think I can get four squares out of it for the sheep in terms of stripe grazing and I am going to be planting willow cuttings around the swale/mini pond that will be planned silvo pasture for the future.
That pasture is also getting a gentle but large collection rain garden, the area is already a collection spot, I just want to take an it a touch deeper and add in the collection swale’s to pull that water into the rain garden area. Its going to be turned into a small stripe grazing paddock with moveable hot line fencing.. It is big enough that I can get nine feeding out of it once it’s fully working.
I will be planting a full new double hedgerow along the road front in the front pasture. The front line will be native fruit bearing/medical with a under planting for native pollinators, the second line will be planned for Silvo Pasture/tree fodder production. I lost over 60 of my smaller feeder tree’s last year. Not just cut down and come back.. I mean I lost them, they were cut down an then pulled out by the roots and piled up.
They need to be replaced or at least a good amount of them do.. and as I am starting from scratch, I might as well do it into mainly willow, a much better choice for all the livestock to be feeding on. I am planning on going with Native Black willow but I will mix it up to a point as well doing some hedge willow in there as well.
It needs to be this way for a few reasons.. One the front needs to have picking access by human’s as required plus all the bushes types need to be the powerline rules in top out growths.
The second line however needs to be protected by the moveable net as it grows up, but it must be kept trimmed enough that it never gets past the height I can work with by hand.
We will see how many planted out this year. We got a great sale for new sheep/goat fencing at a hundred dollars off per roll this week. I am so looking forward getting that fence line redone, not just because it needs it but because it will truly make the farm look better to those that pull in 🙂
This is the blend being used for the Small pasture that will be getting a very heavy frost seeding out to improve and back fill it. This area is a crap shoot this year, I am most likely just throwing things to the wind on this one.. I am not at all sure that I can get this one finished in terms of fencing (its the lowest on my list). While I can get a hot line to keep the horse’s out, keeping the sheep and goats out.. that’s a whole different thing..
The one area that this will be a good thing, is this one is going to into the “Keep” and will be heavily re-seeded. I will see if they are willing to remove the white clover, if not so be it, that is the one thing I do have lots of.. to much to a point.
Bojangles is going to a busy working horse this year in helping me rework the pastures this year..
Frost Seeding Blend
10% Bruce Birdsfoot Trefoil 7% Huia White Clover
10% Double Cut Red Clover
20% Baridana Orchardgrass
25% BG-24T Perennial Ryegrass Blend 15% Promesse Timothy
13% Fixation Balansa Clover
This is my ground cover blend for the “big yard shake up”..
I will be using this blend on the close cropped down side ditches and used in full amounts anywhere there is bare ground that does not get a tree, fruit bush, or plant.. I would rather have to cut and drop this where needed, then have bare soil in the yard.
Add in this blends availability to help feed the pollinators and we are good to go for sure!
Non-crop land Pollinator Blend
Alfalfa, White Clover,
Yellow Blossom Sweet Clover, Crimson Clover, Chicory, Sunflower, Alsike Clover, Single Cut Red Clover, Double Cut Red Clover, Brown Mustard, Groundbreaker Radish
The Big Pasture is going to just get a light cover of oats to help create a quick fast growth on it to fill in the spaces and otherwise, its on next years list.. A person can only do so much per year..
Let me tell you straight up that I have NEVER ordered as much off farm tree’s, bushes, plants and plant plug trays and garden veggies as I have this year.
Spring orders for 2019
Bare Root Fruit Tree’s
Bare Root Nut Bushes
Bare Root Fruit producing Bushes
Started Plant Plugs in lots of 12 or 24 plus Fruit Producing Bushes
Started Plant Plugs in lots of 12 to 24 in regards to “herbal use” bushes
Started Plant Plugs in lots of 12 to 24 in regards to “animal fodder uses or medical use for livestock”
Started Plant Plugs in lots of 12 to 24 for “Herbal Tea use” and different season bee feeder plants
Six kinds of Seed potato’s
2 kinds of Started Tomato’s
4 kinds of started Pepper plants
A full lot of 12 started Aunt Molly Ground Cherries
24 bare root Sweet Potato cuttings
That’s just the stuff that is coming off farm to the farm as each shipment date comes up. Then there is all the early starts that I am working with..
I will be starting my own seedlings this coming week (more on that next week) and I will be doing more pruning this week.. we got the plum tree’s pruned and we will be working on the rest this week.
Ideally this weekend will bring me to the Permaculture propagation pruning’s. I will be pruning and creating a large number of High Bush Cranberry, Elderberry and Black Chokeberry cuttings. I would like to be starting at 2 dozen of each..
Then when I get to the gooseberry and currant bushes, I hope to get at least a dozen, perhaps 2 dozen red, white and black currant cuttings to start after those bushes are pruned up.
I will be adding in some pin cherry babies this year from a friend’s farm. I will be also cutting digging and transplanting at least one more 50 plant raspberry row. I hope to gift at least another 40 to 50 this spring for someone else’s farm, along with at least 10 cuttings of red currant, high bush cranberry, elderberries and maybe a rhubarb cutting or two.
I would like to tell you that this week as been really productive garden wise but it’s just not true, we have been having more below 0 days and down to -14 to -16 nights on average.. they say that it might be warming up a bit
I have gotten some of the now “full sun” side garden along the house raked and some of the smaller rocks removed.. we placed a large piece of glass over one area to help raise the soil temp and I will plant it out and use a cold frame over the area as an early spring move the plants back and forth. I can’t plant there as we need to keep cleaning the area out, move out the rocks, and raise the height of the bed itself. I am up in the air if I need to add enough soil that I need to dig out the daylily’s or if I will just add a layer over them this year and the next couple years and build it up that way over the plants. I will share how it goes.
It’s so very strange to have a whole area of the yard suddenly be full sun, that has always been in shade since I got the farm. It means a good amount of changes in plants a ways to use those gardens.
The new garden bed to be in front of the deck will be a kitchen garden with a lot of vertical growing space being planned into it. The main plan for that garden is dead simple..
Fresh eating climbing cucumbers, cherry tomato’s, radish, green onions and some chives, and then a nice pretty front border row of flowers for a pop of color and to help bring in the bees/pollinators
It’s not so easy to figure out what I want in the small front yard garden area.. it’s not really that small either LOL but that’s its name.. the small front yard garden area because its needs to be split and understood that it’s not part of the Big front yard Permaculture style food forest/mini gardens etc
I will take some photo’s for you when it’s not under 2 plus feet of snow, nothing much to show you.. snow and more snow.. but it is slowly melting (they say we will have more snow in two days)
So I leave you with a cute little video of my Dez being a good helper farm dog, she is always willing to give a helping paw LOL
Hopefully I will have more updates by next week, at least I should have a good amount of pruning updates and start’s for propagation on cuttings
Most folks tell you that you need to use Tallow (Beef) lard in regards to making a homemade bird feed seed cakes. I wanted to share that it is very possible to use lard (pork). I will admit that I am using pasture based no corn/no soy locally processed self rendered by myself.
Having said that if you can find rendered Tallow or Lard at your local butcher, I see no reason why this would not work just as well. I think in a total pinch, you could use lard from the store as well.
I have Tallow and Lard cakes out in the yard at the same time, and I am needing to make and replace the lard one faster then the tallow. I will admit to being a touch surprised by this fact.
This recipe is a great blend of 2 cups of sunflower seeds and 2 cups of mixed small bird seed with two cups of my home rendered lard. Mix together and place it in a tub or pan to chill, then cut and place in the feeder.
This recipe makes 2 blocks. My suit feeder is a double feeder, one block on each side and my big sunflower feeder as seen above also needs two blocks, one on each end. If you only use one block at a time, you can still make this recipe. Just put the second block into a tub or bag and pop it into the freezer until you need it. Bring it back to room temp and then put it out into your feeder.
If you buy a store feeder block, just wash it up and keep it as your mold to make your homemade ones in.
Last fall a huge old Maple Tree came down in the “Yard Shake up 2018” and it left me with this huge rotted out stump. I meant to do more with this it last fall but all I really got done was prepping it some for spring.
Well, Spring is here! This past week, I took a shovel out and removed layers of snow on top and around the stump itself, as once its exposed to the sun it will warm up faster.
Here is my Stump Garden to be.. three days after I shoveled it out. Still very frozen in the middle, I scraped out the top layer of sugar snow till I hit more solid ice.
Then we added in two huge shovels worth of rabbit poo.. So our first layer in the stump is the well rotted wood that you saw being pulled down in the video above and now I have added in a four inch layer of rabbit poo.
This has been done for two reason’s..
The first is that the black rabbit poo will act as a heat sink for the sun and will help this area heat up and melt down faster.
The second is that I want that layer of a cool manure to rot down into the water holding rotted wood below it..
Once that has melted out, I will top it with a mix of well finished compost/dirt to fill up the rest of the stump and get it planted out.
I am sorry to have this rant, I might not even post this.. I most likely will and I am sure I will lose a reader or two.. but I have to write this.. If you live in an apartment or a tiny condo in the city, you can be many things.. You can be […]
Ok, its just going on record that we are going to be “in just in time mode” on most things this year. Let me give a example.. we have pulled at least a hundred or two wild parsnips but then we needed to focus on this or that.. and suddenly this week, we are like.. […]


")
")
")

")

")
")
 (2)")
")

")
")

")

")
")
")
")


")

