High-Altitude Cold-Climate Gardening : Overcoming Soil Challanges.

High-Altitude Cold-Climate Gardening: Overcoming Soil Challenges

Guest Post by WillowCreakFarm Part 3 of 5

This is the third post in our High-Altitude Cold-Climate Gardening series. You can read the other two by clicking the links below:

Now we will discuss overcoming our soil challenges. Living on a rocky mountainside leaves us with soil that is decomposed granite. It doesn’t retain moisture, or heat, and it is low in nutrients. We also have a lot of pine needles constantly falling from the Ponderosa Pine trees that add too much acidity to the soil.

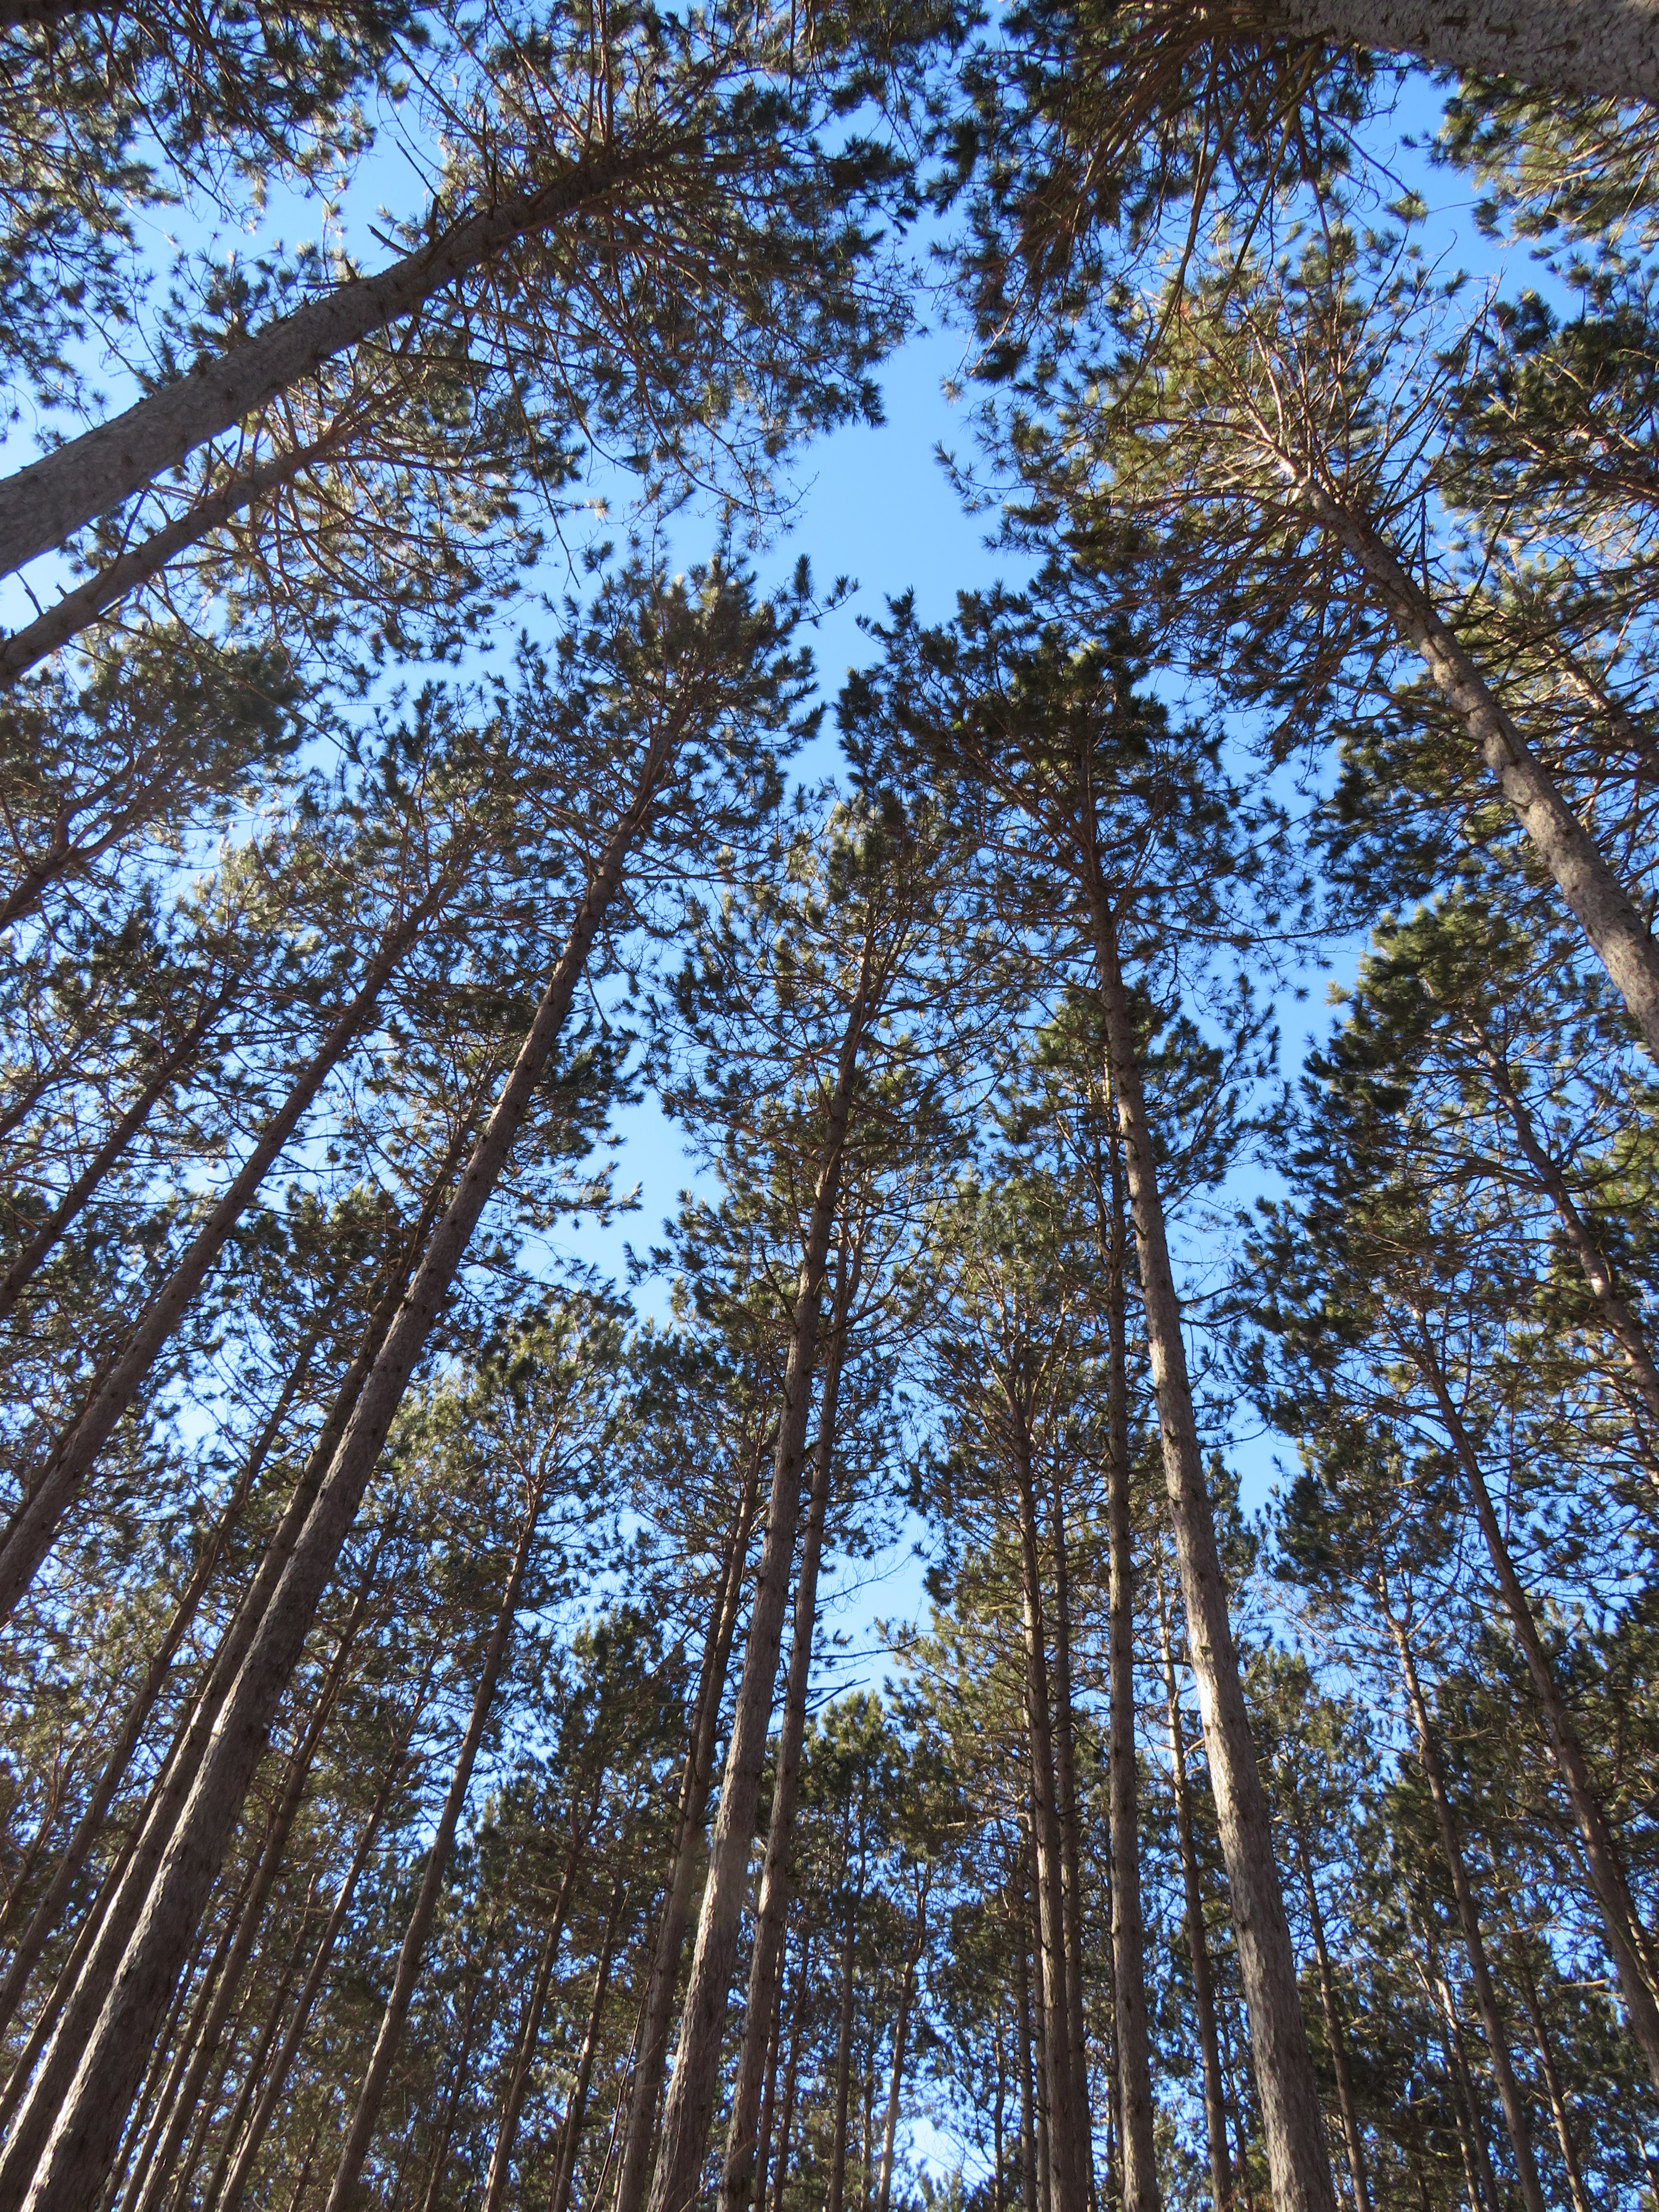
The natural forest around us consists of plenty of pine trees, with rocky outcroppings scattered around as well as some large piles of huge rocks, some shrubby bushes, and a carpeting of pine needles on the ground. There are few plants and grasses that happily grow in the carpet of needles and the rocky soil.

Even though this is a winter photo, you can still see what terrain I am describing. Trees, lots of big rocks, and the scrubby bushes.

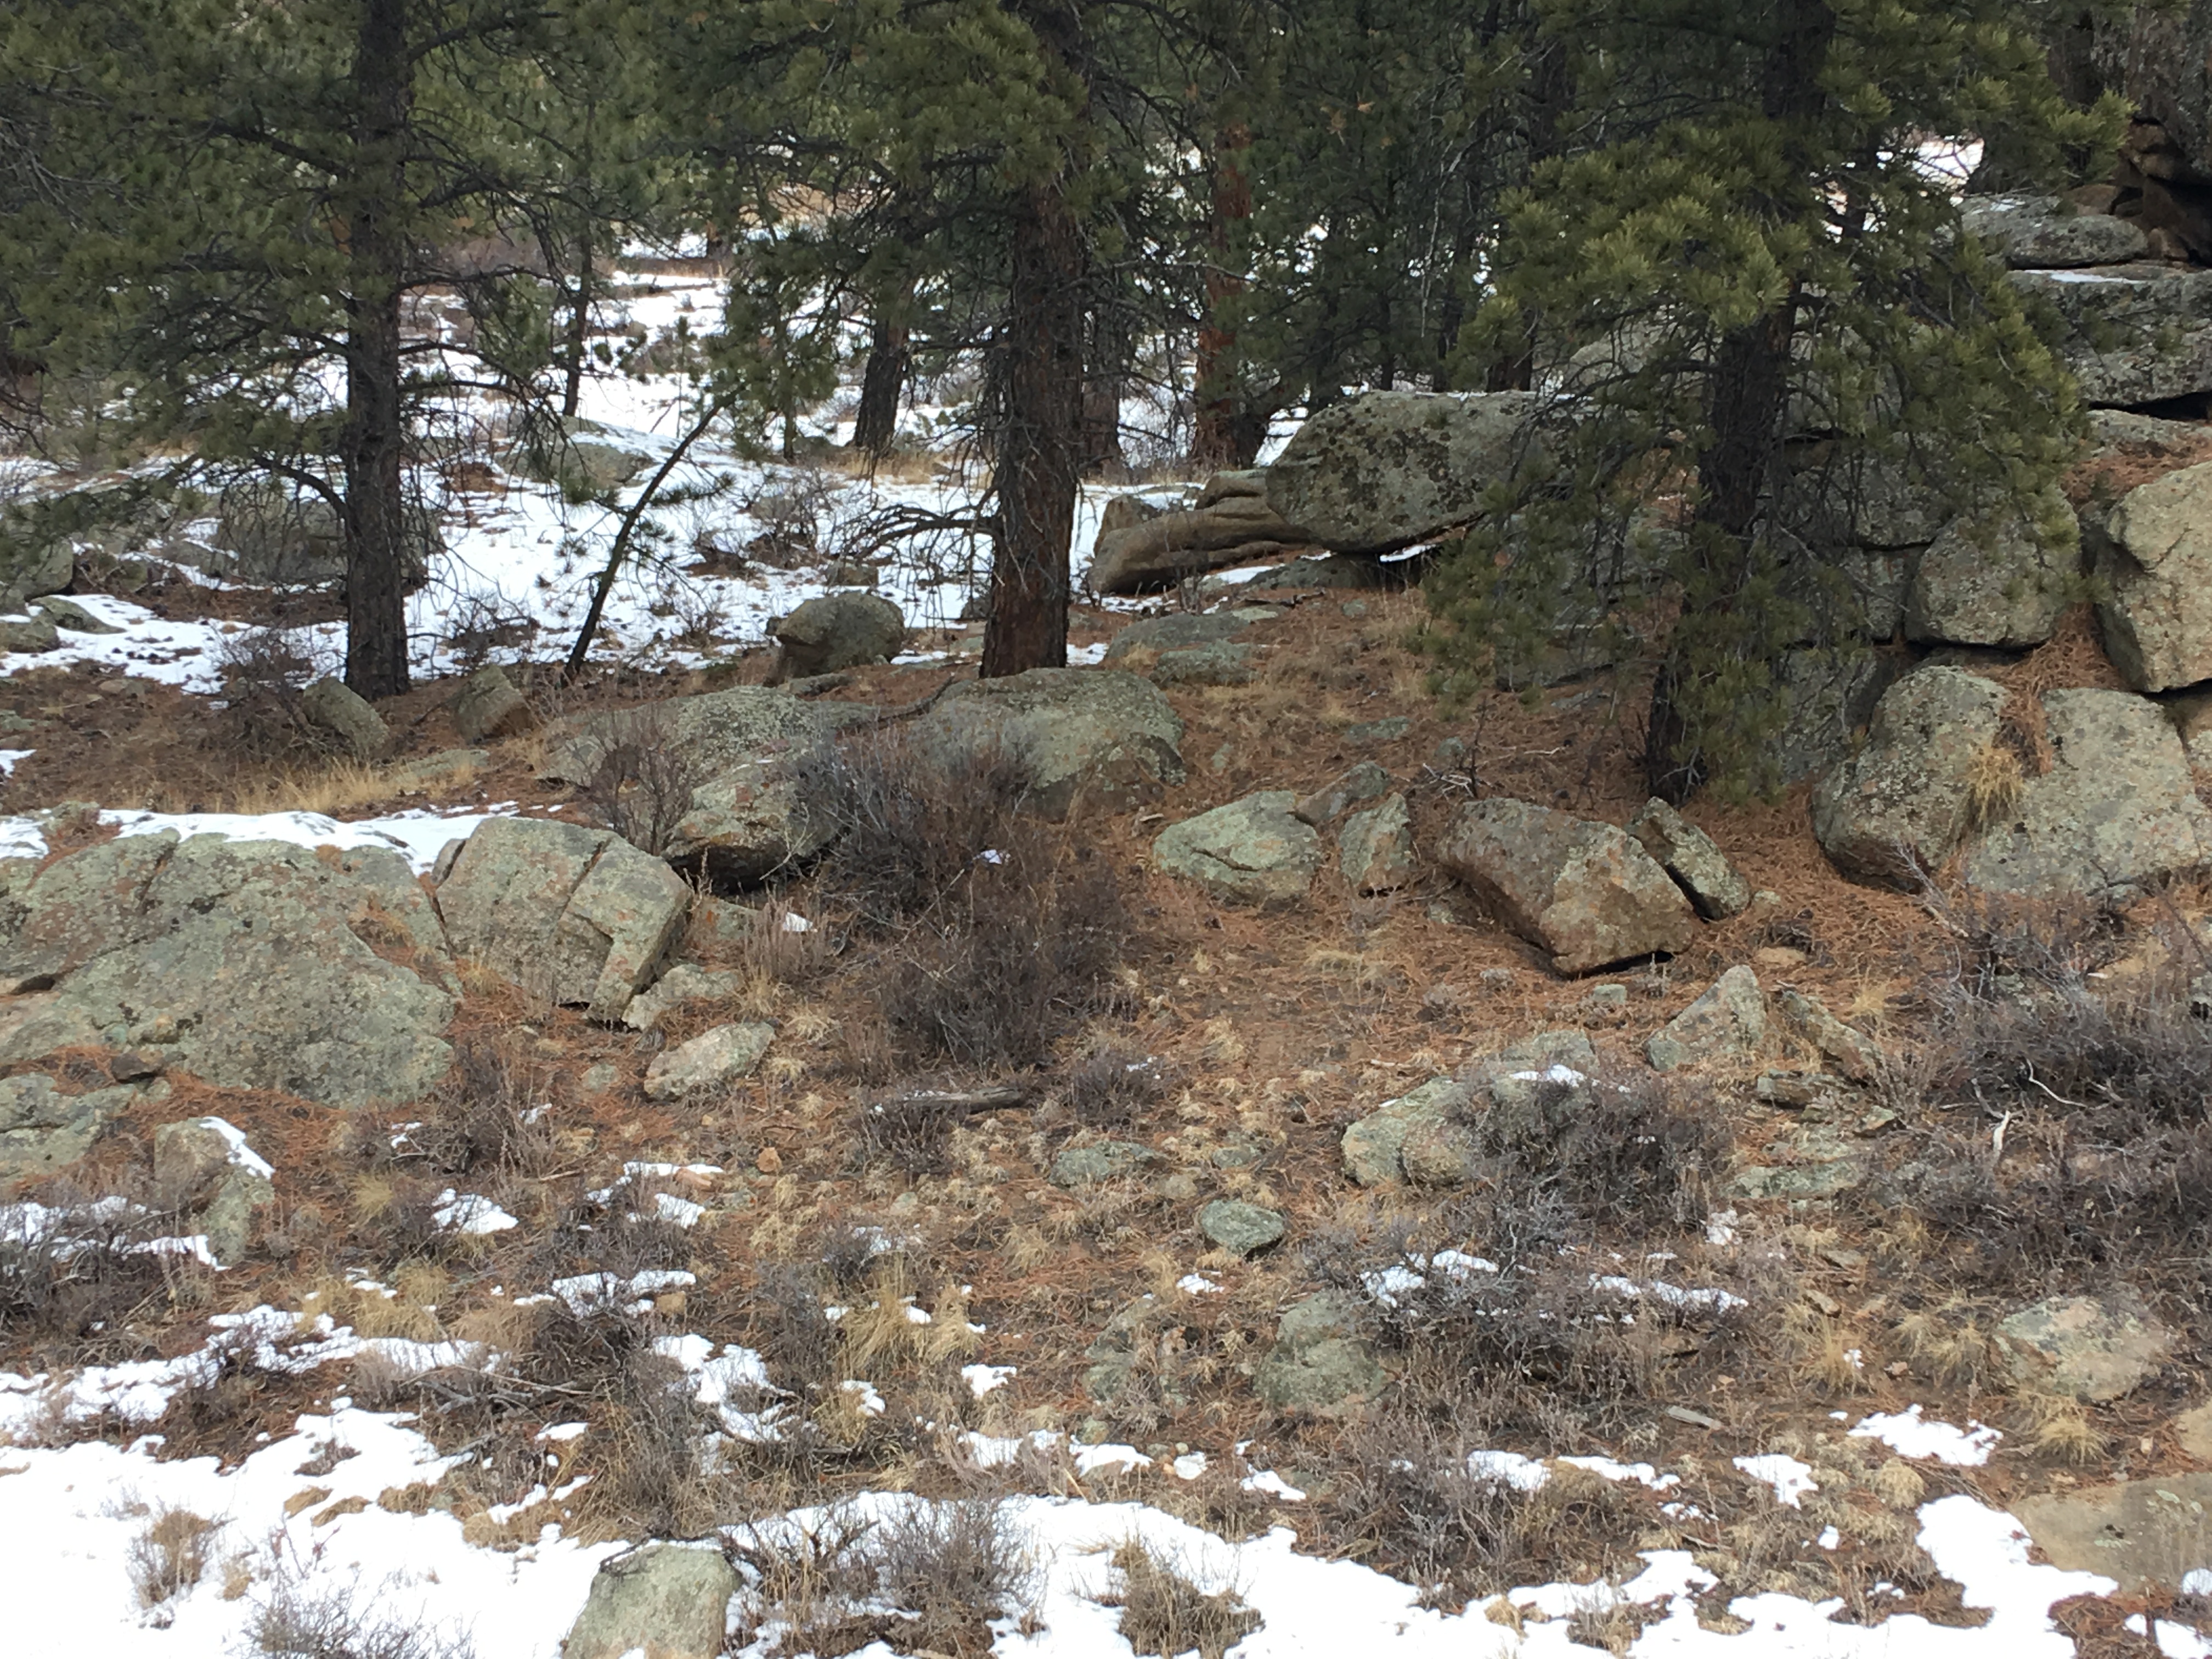
In this closer view you can see the small patches of brown grass and the carpet of dried brown pine needles. In the summer the difference is that the bushes are green with little leaves, and there are small amounts of light green grasses and small plants here and there. But it would never be considered a lush green and growing area due to several factors, especially the soil. Here is one more photo, again taken in winter, but you can see the thin brown grasses, many of which are brown or light green in the summer and still very sparse, and the pine needle carpet, and in the background you can see the trees and rocks.

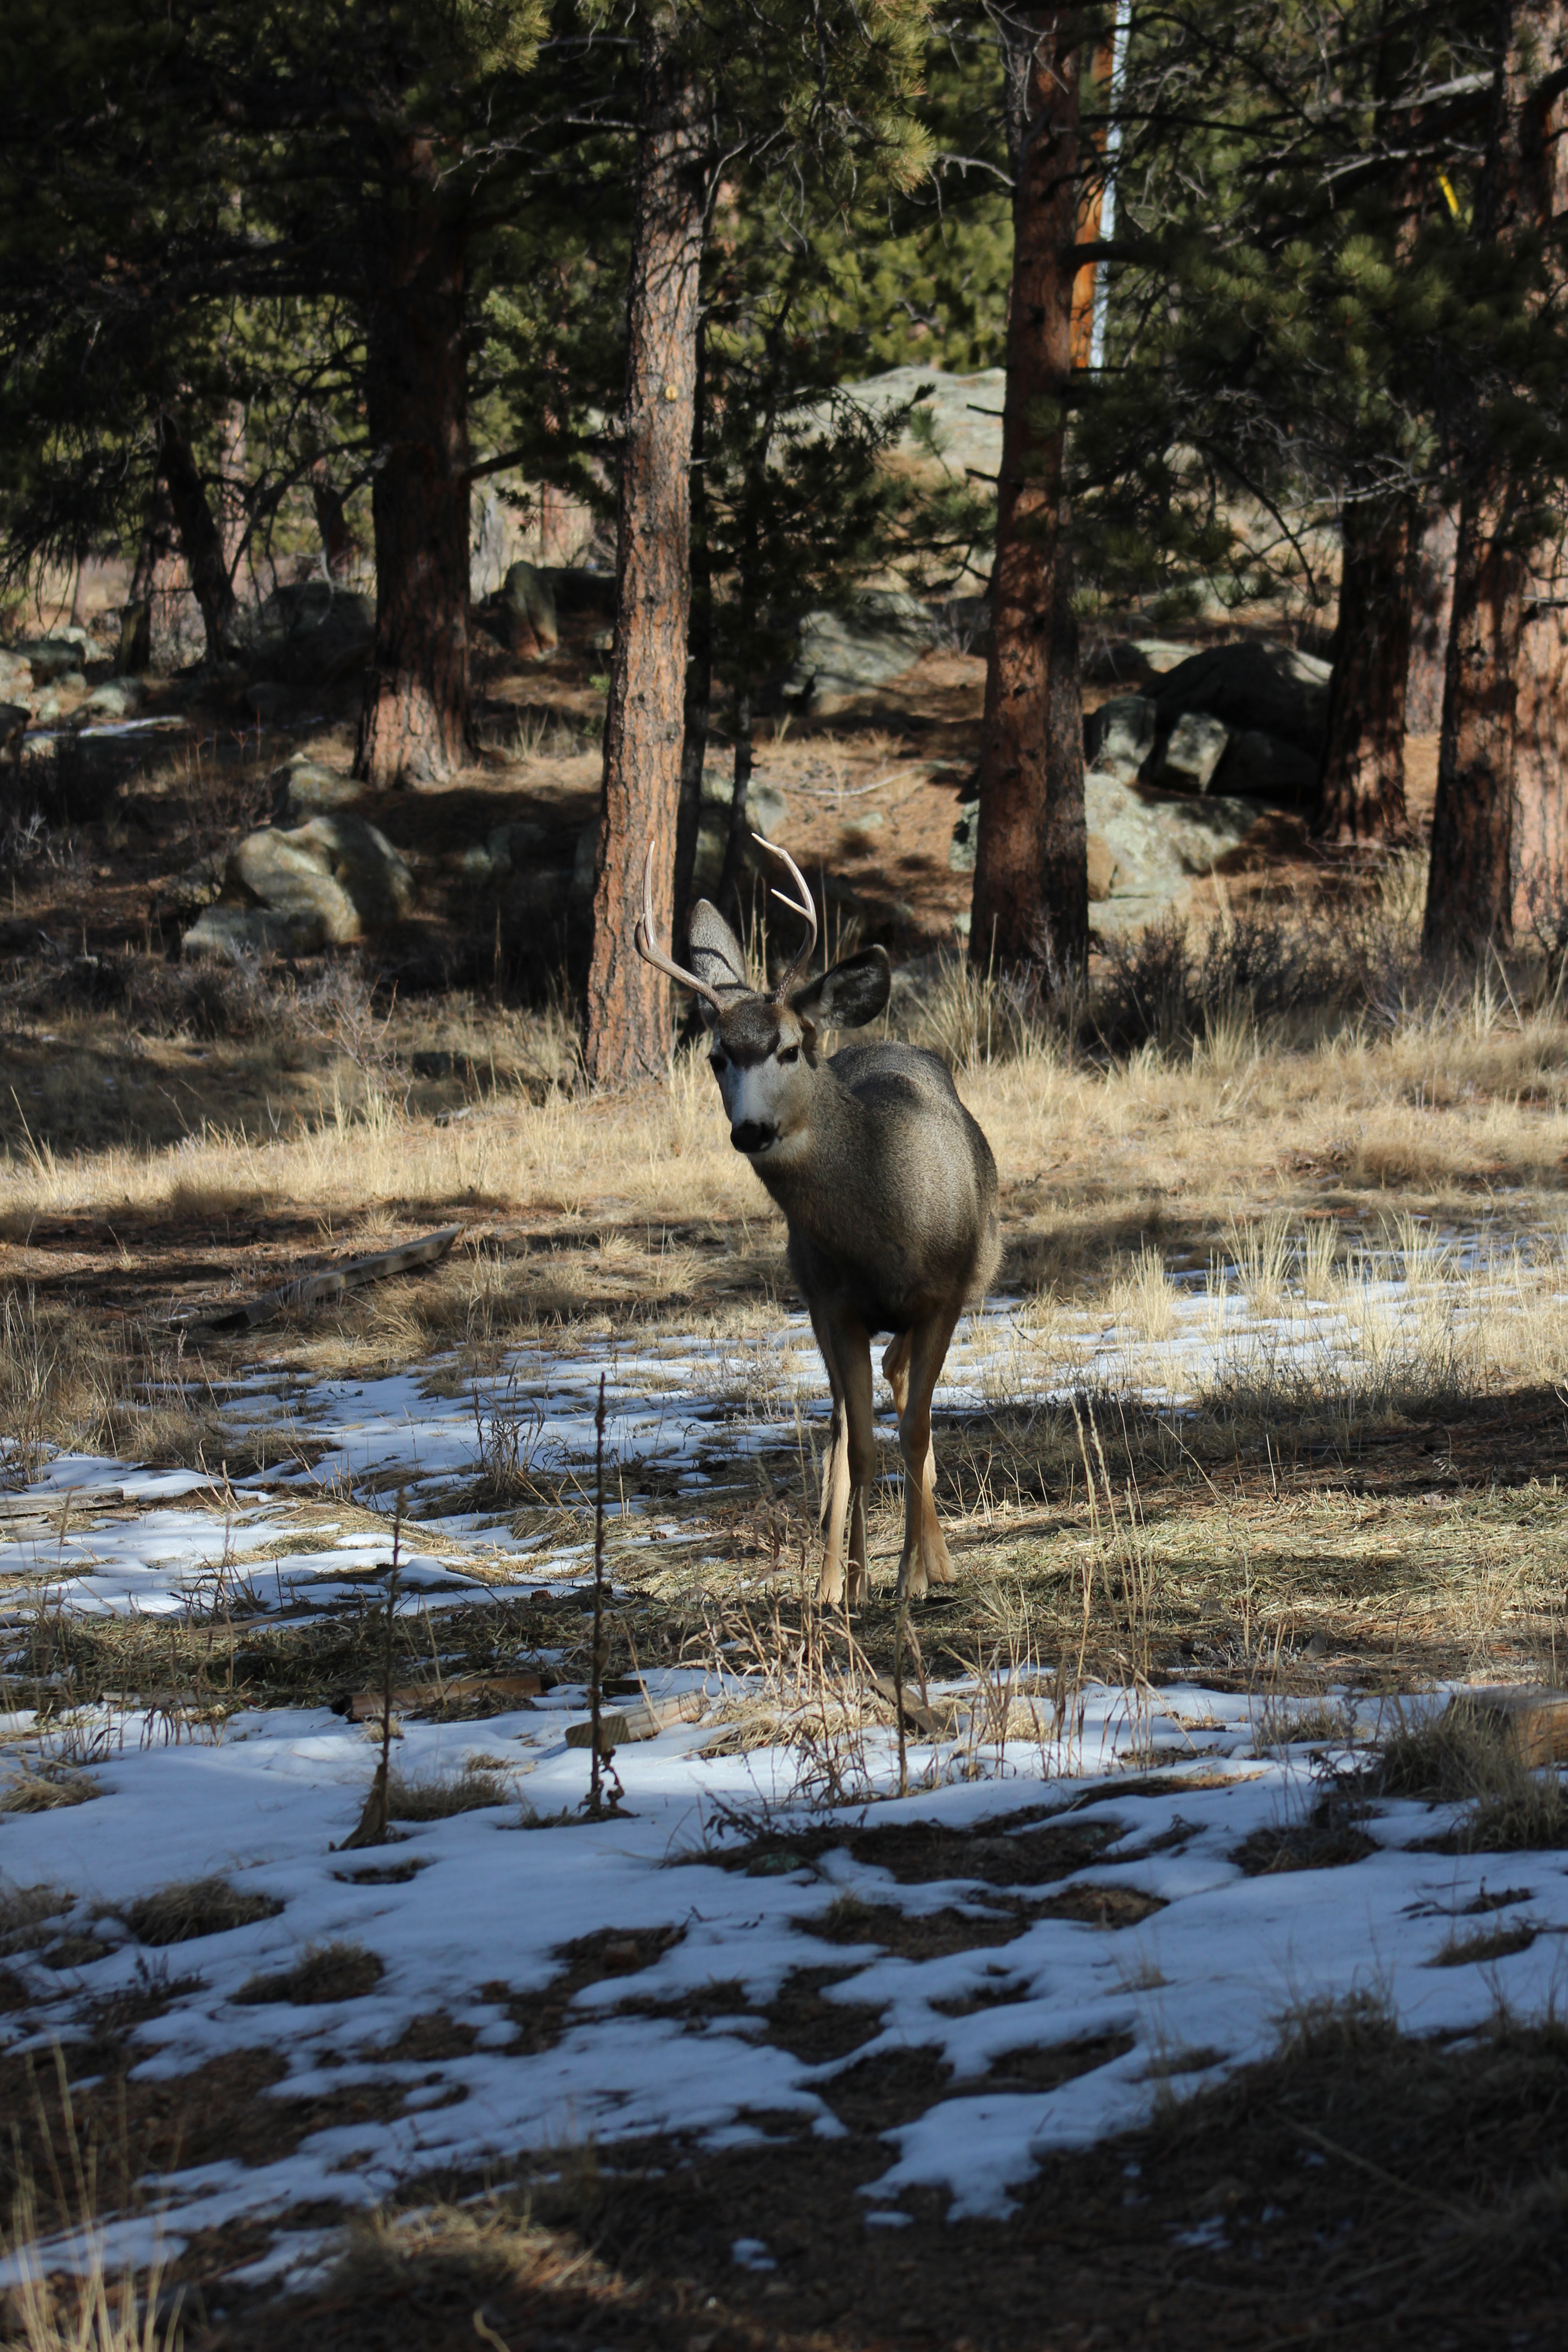
One last thing I would like to point out in this photo is the shade. See how much shade there is? The abundance of pine trees causes that, and it is also not helpful for growing plants.

Overall, terrible soil for growing plants.

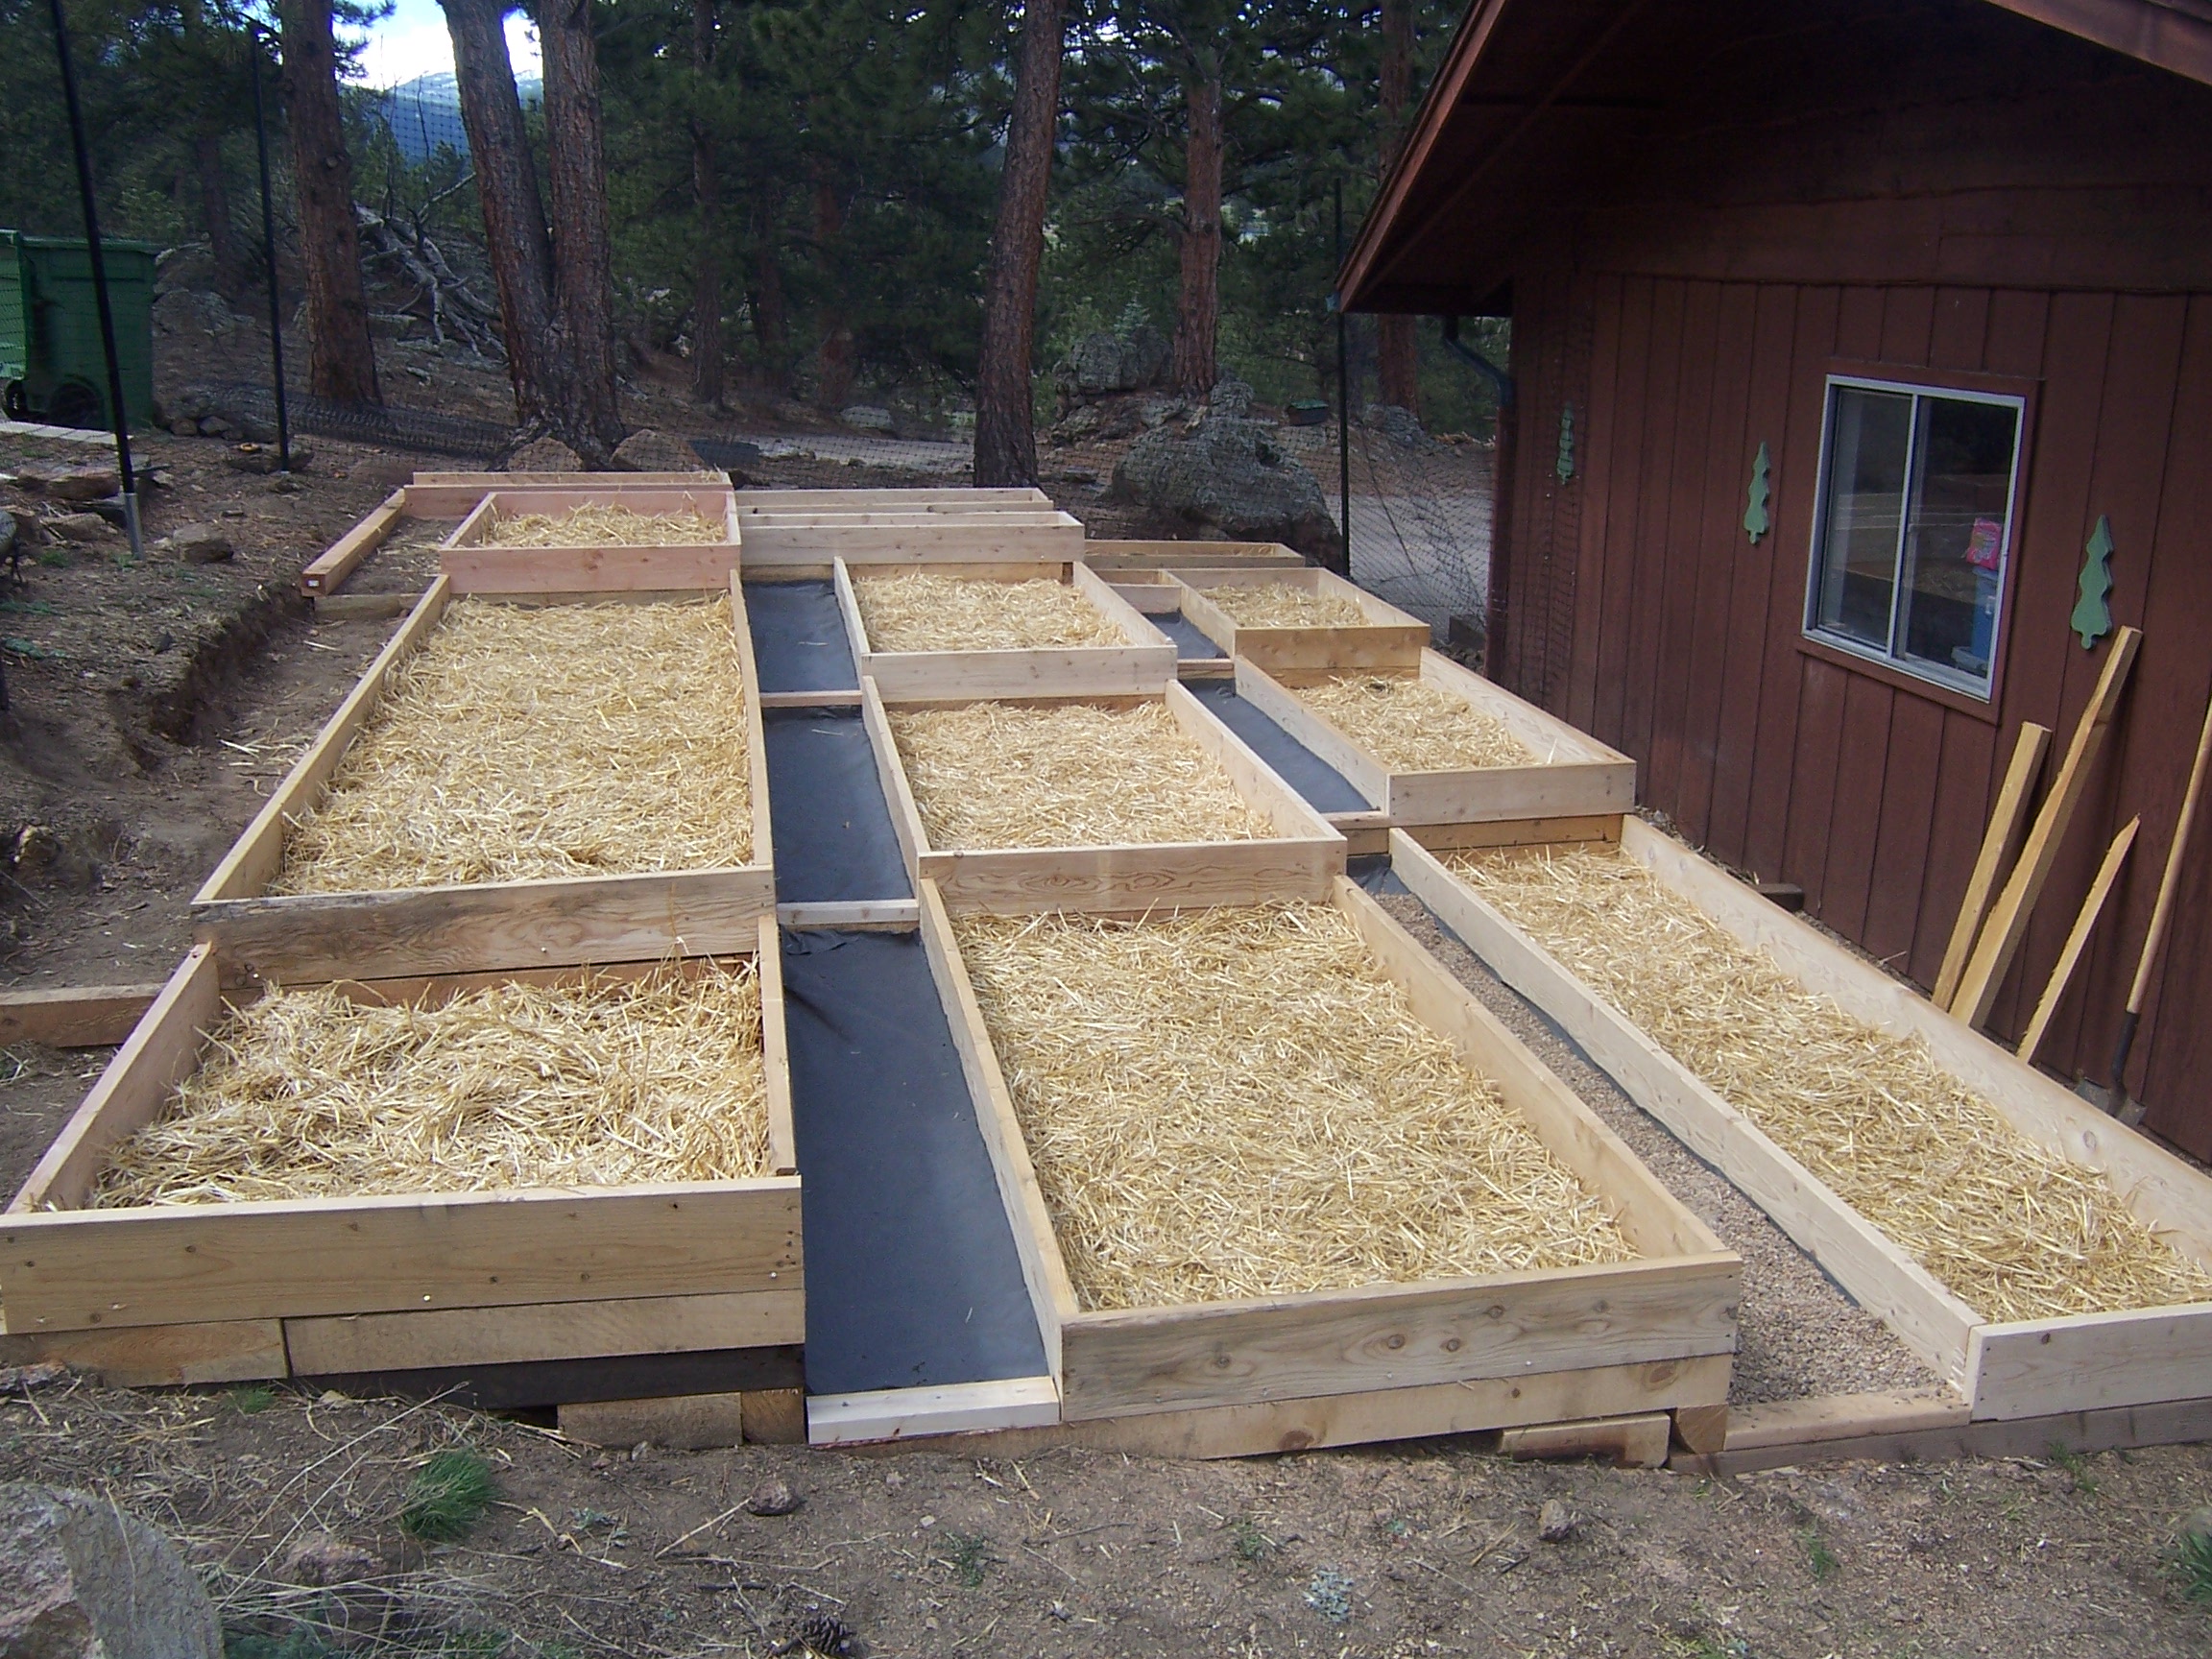
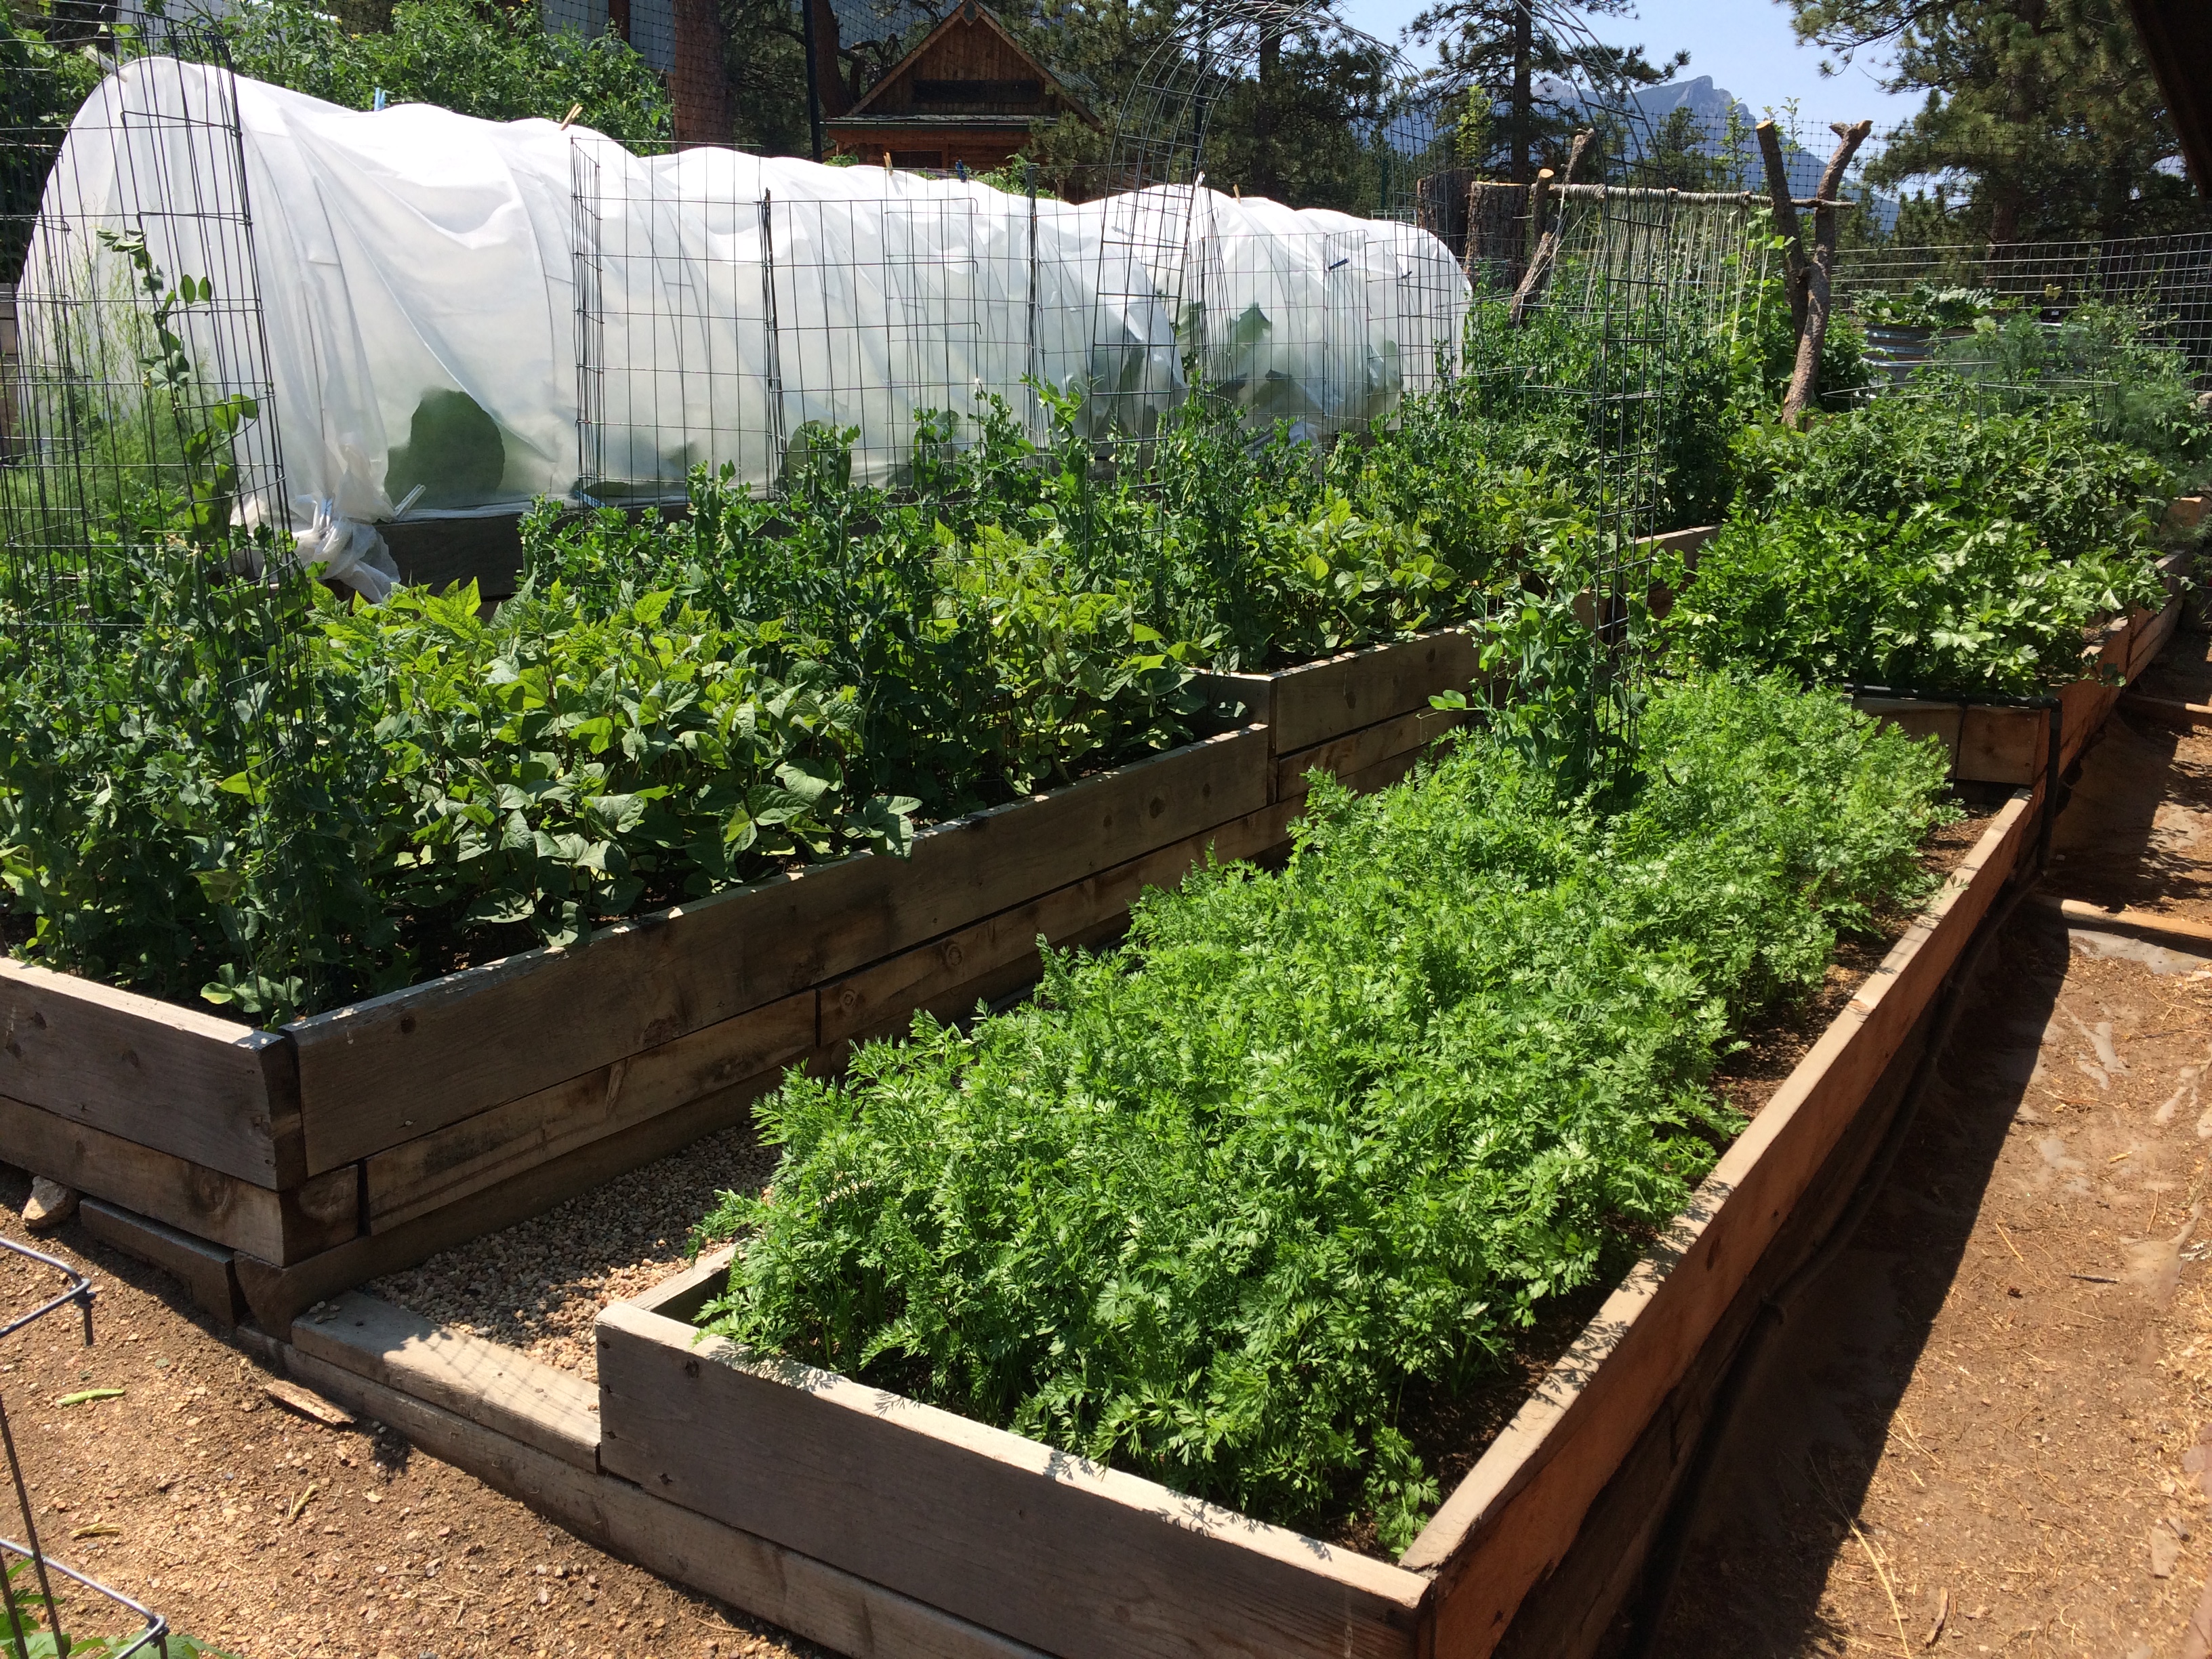
As I discussed in the last post, about overcoming the terrain, we terraced our garden area and built raised beds.

As you can see in the background of this photo, there were 3 big pine trees right along the edge of the garden. There are no pine trees anywhere else around the garden, even behind where I am standing to take the photo. But those 3 trees dropped tons of pine needles into the garden soil (acid) and caused too much shade. So they were eventually removed and we have since then planted a couple of apple trees in that area to provide small amounts of shade and no acidic needles in the soil. Some shade is important for a high-altitude garden because the sun is more intense at high altitude.

The terracing and raised beds were done because of the steep terrain, but it was also done because none of the existing soil is something we want in our garden beds. We needed to completely bring in garden soil.

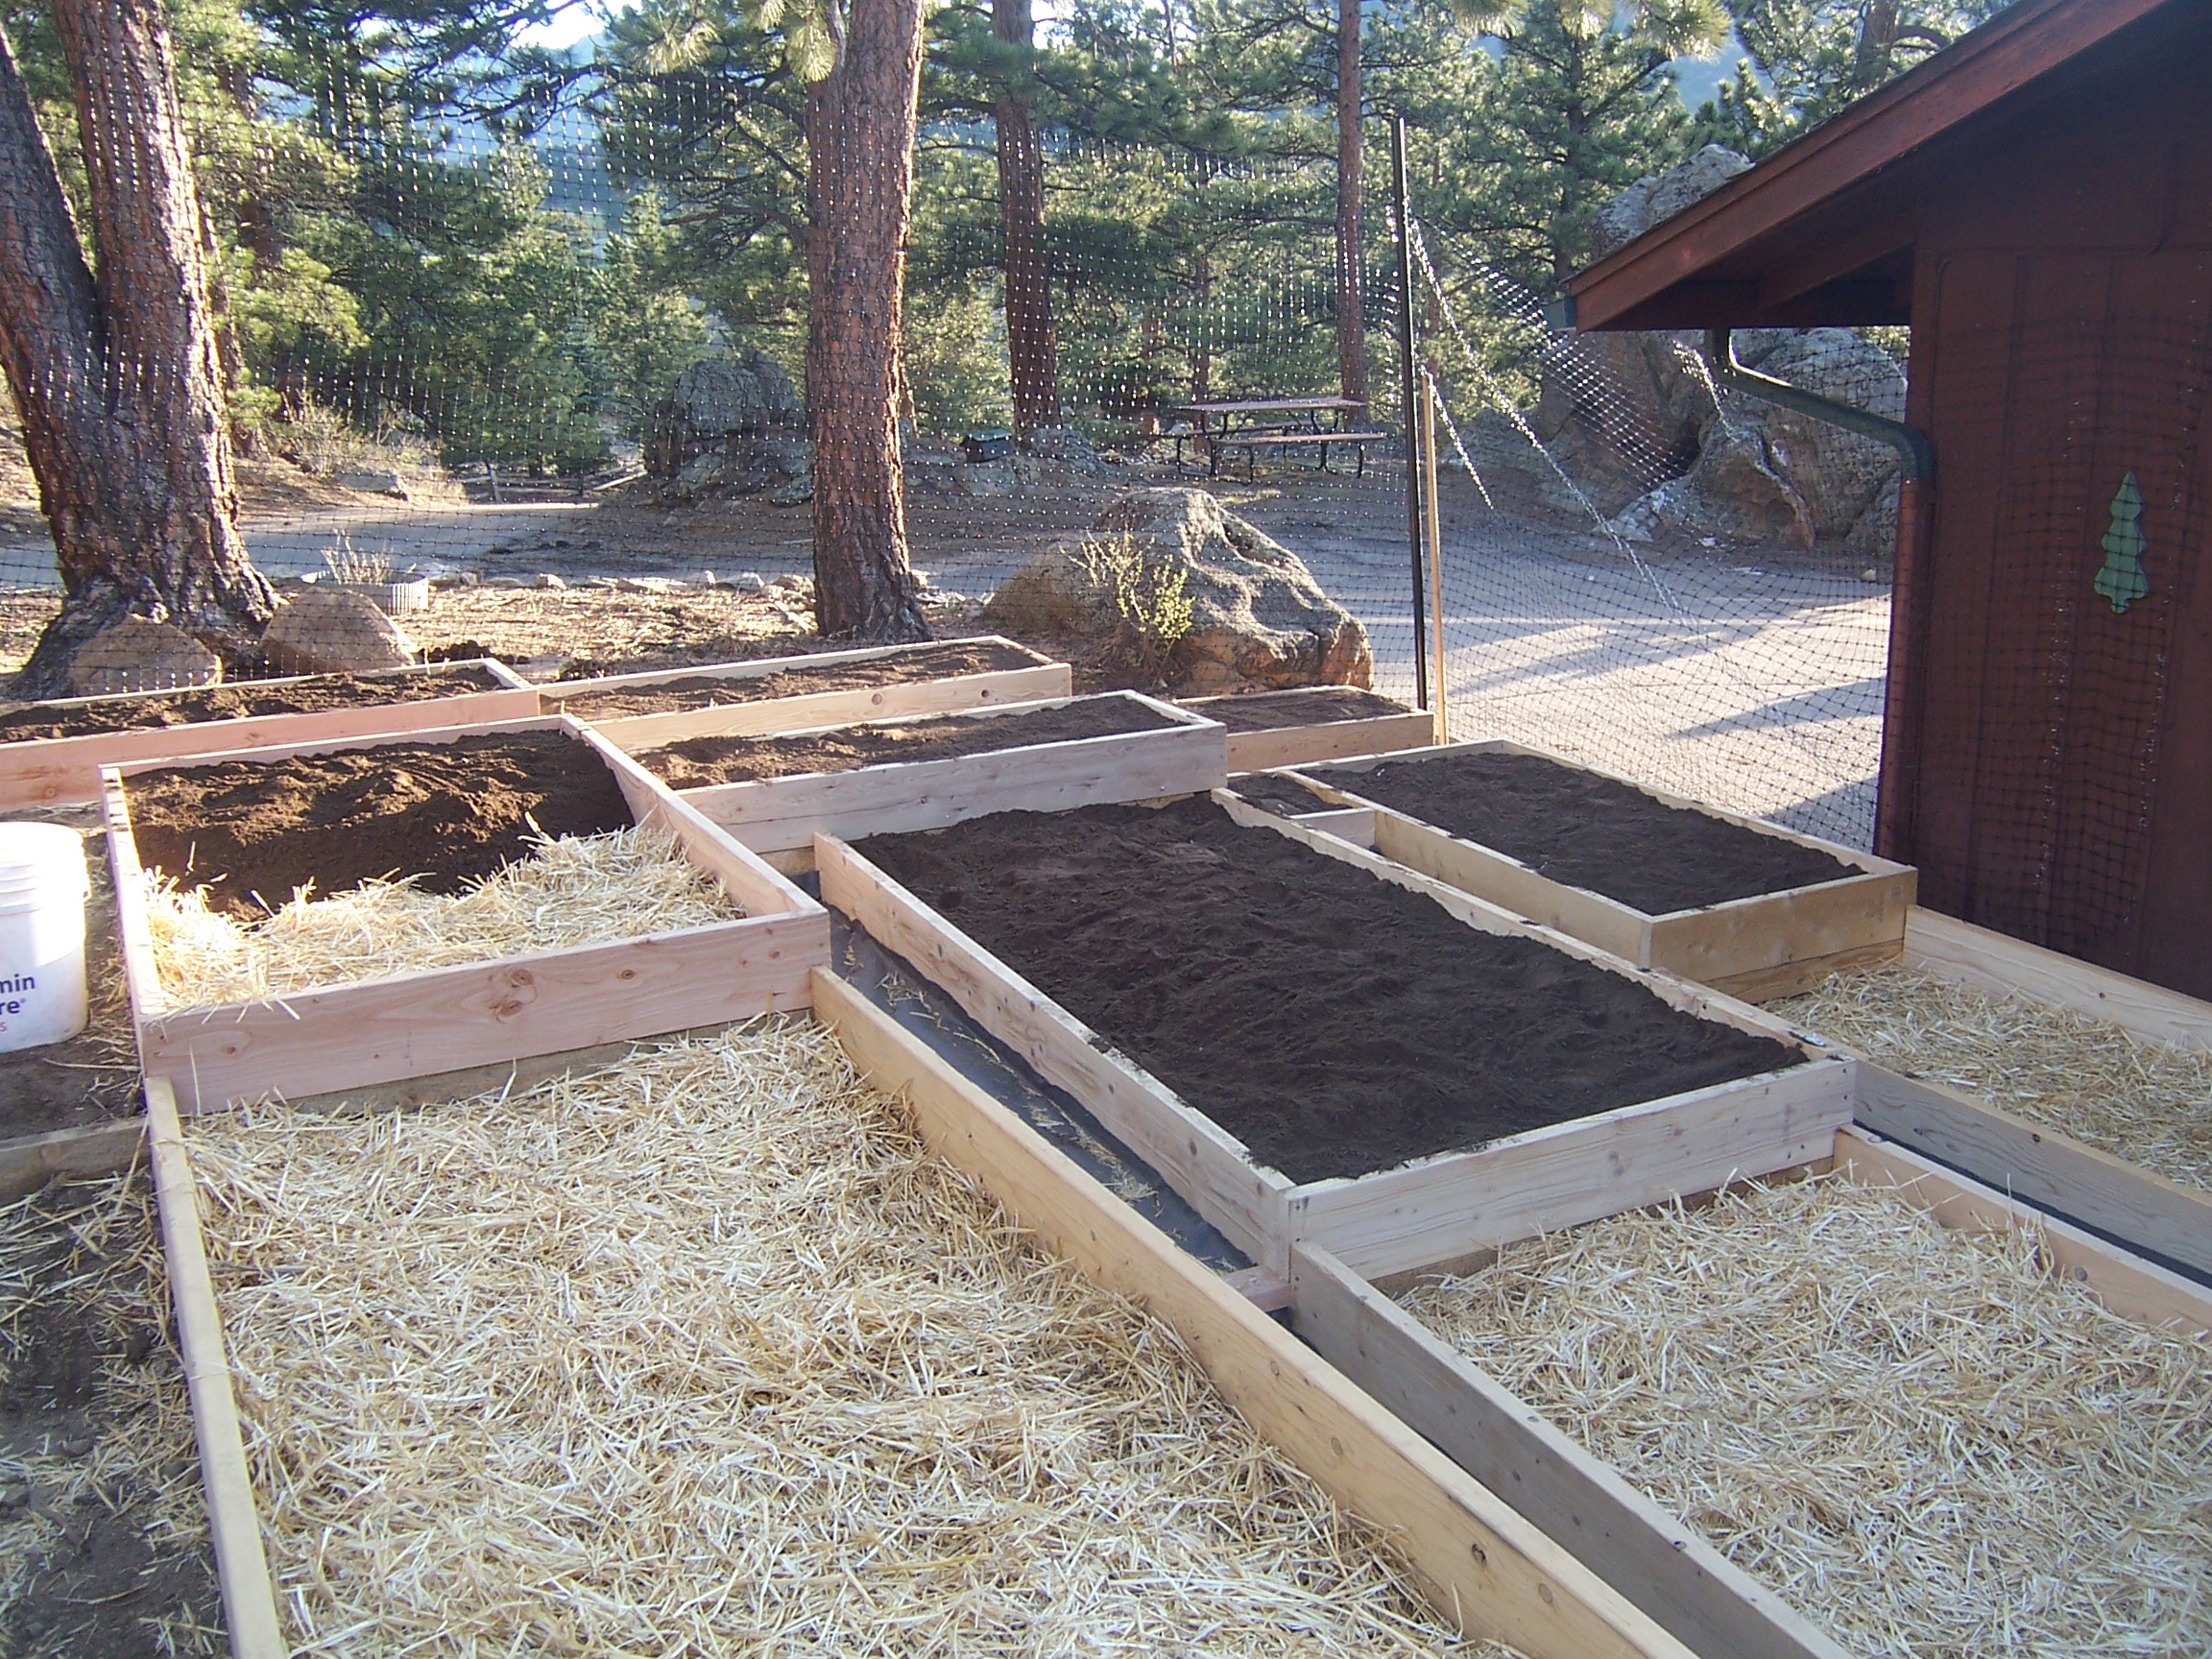
When we were very first starting our garden we didn’t have very much compost of our own from the barnyard compost pile, so we had to buy compost and soil and bring it in to fill the boxes. We started by putting out a layer of straw to help fill the area a bit since we were in need of SO much soil, and then over the years it would break down and add to the soil.

We decided to do a mixture of 1/2 topsoil and 1/2 compost. And we decided to save money and not buy the 40 lb bags, instead buy from the bulk pile. We figured that would also save us having to throw away all the plastic bags since we needed A LOT of soil. Boy was that a disaster!

The compost we got was FULL of trash, mostly little scraps of plastic and glass. I have no idea why it was in there, but we ended up spending a ton of time picking it all out over the next year as we worked in the garden and I was very concerned that one of the children would get cut by a piece of glass while working in the garden.

Thankfully, the next year, when we were ready to add a bunch more soil to the garden because of settling, we had our own compost to add. Each year since then we add an inch or so of new compost on top of the beds and stir it in before we plant in the spring. We have also used all of our own compost to fill the boxes as we built them deeper when we realized that they were too shallow (I discussed that in the previous post).

The soil has gotten better and better over the years. It improves with age and proper care. I have started 3 gardens in 3 different locations over the years as we moved from house to house, and I have learned that it definitely takes time and patience to get the soil just right. The first year is always the worst.

Last garden season was our 6th year growing in this garden and it was the best ever. And as I look back over those six year I can see a consistent upward tilt in how well the garden did, improving each year. Some of that is learning curve of this particular garden plot, but a lot has to do with the soil improving.

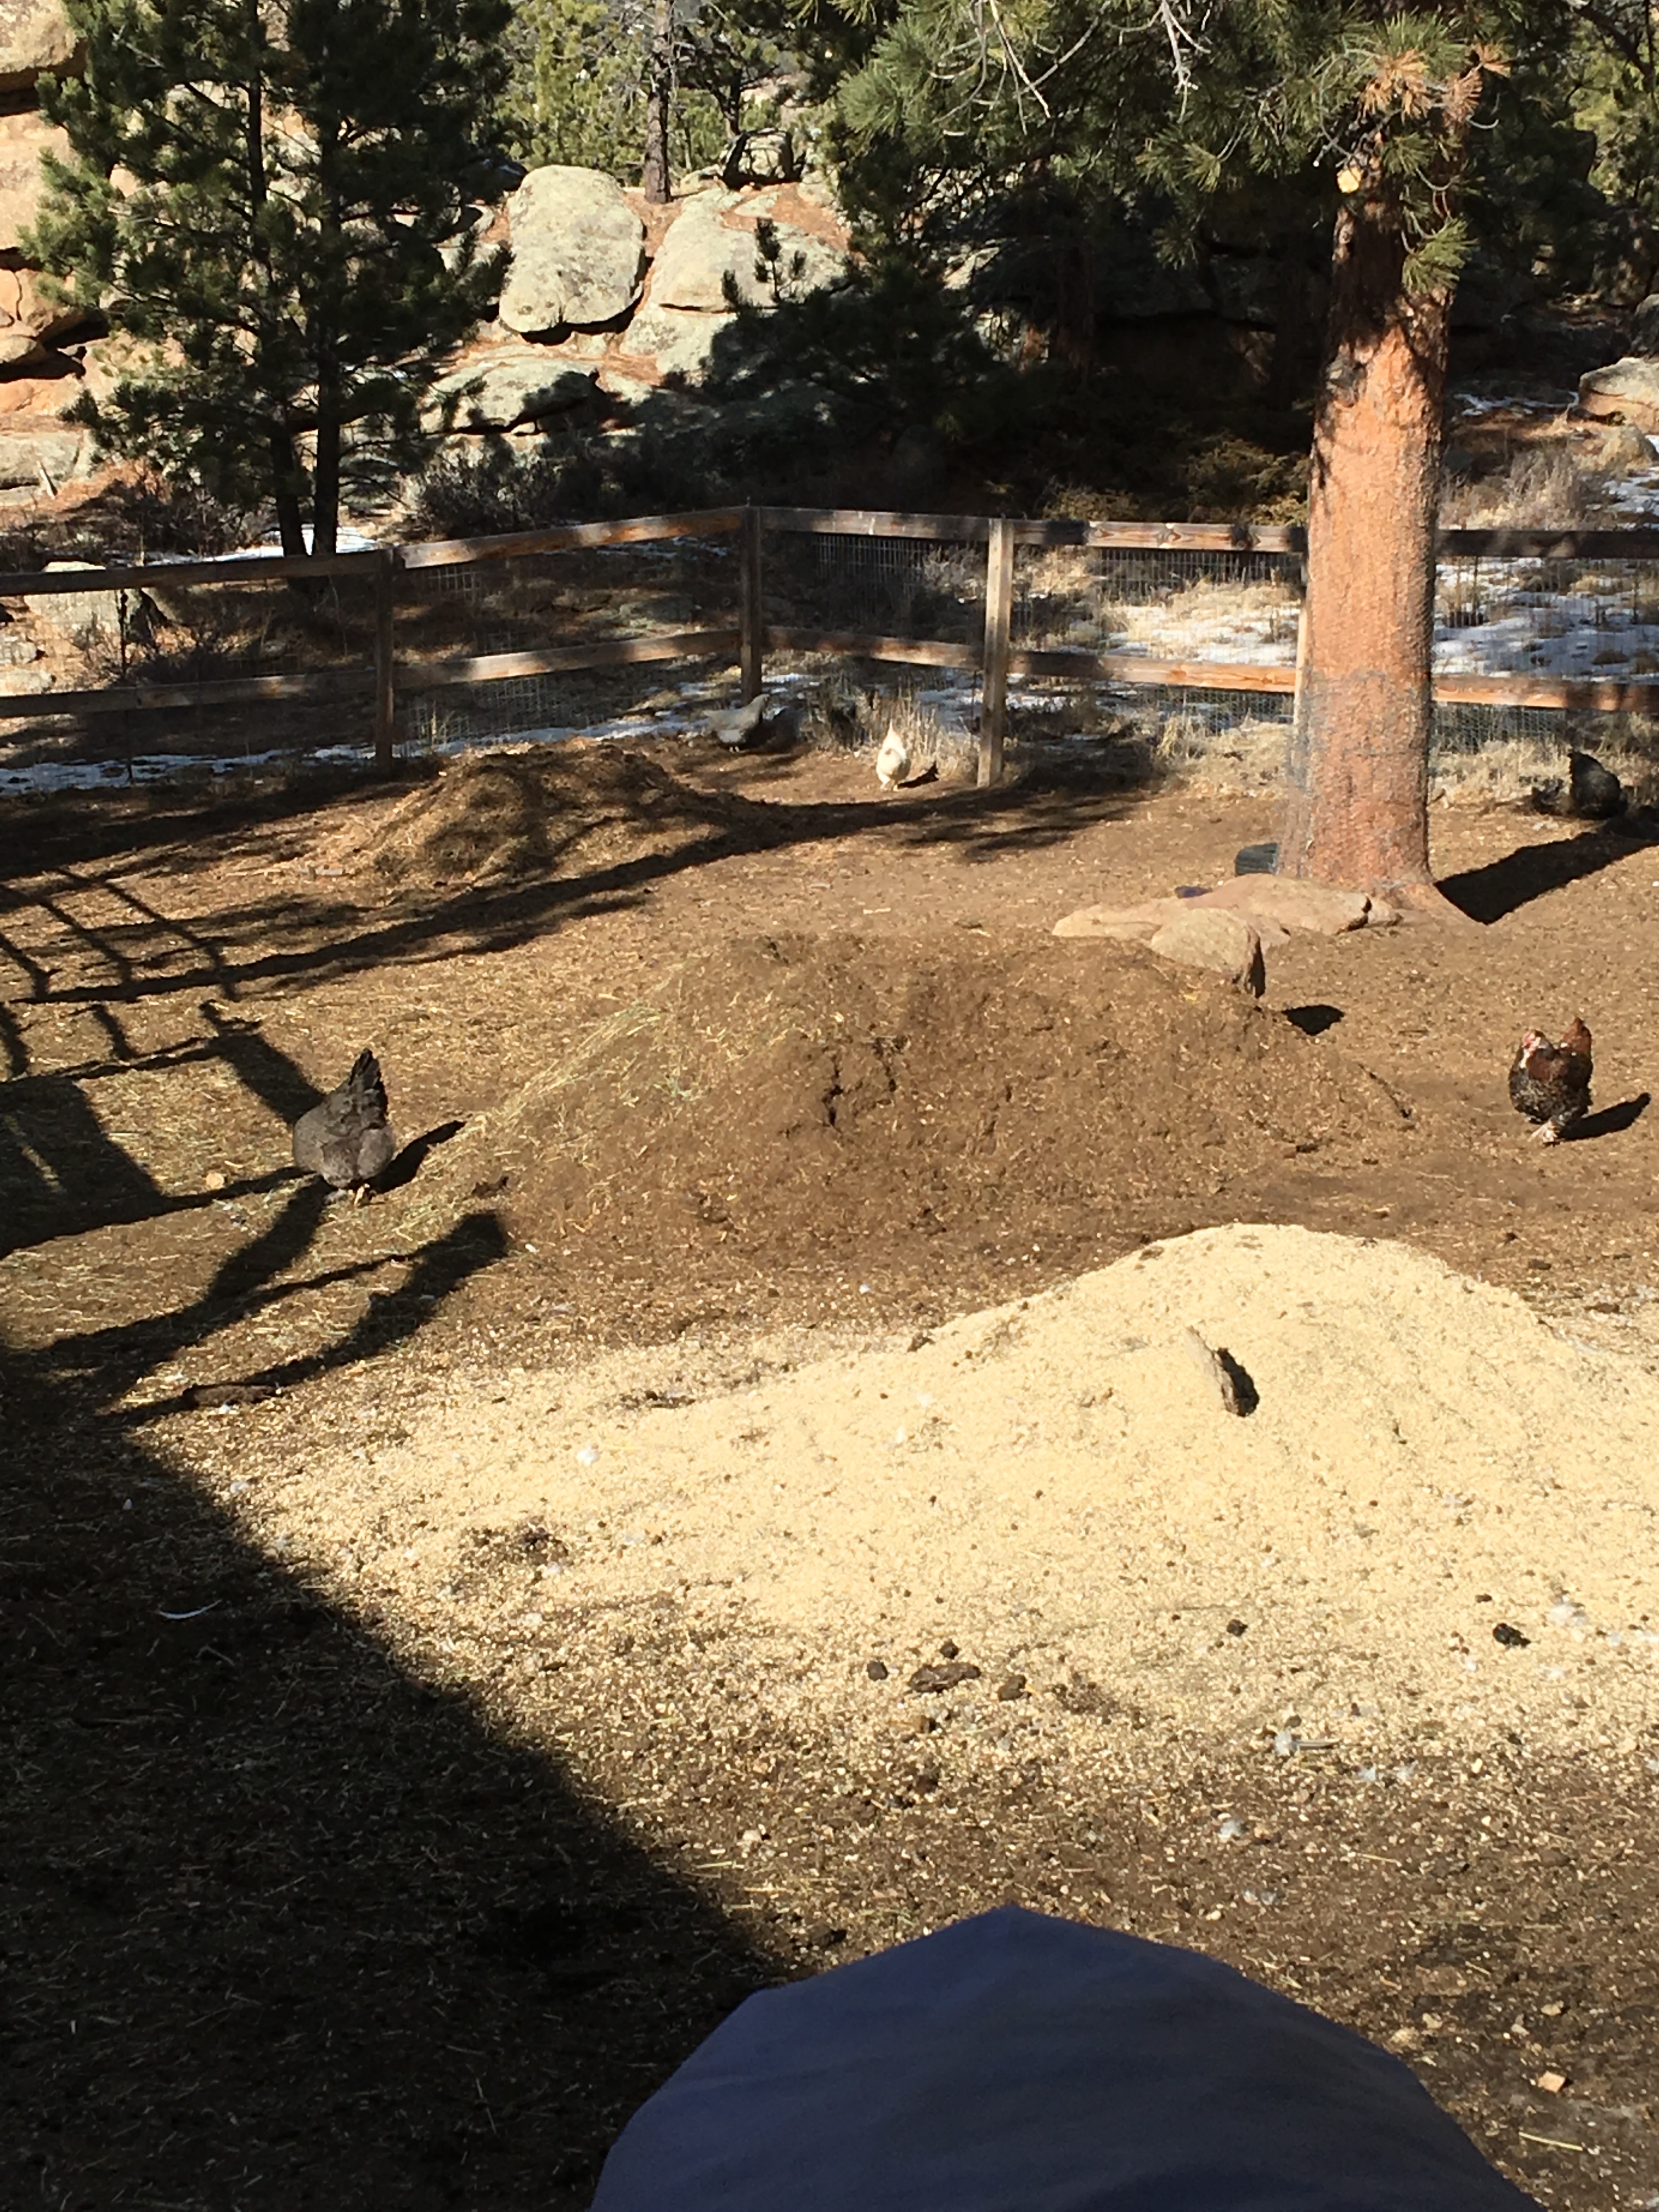
So, how do we make our compost? The basic explanation is that we use a mixed livestock barnyard living situation, and we put the compost pile in the barnyard with the animals to allow the chickens to turn the pile for us. Our compost heap consists of kitchen and garden scraps, as well as manure from whatever livestock we have that year (a mix of cattle, goats, sheep, chicken, and rabbits), and the straw, pine shavings, and hay that are used as bedding for the stalls and coops. We clean all the stalls, cages, and coops out onto the compost heap, as well as adding the garden scraps/waste and the kitchen scraps. The livestock will eat a lot of the garden and kitchen scraps we throw on there, but some of them get mixed in.

Because we have so much available to compost we generally have 2-3 piles in the barnyard because one pile would be way too huge. At the higher end of the barnyard is the least composted pile, where we add all the new stuff. The one farther down is more composted and the lowest is what we haul to the garden in the spring. As it breaks down we move it down the hill to the next pile. If the upper pile hasn’t had much stall/cage/coop cleaning out onto in awhile and is starting to break down pretty well we move it down right before we do a major clean out so that all the new material is in its own pile to start decomposing. The movement of the piles 3 times a year or so also gives them a big full turn over. And it gets small stirring and turning daily as the chickens scratch through it and then we rake it back into piles every few weeks.

I explain how we make our compost in more detail in a post called Putting Your Chickens to Work Making Compost.

The soil in the high-altitude Rockies is generally not at all useful for gardening. But using raised beds and adding good top-soil and compost can over time give a very good base for growing plenty of produce. And removing troublesome pine trees that drop pine needles into the garden soil will help as well.

Overcoming Soil Challenges in High-Altitude Cold-Climate Gardens:

  • Build raised beds so you can provide all your own garden soil and avoid the decomposed granite soil that is natural to the area.
  • Remove any pine trees around the garden area to prevent needles dropping into the soil and to prevent too much shade.
  • Start with a mix of 1/2 topsoil and 1/2 compost – if you have to buy the compost from the store give it a good examination before buying to avoid trash and glass in it.
  • Add an inch or so of compost each year and stir it in before planting in the spring.
  • Be patient, great soil takes a few years of perfecting and aging.
Posted in Chickens, Garden | Tagged , , , , , , , | 4 Comments

Keeping your Fruits and Greens Fresh

There has NEVER been a better time to start sprouting your own seeds for use in your home or growing all kinds of different greens in pots, in the garden, in a close raised kitchen garden bed.

Its crazy the amount of recalls that have been happening in regards to fresh salads, premade salads and even just whole green salad heads.

This is a bit of a different post today as I will be promoting a product and a company which is not something I do often.

It is possible that I could get a small percentage back on a some of these products, not all if you decide to buy directly though my link on this post only! While that is nice, you do not need to do so anyway to enjoy the information in this post!

Now I am the first one to admit that I prefer glass, metal or steel but I have to admit that these plastic based Fridge Smarts have won me over!

I have to admit that I didn’t want to even try this, the cost of them made my eyes bug and I went nope.. (remember I do most of my shopping in second hand shops and I love my reuse items) but a friend of mine that sells these, offered me one of the yellow topped ones to trail test..  I thought how much of a difference can it offer over my glass bowl with lid.

Turns out a lot.. I am not even going to try and explain why these work so well on fruit, veggies and fresh greens but they can hold your fresh items from the store or from the garden for days long then any other thing I have tried. I bought the first full set and worked them hard! I have layered up fruits, I have prepped veggies, I have pre-made salads without dressings, I have trialed out home grown sprouts and more..

I ended up buying a second full set of these when they went on sale about six months after I got the first set at full price!

They do go on sale twice a year, they also sell a massive one that those of us on homesteads should be given a hard look at when it comes up, its the only thing I have found that can hold things like strawberries and raspberry’s for extra time without them starting to spoil, when you just need that extra day or two for cleaning, processing. If you homestead, you know that sometimes just holding for even a extra 24 hours without damage is so needed and worth it!

These are getting a 5 star review. I am into my second year on them and I do NOT have a dishwasher, so they are being hand washed but they are working as perfect now as they did when I got them. If you use them, they will save you money in the end..  they do stack nicely in the Fridge which matters to me, as I need space savers.

Food waste is becoming a very known issue and I am/was just as bad as everyone else. I am blessed that as soon as I see things start to wilt to much or be a touch old. It goes to either the hounds, chickens or the pig bucket so nothing is going to true waste.

I think to a point this was both a good and bad thing, because it meant I didn’t feel that I really had food waste in the house because everything goes back into the farm, so if I did not get to this or that, it goes to the critters and yum, they love it

However with the rising costs of fresh food in winter, its dearly and I would rather sprout or ferment food for the critters or use the meal worms or red wigglers or BOSS to give them a boost and keep the food I am BUYING from the store working for us the people.

It got me using these Fridge Smarts even more.. So when I a friend of mine asked very nicely if I would give her a helping hand and host a party, I went.. AH.. I don’t do that..  I am very anti-microwave, so I could not say use them.. NO!

I think most things are on the high end for pricing.. so I struggled as I did want to give a helping hand. We have all had times in our life where we needed to reach out and I have always tried my best to give that lift up when I can.

Then I pulled my fridge smart of the fridge to make a dish with the veggies in it and went.. huh.. YES, this I can promote, this fits me, this works, I use it, It works like a trick!  So that’s how this post came about.

If someone is cleaning out their kitchen (to find joy) and they offer you these, snap them up!, if you find these in the second hand shops, into the basket they go.. but if you are not that lucky and you want to be able to extend your fruits/veggies and salad fixings by days (per my own use).  Then consider picking up a set to add to your fridge to help you with food waste.

Farmgal tip. If you have the time to do so.. and you have a local friend that sells stay with them., if not and you are in Canada, I have two different ladies I know that would love to help you out and can ship Canada wide (both working mom’s who have young children that use this as a second income stream) then wait till they go on sale.

Posted in At the kitchen table | Leave a comment

High-Altitude Cold-Climate Gardening: Overcoming the Terrain

High-Altitude Cold-Climate Gardening: Overcoming the Terrain

Guest Post by WillowcreekFarm Part 2 of 5.

When gardening on steep, rocky mountainsides the terrain presents quite a challenge. Finding a flat space to build a garden is nearly impossible, and the few naturally flat places that exist are often a risky area because the runoff water from the mountain runs right to that area. And even if an area is flat, it is still often on rocky ground which can’t be plowed up for a garden.

Our property is a rocky mountainside ponderosa pine forest.

The most successful option we have found is to terrace the garden area and plant in raised beds. Yes, terracing and building the raised beds is expensive, but when you are dealing with a rocky mountainside it is really the only option because there is nowhere to just plow some rows and have a mostly flat spot with reasonable soil. The investment in the beginning has definitely paid off for us in the long run with a super-productive garden.

Thankfully, Mtn Man spent his teenage summers working at a local campground building nice, flat campsites on rocky mountainsides, so he is very skilled at terracing. That made our work so much easier.

Here is the spot we chose for our main vegetable garden. The rise in elevation from the lower part of the garden to the upper part is about 6 feet over a 20 foot distance, and then about 3 feet rise over a 40 foot distance going the other direction.

That gave quite a rise diagonally across the garden from the lowest corner to the highest corner and made the build tricky. And the bedrock is just below the surface of the dirt leaving very little dig-ability – so we had quite a challenge ahead of us.

We picked the location of our garden based on the ease of access for us, as well as ease of access to water, and the micro-climate. The dark painted wall of the garage reflects the heat of the morning sun thus warming the garden faster in the morning, gives shade from the intense high-altitude late-afternoon sun, and it is a good windbreak as the majority of our wind comes from that direction.


We started by measuring it out and drawing the full outline on graph paper. Then we drew in the beds where we wanted them, with the walkways in between. We drew several different layout options, trying to give ourselves the most plant-able space and the least walkway space. We wanted to be sure we were using the space efficiently. I don’t have that original layout drawings, but below you can see this year’s graph paper drawing that I use to decide what I am planting and where I am putting it. That is the layout of our garden beds and walkways.

Coming together now..

We built our main garden beds 4-feet wide and as long as they can be in our garden space. Around the edges of the garden we build them 2-feet wide along the fences (not included in this picture).

The 4 and 2 feet wide beds work well for many reasons. An average person’s reach is about 2 feet. So with the 4-foot beds you can easily reach in from either side and get to the middle. And the 2-foot wide ones along the fence means you can easily reach all the way to the fence.

Also, the size makes it easily compatible with the various hoop tents and trellises that we use, which will be discussed in a future post.

Our paths are about 18-inches wide to give us the most plant-able space possible, but late in the season, when the garden is jungle-like, I do wish the walkways were wider. We put down weed fabric covered by pea gravel in the walkways. The weed fabric was easy to put in because we were able to staple it to the raised beds, holding it in place all along the walkway. The fabric and gravel help a lot in that we don’t have to worry about weeding the walkways. The garden has enough work and weeding of its own, why waste time weeding walkways?

We lined the bottom of the raised beds with straw, and then put compost from the barnyard over top of that.

We will discuss soil and compost more in a future post.

Originally, the garden beds were built to be about 9-inches deep, depending on the area of the garden and how we did the terracing with the bedrock under it. But over the years we have found that they grow much better when they are deeper, so we have been expanding each raised bed section to be about 13-18 inches deep and that has helped a LOT.

(Farmgal’s first question, are those water lines or are they hot line to help heat the soil or a combo of them?)

(Farmgal, look at those outstanding cattle panels? that are giving all that amazing vertical garden space..! Love it!)

In addition to the main veggie garden, we have a few other garden areas around the property. They use many of the same concepts of using raised beds to deal with the steep rocky terrain, but with some creative changes to how we built them.


The Garlic and Onion Patch raised bed was built with some old railroad timbers we found on our property.

The Strawberry Patch was pretty flat and had pretty good soil in that area to begin with, so we just used some edging bricks to build that bed and added a few inches of compost to that area.

The Apple Garden, which is our medicinal herb garden with our apple trees in it, was built with a 4-foot high retaining wall right next to our driveway. That’s a RAISED bed.

And our herb garden is made with various fun containers for planting in

We have used a water trough and an old clawfoot tub as “raised beds” too.

There are so many creative options for how to build raised beds and planting areas.

With a little planning, and a lot of effort, you can overcome the steep rocky terrain of the high-altitude Rockies.

Overcoming steep, rocky terrain:

  • Choose a good location based on ease of access, terrace-ability, and microclimate
  • Terrace the garden area
  • Plan the garden area to have as much plant-able space as possible, minimizing walkways and maximizing planting beds.
  • Build raised beds that are about 15+ inches deep, 4-feet wide (2-feet wide along fence) and the length of the garden area.
  • Build 18-inch wide gravel paths (or wider for comfort and ease of use) lined with weed cloth.


Posted in Blogging, Garden, homestead | Tagged , , , , , , , , | 6 Comments

Dogwood Photo Week 8 -Leading Line

This week has been a total wash out when it came to outside photo, I mean, the weather has been crazy bad for this and the weekend was a total off as I was focused on my seminar’s and time away from the farm for two days..

I am using this photo that shows leading lines leading up and away.. but its not the official photo, I will work hard to get a better one to come back and replace this one with..  The rules for the program allows me to this, I can go back at any time and put the official photo in the right album though out the year.. the blog as I want them to go up on time, is a little harder.


Posted in photography | Tagged , , | Leave a comment

High-Altitude Cold-Climate Gardening Series Part 1

High-Altitude Cold-Climate Gardening Series Part 1 of 5

Guest Posts by Willow Creek Farm

Farmgal “As my readers know, I love to garden, its a huge part of our farm and our life all year long.. I also enjoy reading other homestead/garden/natural living blogs and one of the ones I have been reading for a number of years is WillowCreakfarm. She did a outstanding Garden Series in 4 posts in regards to Gardening on the side of a mountain” 

So for my readers that are growing on more marginal land, for those that are zone 2/3 and those that deal with super short garden seasons… These guest posts are for you!

As the snow flies outside my mind begins to go to gardening. Even though our last frost isn’t until early June, we actually start gardening in March with indoor seed starting, so January and February are usually my garden planning months.

We face many challenges gardening in the high-altitude (above 7,500 feet) Rocky Mountains including:

  • steep, rocky terrain
  • rocky soil – decomposed granite that wont retain moisture, is low in nutrients, and doesn’t hold heat, plus ample amounts of pine needles constantly falling, adding too much acidity to the soil
  • wildlife – especially deer and elk, bears, rabbits, gophers, raccoons, chipmunks, voles, and other rodents
  • very short growing season (about 77 days frost to frost)
  • cold, windy, dry climate – summer days average 70sF and summer nights drop into 40sF with low humidity

But over the many years we have been gardening here we have learned a lot of tricks to make our garden successful. Last year our garden boasted over 490 lbs of produce harvested from about 500 square feet of plantable garden space.

So as we plan our garden for this spring I would like to share a series with you on how we have made our garden so successful in the high-altitude Rocky Mountains.

I will be sharing a post each day for the next four days and then I am going to ask very nicely if there are questions for Willow Creek to answer some of them and post that as the  Round up post in this series this week.


Posted in Blogging, Garden, homestead | Tagged , , , , | 6 Comments

Friday’s Rambles around the Table – Physiotherapy

Morning, come on in..  Hope that sun on the snow fields were not to bright for you on the drive over.. its crazy that glare.. you need snow goggles or at least your sunglasses if you are going to spend to much time out there or you can get snow blind.

How would you like a dried nettle/mint tea blend today? I am feeling worn down, a combo of leftover ah from being sick, the never ending yo-yo of cold//warmer and then what seems like a never ending winter. I just can’t wait to see the first spring nettles popping their heads out. I am trying hard to remind myself that I almost always am able to get my fresh wild greens in april.

This photo below was taken in March of 2016, the year we had a crazy early spring, a full summer drought and a hard frost but long, long wet fall.. I know that we will not have bare ground or anything growing in march of this year!

Did you see the update that we have one big old messy storm coming in for the weekend, as long as it does not mess up my travel to my weekend away I should be able to manage, hubby might have a harder time here on the farm. He is holding the fort down for me while I head out to Eco Farm Days.

I have to admit that I am touch concerned as storm pressure changes can often encourage the ewe’s to have their lambs if they are close and that means he might be on baby duty.

If you want to see lots of photos, and little updates on the whole event and weekend, then make sure to pop over to the farms facebook page as I will be sending updates thought the events, but I will also ideally sharing at least a few things in more detail here on the blog but at a later point in time.

March is going to be busy with different events and gatherings, I am quite excited about it, so much learning, some things should be new, some things should just be new ways of looking at things and ideally if I have done it right, a number of things should be more in-depth learning to subjects I already have knowledge on.

April will be here before I know it.. April and May is all about the farm.. April is going to be a full month on working on the barns/outbuildings, as well as new babies and milking.. the weather will be better but I honestly can not see it be a early spring in terms of the garden.. May will be all about the yard/gardens/planting etc.

Well, I have been seeing a positive result from my physiotherapy and I really like the young lady who I work with, she is awesome.. I think she broke me this week lol..

I know that sound’s bad but she always says things like.. if it hurts you are going to far, go smaller, which in truth really does help, I have a thing about go big and feel the burn.. she is not after the burn.. she wants slow tiny controlled movements till you get stronger..

Which has turned out to be a amazing thing as you build things faster that way.  However I asked for help on up and down on the hard cement floor in the barn and she gave great advice on how to move my leg and how to use my own leg as a push off point for balance, however I have a issue on strength and so I got modified squats..

O My Friggin  Bleep-Bleep..  I did the full amount on the first day and the next day I could barely move without wanting to cry..

I did move.. barely.. my fit bit does not lie.. It just sucked.. I stretched, I walked and I finally yielded and took pain meds.. It was a rough day.. I tried to do just ten of those reverse suckers and knees popped and cracked and legs went.. ARE YOU CRAZY! why, why are you doing this to us..

But today is a new day! and the pain is leveling off so today I will start again.. I am so glad I have a full two weeks to work on this before I see her again.. hopefully I will slowly, daily get better at this.. I am so excited that I have a hot tub (as well as a swimming pool) at the hotel I am staying at, and I swear, I am temped to head in early, soak in the hot tub for 20 min before the first day for the event starts lol..

but the odds are better that I will enjoy a good long soak on Saturday night after I have a nice swim and I will be setting the alarm for another swim on sunday to start my day.

I know that in the long run this is going to prove to be very useful but I did find it hard that it slowed me down so much on a healing day.. Well, I wish you all well today.. have a great Friday..

Are you one of those in a area that spring has already arrived and you are in the gardens/yards, or are you like me, covered in snow by a couple feet? Did you have any new babies this week? Waiting on a expecting momma that looks like she is whale big?  Healing or working on a rehab on certain body part?

Well, I had better go haul some water and shovel some snow and do some more stretches!

Posted in At the kitchen table | Tagged , , | 4 Comments

Home Grown Food Summit 2019

Check out the online Home Grown Food Summit 2019

Please click on the link in blue above to be taken to the sign up page. I do NOT get anything for promoting this. I just think some of my readers might enjoy it 🙂

This is a event that happens yearly for a while now but its possible that some of you are not aware of it, so I wanted to share it. I have had friends and readers sign up in the past years and pick and choose what they want to learn from that have spoken highly of it.

Its free

Having said that I will let you in on how it works so you go in with eye’s wide open. I did sign up a numbers of years ago before I realized that I would need to watch it all online and I just do not have the data plan to do that.

Then I got the offer.. you see it is FREE on the day of.. each day they release new video’s and then you have a time limit to watch them.. then at the end of the online summit, they close them from being able to be watched ..

and the offers start coming in by email 🙂  They bundle all the video’s and put them on a disk (back in the day) now however its more likely to be a storage data key that they charge X for and that they will mail to you.

Now it could have changed by now, and perhaps now it’s up behind a pay wall, I am not sure.. however If you sign up for it and enjoy it.. that first viewing is FREE and you get to pick and choose what to watch and learn from, then as soon as possible click the remove me from the mailing list so you don’t get the upsell afterwards.

If any of them are of interest to you.. enjoy..


Posted in At the kitchen table | Tagged , , | 2 Comments

Sweet Sixteen Apple Tree

Ah, Apple Tree, how I adore you.. I have ordered in a few new apple trees that are harder zoned for the farm this year. I have some lovely apple tree’s on the farm but the extreme cold this winter got me thinking..  Maybe I should add a few more that can handle colder winters.

The Sweet Sixteen Apple Tree is one of them. I got two of them as I am totally in love with how they are talked about.. these sound like the must be so interesting for fresh eating but to have that flavour blend made into apple sauce..  Its a way to create a new apple sauce without needing all the other extra’s!

“the Sweet Sixteen apple tree offers a truly unique taste, with a blend of spice, sweet, vanilla and cherry flavours. It is a must taste!”

“The Sweet Sixteen is a medium sized, sweet flavoured apple, with an acidic hint, that is crisp and very juicy. It is an attractive apple; yellow in colour with red stripes; and is known for its unique taste, ranging from hints of cider, spices, anise, cherry, vanilla bourbon and nuttiness to name just a few! The flavour is already good before the apple is completely ripe; at this point it has more tartness and the cherry flavour is more pronounced; but at full ripeness its taste is really amazing; on our table it’s the apple everyone reaches for first!

It’s a wonderful apple to eat fresh but also gives excellent results when cooked. The taste is even more refined when the summer is not too hot. Its fruit matures on a three week period and will keep for about 4 months in a cool room.

The Sweet Sixteen apple tree has resistance to most diseases. Hardy to zone 3b, it’s quite vigorous and easy to grow.”

And a little of this tree’s history!

“The Sweet Sixteen apple can be traced back to the work of Dr. William H. Alderman. In 1936, at the University of Minnesota in Minneapolis, Dr. Alderman crossed the varieties Minnesota 447 (also known as Frostbite) and Northern Spy, to produce an apple tree that he named MN1593. In 1947, a series of tests on the MN1593 variety were carried out. This continued for 31 years until Sweet Sixteen was released to nurseries in 1978. You can see Dr. Alderman in the photo. Just as we are, Dr. Alderman was also promoting standard rootstock on apple trees when growing in northern areas.”

What a amazing tree! I can’t wait to get mine.. Want one and you live in Canada (other then B.C.) you can have this interesting apple tree sent to you though the post in bare root. We can compare notes growing it and seeing how it turns out 🙂

http://www.hardyfruittrees.ca/catalog/apple-trees/sweet-sixteen-zone-3b-the-most-unique-apple-you-will-ever-taste

All information in “X”  comes from the Hardy Fruit Tree’s website including the photo used! Please note that I am not getting anything back for promoting this tree or this nursery.. I am just so excited about some of the things I have ordered from them that I have to share!

Is anyone out there growing this apple? Have you eaten one? What did you think of it? do you love it? hate it? bla.. didn’t live up to the hype?

Posted in Garden | Tagged | 9 Comments

Farmgal’s Photography Feb 21st

Well, I wish I could say that I have picked up the camera each day like I have been doing faithfully for most of the year, I did get five out of the seven days and I had two planned photos shoots. I need to step it up and get back to bringing out the camera daily. (be it the new one or my phone camera, I am not fussy on that part)

I swear I could just make this whole post nothing but “full moon photos” and that will be the main push on it, as I did a photo session as it was rising up and was colored still.. then I got up at just after 3am and snuck out of the house and its clear and cold in color.. both sets are lovely in their own way..

This was the early rising and it was hued from the setting sun.. I also had to laugh as I was taking it low enough that it was “just clearing the tree line.. or not

The later very early morning photo shoot , the moon was coming down but was still high in the sky, clear and clean! It was a brisk -24c.. brrr..


I love the halo effect on this further away shot, it a very good one because it was pretty much what you could see with your naked eye.. maybe not quite as much detail but close and it lit up the whole night in this amazing moonlight,  I honestly had the thought that if it had been safe to do so, I would have saddled up and gone for a ride to bring in the sunrise.. it would have been earth magic!

I am very pleased with this one, I did realize that I need to get to the point that I can take a photo without needing to press the shutter button as I would have gotten even more detailed photos if I had not had to touch the camera which caused it to “shake” just a touch..  Below was my version of a close up (in camera, not cropped) of that strike.

All of the photos above where taken on a tripod, none of them have had their colors messed with or any cropping or other photo software.. I left them as the camera took them, I think they stand on their own as is.

I guess I am going to just leave it here.. Yup.. it was truly a beautiful moon and so worth the effort to try and get these.. I hope you will enjoy them 🙂

Posted in photography | Tagged , , , | 6 Comments

Help a farmgal out? Share your Best Beet Salad with me.. please

Now I love beets, pickled beets, roasted beets and Baked Beets in a Cream Sauce is a huge treat!  Of course we all love our Beet soup.. hmmm

Where I am struggling is more how to successfully use beets in a salad?

I have found that the fresh tiny baby beets are good in the raw matchsticks, but not so much the storage beets and that is where we are at.. I have storage beets that are starting to sprout green tops on them.. They are not woody but they are no longer fresh/fresh, nor are they as sweet as they used to be.. they are however very deep in flavour.

So I am reaching out.. do you have a favorite way to use beets? What is your favorite dressing to go on beets? What do you think is the best beet/with X and X flavour combo you like? I have frozen and I have plain canned and pickled.. and soon enough beets will be planted out into a manure hot box as one of my first spring veggies..

right now.. right now, I need to find new ways to use up these winter storage beets.. I look forward to hearing from you 🙂

Posted in food | 13 Comments