
High-Altitude Cold-Climate Gardening: Overcoming the Terrain
Guest Post by WillowcreekFarm Part 2 of 5.
When gardening on steep, rocky mountainsides the terrain presents quite a challenge. Finding a flat space to build a garden is nearly impossible, and the few naturally flat places that exist are often a risky area because the runoff water from the mountain runs right to that area. And even if an area is flat, it is still often on rocky ground which can’t be plowed up for a garden.
Our property is a rocky mountainside ponderosa pine forest.
The most successful option we have found is to terrace the garden area and plant in raised beds. Yes, terracing and building the raised beds is expensive, but when you are dealing with a rocky mountainside it is really the only option because there is nowhere to just plow some rows and have a mostly flat spot with reasonable soil. The investment in the beginning has definitely paid off for us in the long run with a super-productive garden.
Thankfully, Mtn Man spent his teenage summers working at a local campground building nice, flat campsites on rocky mountainsides, so he is very skilled at terracing. That made our work so much easier.

Here is the spot we chose for our main vegetable garden. The rise in elevation from the lower part of the garden to the upper part is about 6 feet over a 20 foot distance, and then about 3 feet rise over a 40 foot distance going the other direction.
That gave quite a rise diagonally across the garden from the lowest corner to the highest corner and made the build tricky. And the bedrock is just below the surface of the dirt leaving very little dig-ability – so we had quite a challenge ahead of us.
We picked the location of our garden based on the ease of access for us, as well as ease of access to water, and the micro-climate. The dark painted wall of the garage reflects the heat of the morning sun thus warming the garden faster in the morning, gives shade from the intense high-altitude late-afternoon sun, and it is a good windbreak as the majority of our wind comes from that direction.

We started by measuring it out and drawing the full outline on graph paper. Then we drew in the beds where we wanted them, with the walkways in between. We drew several different layout options, trying to give ourselves the most plant-able space and the least walkway space. We wanted to be sure we were using the space efficiently. I don’t have that original layout drawings, but below you can see this year’s graph paper drawing that I use to decide what I am planting and where I am putting it. That is the layout of our garden beds and walkways.

Coming together now..
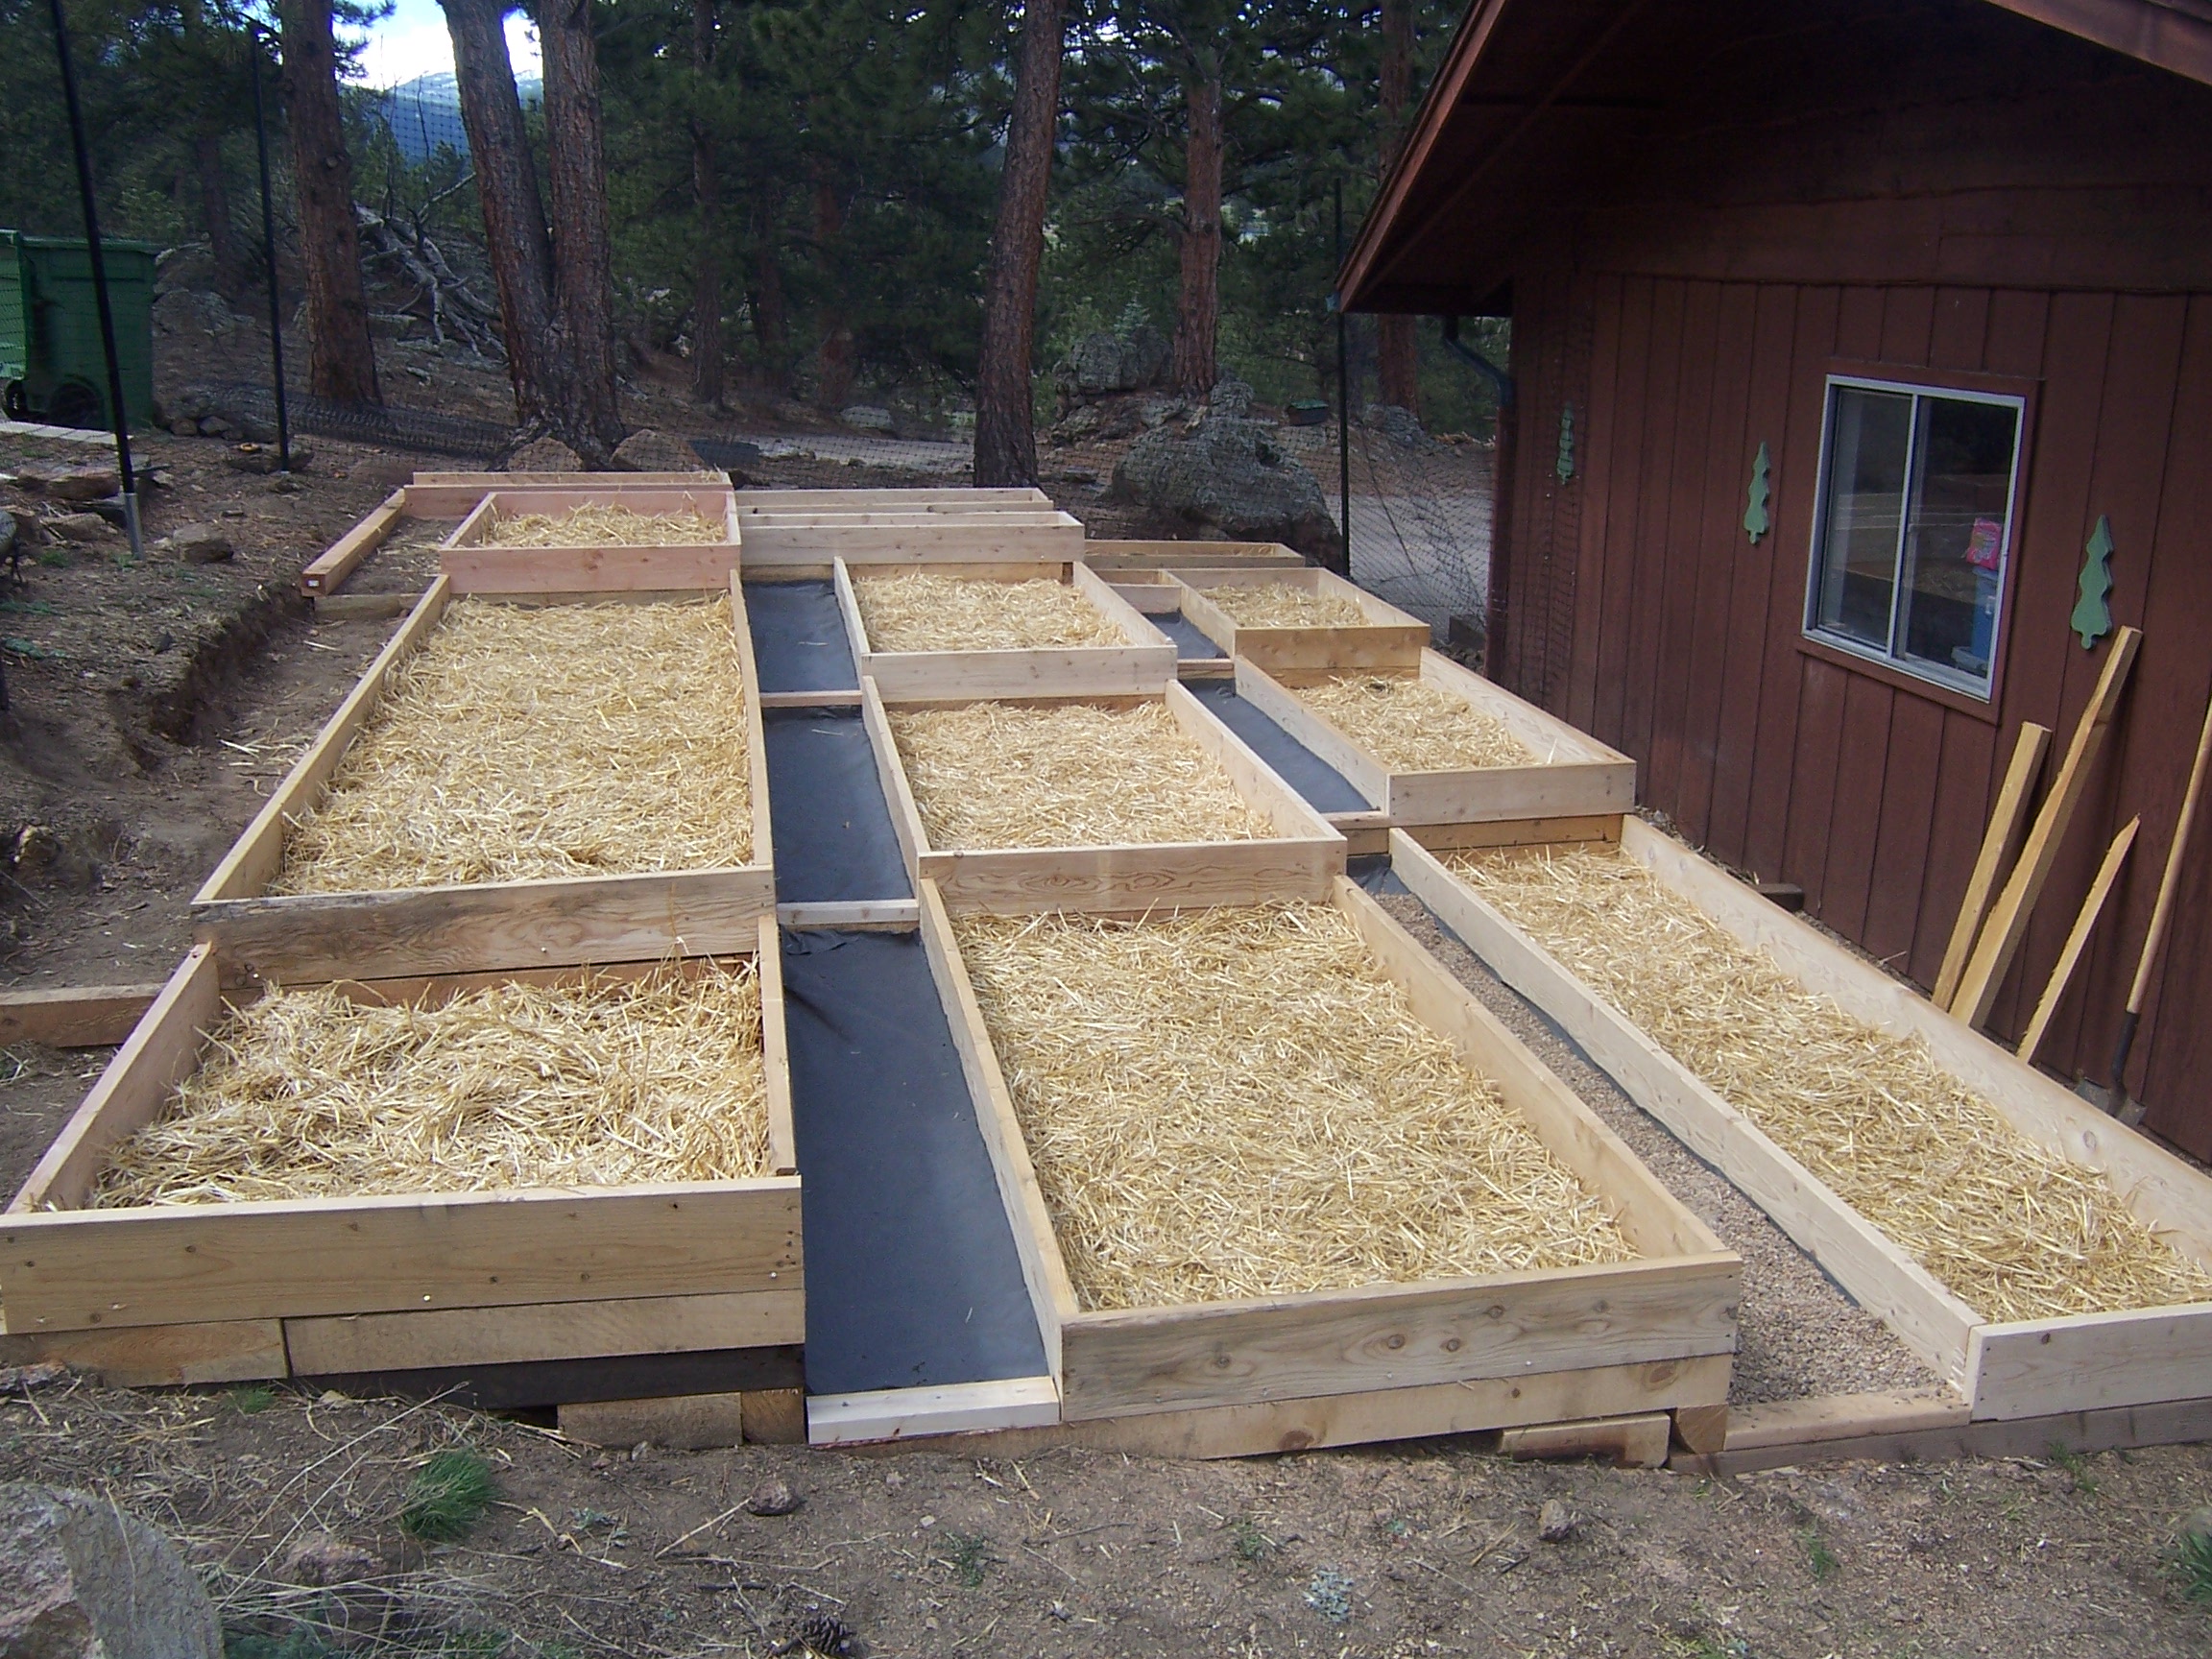
We built our main garden beds 4-feet wide and as long as they can be in our garden space. Around the edges of the garden we build them 2-feet wide along the fences (not included in this picture).
The 4 and 2 feet wide beds work well for many reasons. An average person’s reach is about 2 feet. So with the 4-foot beds you can easily reach in from either side and get to the middle. And the 2-foot wide ones along the fence means you can easily reach all the way to the fence.
Also, the size makes it easily compatible with the various hoop tents and trellises that we use, which will be discussed in a future post.
Our paths are about 18-inches wide to give us the most plant-able space possible, but late in the season, when the garden is jungle-like, I do wish the walkways were wider. We put down weed fabric covered by pea gravel in the walkways. The weed fabric was easy to put in because we were able to staple it to the raised beds, holding it in place all along the walkway. The fabric and gravel help a lot in that we don’t have to worry about weeding the walkways. The garden has enough work and weeding of its own, why waste time weeding walkways?

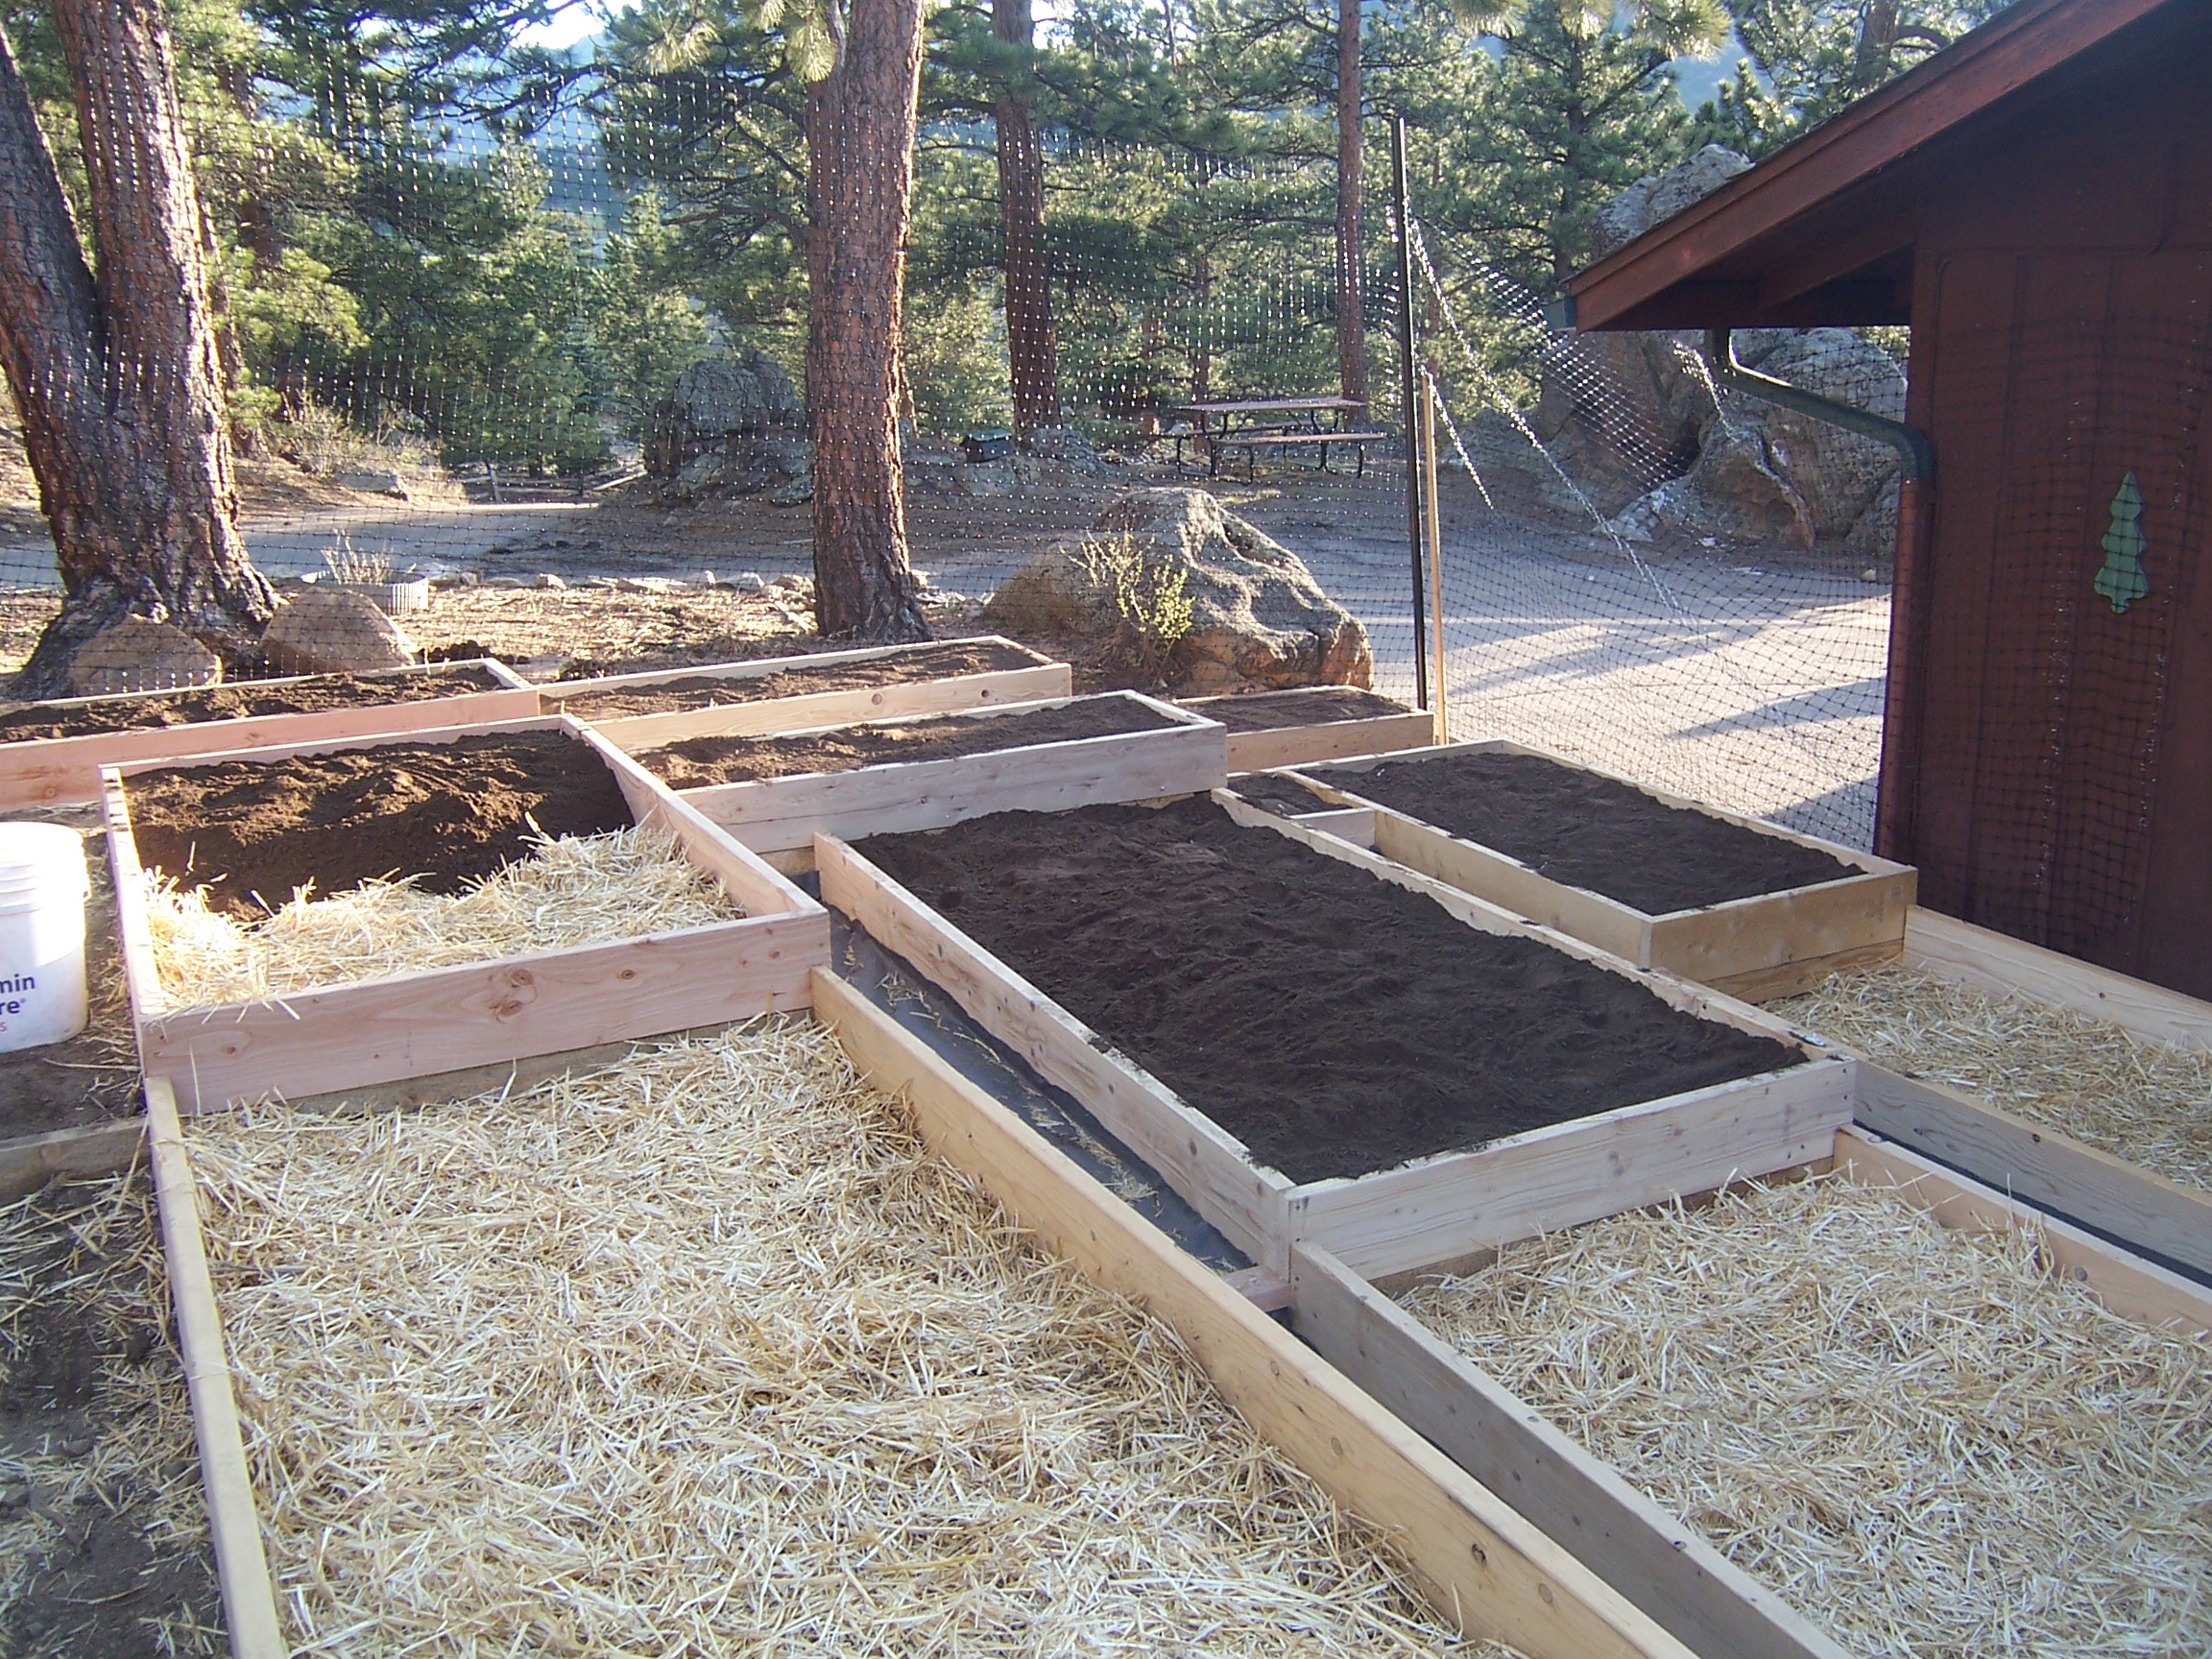
We lined the bottom of the raised beds with straw, and then put compost from the barnyard over top of that.
We will discuss soil and compost more in a future post.

Originally, the garden beds were built to be about 9-inches deep, depending on the area of the garden and how we did the terracing with the bedrock under it. But over the years we have found that they grow much better when they are deeper, so we have been expanding each raised bed section to be about 13-18 inches deep and that has helped a LOT.
(Farmgal’s first question, are those water lines or are they hot line to help heat the soil or a combo of them?)

(Farmgal, look at those outstanding cattle panels? that are giving all that amazing vertical garden space..! Love it!)

In addition to the main veggie garden, we have a few other garden areas around the property. They use many of the same concepts of using raised beds to deal with the steep rocky terrain, but with some creative changes to how we built them.

The Garlic and Onion Patch raised bed was built with some old railroad timbers we found on our property.

The Strawberry Patch was pretty flat and had pretty good soil in that area to begin with, so we just used some edging bricks to build that bed and added a few inches of compost to that area.

The Apple Garden, which is our medicinal herb garden with our apple trees in it, was built with a 4-foot high retaining wall right next to our driveway. That’s a RAISED bed.

And our herb garden is made with various fun containers for planting in
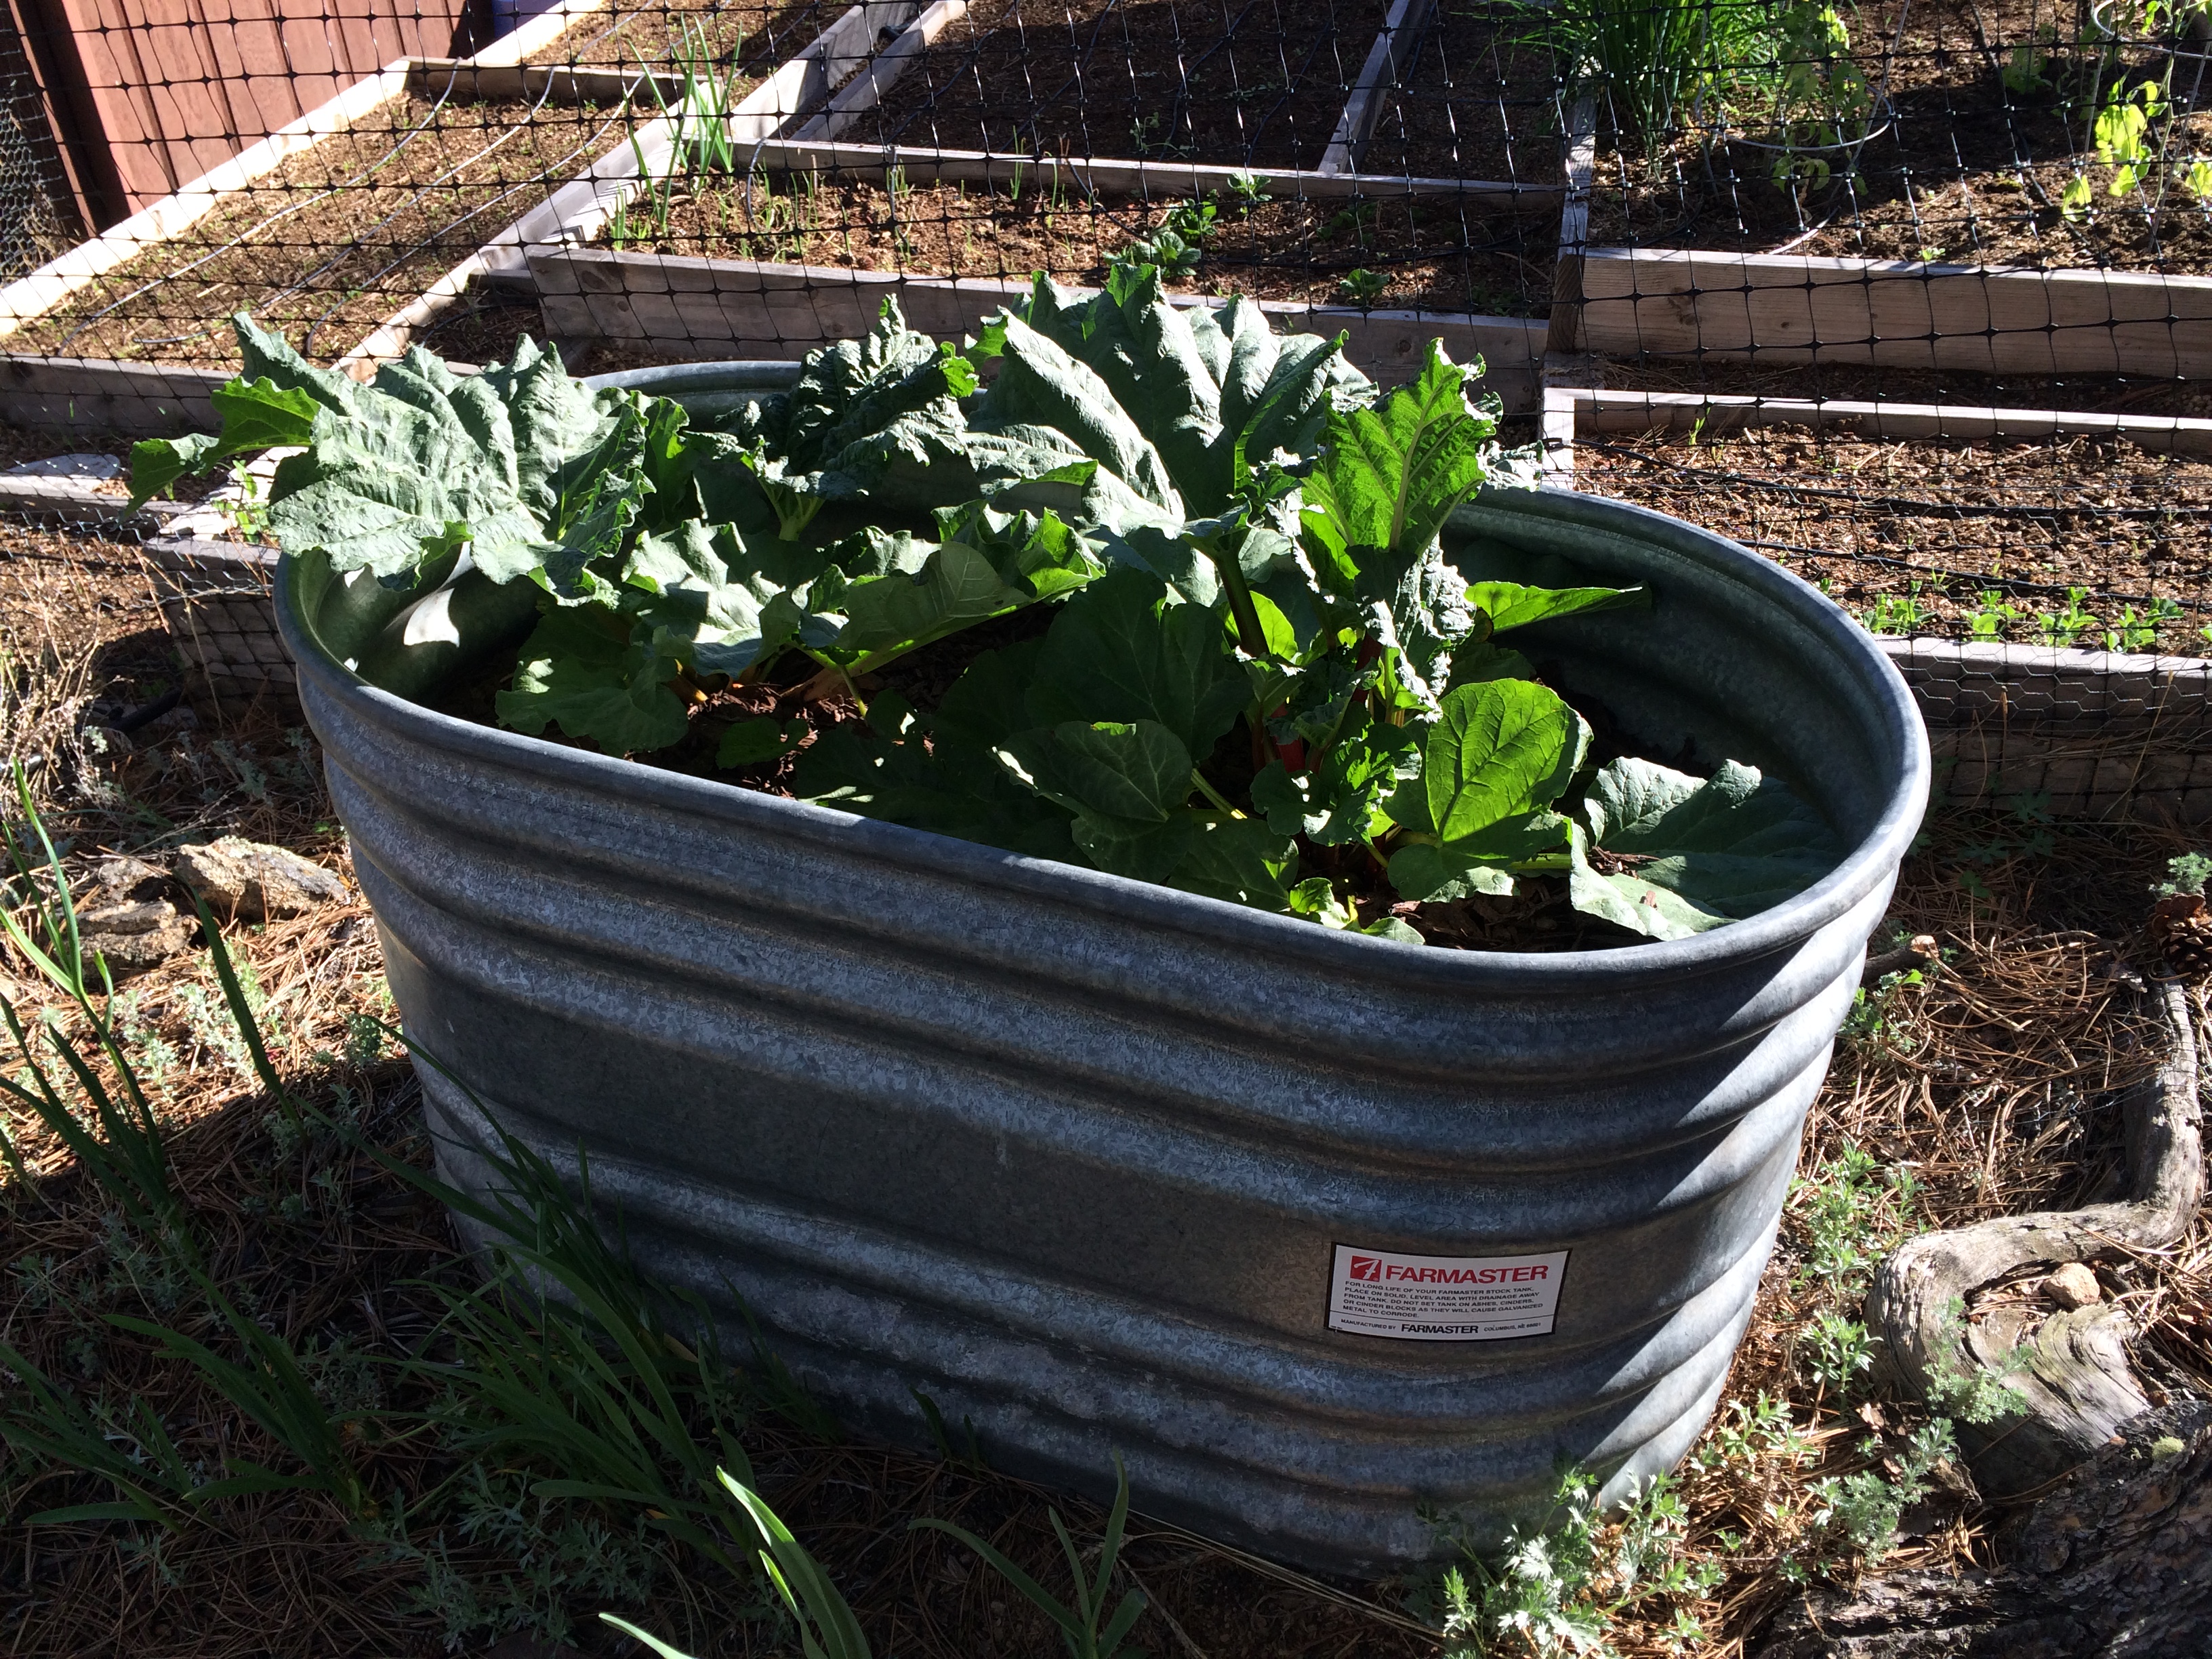
We have used a water trough and an old clawfoot tub as “raised beds” too.
There are so many creative options for how to build raised beds and planting areas.
With a little planning, and a lot of effort, you can overcome the steep rocky terrain of the high-altitude Rockies.
Overcoming steep, rocky terrain:
- Choose a good location based on ease of access, terrace-ability, and microclimate
- Terrace the garden area
- Plan the garden area to have as much plant-able space as possible, minimizing walkways and maximizing planting beds.
- Build raised beds that are about 15+ inches deep, 4-feet wide (2-feet wide along fence) and the length of the garden area.
- Build 18-inch wide gravel paths (or wider for comfort and ease of use) lined with weed cloth.


")

")
")
")
")
")
")


")
")
")

")

")


 (2)")
")

")


")


Oh wow – a great and informative post. I have severe garden envy now but I am inspired.
I know right Crafty, amazing, so much work but what a garden!
Pingback: High-Altitude Cold-Climate Gardening : Overcoming Soil Challanges. | Just another Day on the Farm
Yes, those are water drip lines in the garden boxes.
And yes, those arches are made of scrap strips of cattle panels that we had leftover after building our lambing jugs.
We also use 2×4 inch welded wire to build trellises for the peas to climb up. They are way less expensive than store-bought and very easy to make. We have been using them for 5 years now and they continue to be in great condition. You can see how we make those at https://willowcreekfarm.wordpress.com/2013/07/11/diy-trellises/
Pingback: High-Altitude Cold-Climate Gardening : Overcoming Wildlife Challenges | Just another Day on the Farm
Pingback: High-Altitude Cold-Climate Gardening: Overcoming the Climate Challanges | Just another Day on the Farm