Overwintering Cherry Tomato’s Slips or Plants

Fall has fully arrived on the farm but some of the tomato plants are still going thanks to the permaculture planting styles used on the farm, the cherry tomato plants are still producing in the main garden, they are quite sheltered. We often think of tomato’s as a annual but if the weather works right, its very much a perennial. With a little care we can overwinter a few in the house and then taking slips at the right time, start lots of wee babies that will give us a huge head start in the spring.

Today was a perfect day to go get slips, two off the best plant and one off each of the other two next best plants.. only take slips from your best producers. Each slip was cut on a angle with a clean blade and then all the bottom leaves/stems taken off and any flowers also removed off each stem.

This one is a touch long, I will shorten it up one more nod now that I see it in the picture 🙂 I got a nice piece of young willow and cut up a few stick of willow to add to the water to help with the rooting out process for the tomato’s. Once I have roots, I will pot them up with rich potting soil from the store to make sure I do not bring in anything for the winter bug wise.

I placed it in the glass jar so I can keep a close eye on what is happening and its in my bathroom which is warm with nice indirect lighting.  I have tried potting up bigger tomato’s types and I have found over the years that while you can keep one or two of the bigger ones for slipping in the spring.. they do not get enough from the winter light to produce the same way that the smaller cherry tomato plants seem to.  It might be different in your zone.

Are you going to be bringing in tomato slips? this fall, will you be overwintering any tomato plants in your house? Got a story about a plant that has been alive in the house for many years. I went to one ladies home, her whole living room window was covered in the most amazing cherry tomato plant that she had for many years.. I can not remember how old it was, just that it was a long time and she just pruned it to keep the shape and to keep it producing.


Posted in Garden | Tagged , , , , , | 9 Comments

Apple Pie Recipe

Fall has arrived and the apple tree’s are filled with lovely apples, some for fresh eating, some for winter storage and some for baking.

Freshly made apple pie for Canadian Thanksgiving is a treat!

You will need Premade pie dough (homemade is awesome) Follow the blue link to a detail pie pastry dough blog post.

Apple Pie Filling

Peeled, cored and sliced apples (it took five large local apples to fill this pie

2 tbsp. of flour

1/2 a cup of sugar (you can go as low as 1/4th)if the apples are on the sweeter side

1 tsp of cinnamon

1/4th tsp of all spice

1/4th tsp of ground ginger.

In a bowl mix the apple slices/flour/sugar and spices together. Pour into the bottom unbaked pie shell, Top with a unbaked pie shell.  Brush with cream and sprinkle sugar on top of the dough if you would like.

Bake in a preheated 350 oven for approx. 45 minutes

Serve Warm with ice cream or excellent cold with whip cream, ice cream or sharp aged cheddar Cheese.


Posted in Baking | Tagged | 4 Comments

This and that Post.. Family and Gravel

Wow, its been busy.. Dear Hubbies mom flew in from Alberta and its has kept us running pretty much since.. she headed home yesterday.. and I am back on the blog.. Whoot!

Our home was the center, as his mom has fragile health and limited mobility at this point, so we have lots of family come visit over the time she was here, some for the day, some for a couple days at a time, our guest rooms and beds were full 🙂

Its fair to say that the dogs are missing all the company, they loved all the pats, cuddles and play times. Lots of lovely meals was made and served.. I did a smaller finger food for when we have more folks and little ones around, so that it was easier  for everyone to get different choices., Everyone got sent home with fresh buns and farm eggs

Then the other thing that happened was that our gravel arrived to redo the drive way, it needs a touch more work done with the rake but it looks amazing! It really needed to be done.. The laneway itself took 27 tons and we got a second load for the front parking area and the side walkway by the house.. so great to have that done before winter hits. Lots more packing it down to go yet.. I will drive up and down the drive with the truck and help it get packed down.

I will be doing a full post on it coming soon but I have been faithfully doing October unprocessed again this year. I was so pleased that we were able other then one single meal, (and not in oct) we were able to totally prepare all our meals on the farm. Its harder then it sounds to get folks to not just want to stop for fast food lunch or lets go out..

Everyone enjoyed the meals and we have a early thanksgiving dinner (Canadian) for his mom with all her favorite trimmings including her asked for apple pie. The hit for everyone was this little wee girl.. They adored my farm dogs but the wee Paris never lacked a lap LOL

Everyone have a great day!!


Posted in At the kitchen table | 6 Comments

Zucchini Fruit

I love Zucchini canned fruit..  This is often called Mock Pineapple and I have talked about it before on the blog. I have done it a number of different ways, my grandmother made a version of it with lemon’s.

Dear hubby loves it with mixed fruits, including peaches or even as the base of a fruit cocktail..  However this batch.. It’s perfectly done plain and I adore it!

Take large over grown zucchini and skin and gut it and cut it into cubes.

For every 6 cups of chopped zucchini I added one cup of sugar and 1/4th cup of lemon juice to mix though the fruit. The sugar is needed to help create a light syrup to can the fruit in but just as important it pulls the juice out of the fruit. The lemon juice is to increase the acid in the recipe.  Once you are done as much fruit as you are doing. Over and let it sit at room temp for six to 12 hours..

At the end of that time, you will see the above, it will have pulled enough juice to create the syrup, if for some reason your’s are drier then normal, you can make a sugar syrup on the light side per your canning fruit book.

Bring this to a simmer and simmer the fruit till the fruit turns clean and golden yellow in color. Test your fruit, it should be firm but have NO crunch left to it 🙂  Put into your washed, cleaned and prepped for water bath canning jars and lids.  Leave half a inch head space, water bath can 15 for pints and 20 minutes for quarts.  Store in a cool dark place, will last a year in storage.


Posted in Canning | Tagged , , | 2 Comments

Salsa -End of garden harvest goodies :)


With the frost warnings, I said to hubby, better pick the peppers and so this big bowlful came in, as did tomatoes. I have been keeping up pretty well on the tomato’s for sauce making so I went.. Salsa!!!

Equal parts prepped diced peppers and Roma tomatoes with half the same amount of diced onion. I fall harvested grated horse-radish root, salt, black pepper, a tsp of keen mustard powder and vinegar

I did a tea baller full of pickling spice, I love my steel bags so much compared to cheese cloth, such a better reuse item in my canning.

Cook for 30 to 40 minutes and then into hot cleaned and prepped canning jars and 15 min in water bath..  Fresh yummy salsa for winter..

Dear hubby does not like “hot pepper heat much” so the mild heat in this salsa comes from the black pepper, horse-radish and keen mustard power 🙂 its zippy just in a different way 🙂


Posted in Canning | Tagged , , , , | 6 Comments

Permaculture Hedge Row Garden Overview 2018

Spring build this year 2018..  the link in blue will take you to the blog post that is talking about putting this bed together. The video above is once it was fully planted out with the pre-started plants.

This one is eight weeks later after the first video above, you can see the crazy growth on this bed. We were already starting to get peppers, fresh eating ground cherries and squash, along with cut and drop comfrey.

This video is the fall one, it is pretty close to another eight weeks to the day to the mid-summer one, the bed is overflowing, the yields have been very good. We were under warning of a hard frost on the weekend but it did not happen.  Forgive my moment of not being able to think of powdery mildew LOL just laugh with me..

We only watered this bed twice in the whole year, we had drought, high heat, crazy high winds, early frosts and it just keeps on trucking and producing. What do you guys think of it so far?


Posted in Life moves on daily | Tagged , , | 7 Comments

King Ram 2018

Sometimes we make choices that we regret to a point, I like King my new ram, he is a good boy, but I miss both Horny and Whiskey. I should have kept them for more years.  I liked that both of them sheer out their wool coats on their own, where King lets some go on his back but still needs to be sheared on his sides and front.  Whiskey was a total suck and loved his cookies so was so easy to catch.. King is respectful but he is not friendly.  Makes catching him a lot harder. I need to get a collar on him to help as he is a VERY large male.

This year is our first year with him as a new flock ram and he gets high points for easy of lamb to be delivered, he gets high points for strong active lambs, great growth rates, good depth of loin and nice meaty rear’s on his babies.  I am greatly looking forward to see what he passes on in terms of milky traits.

Over the past week, I have seen three ewes breed by King and I will mark it down on the calendar.  I did not see any breeding in Aug, so that puts my first lambs due in Feb, unless someone slipped in there last month that I didn’t see.. its possible..

However I am leery on this.. you see on average in a rough way, sperm is started being made about 3 months before its needed, and when sperm in pretty much any stage is over heated, it goes.. NOPE and that’s just that..  If it’s overheated by a mear 4 degree’s compared to normal, you will have a run of sperm that is Blanks.. the boy’s are breeding, but they are not swimming.

So the question for me is this? was Kings low hanging boys in our major extended heat waves in Late June/ July/Aug going to have an effect on his boys. These times were hot enough that it was clearly stressing the sheep, they hide in the shade, they panted and they dug into the soil to lay on it in shade, they hide in the barn during the worst of it etc.

I am not sure that I am going to have good sperm till late Oct or early Nov given the year we have had.  The only way to even have an idea on if I am right is to watch the girls, I have the three females that are in heat and have been breed marked down and if they cycle again in another 21 days give or take.. then they didn’t catch and they are all proven healthy mature females that normally catch well.

I know that the heat has effected the fertile rates of my eggs and my hatching rates from my different fowl over the summer. I certainly did not want or need more babies hatched. I have lots of babies as it is.. however that does not change the fact that there is a noticeable different in our hatch rate with the heat waves.

We will see how it goes.. but if I am right.. Then my girls will most likely catch late and be lambing in April 2019. Time will give me the answer.  Have you seen fertile rates being effected by higher than normal temps?


Posted in sheep | Tagged , , | 2 Comments

Ottawa Tornado EF-2 Storm 2018


A tornado ripped through parts of the Ottawa-Gatineau area Friday afternoon leaving two people in critical condition and more than 170,000 people without power across the region.

The twister touched down in Dunrobin — a rural community in Ottawa’s west end, where multiple homes were severely damaged — before heading east across the Ottawa River toward Gatineau Park, according to Environment Canada

https://www.cbc.ca/news/canada/ottawa/ottawa-gatineau-tornado-1.4834216

Muglia said however, the damage is serious, nearly as bad as the 1998 ice storm.

“This is the worst storm that we have dealt with in the history of Ottawa … at least since 1998.”

The storm “tracked for quite a significant distance,” said Peter Kimbell, a warning preparedness meteorologist with Environment Canada.

“We know for sure that there was a tornado in Gatineau because we have colleagues of mine who actually saw it.”

Based on damage reports, the tornado was likely an EF-2, which have sustained winds from 179 to 218 km/h, he said.

Dear Hubby had a late meeting on Friday and was on the last bus for commute home, he snapped a photo of the sky and storm moving his way, he quote said, wanted to show me the dark area of the sky, once home and blown up, he in fact took picture of the tornado moving forward west to east in direction, while he was located to the south.

I was nervous waiting for news and was so glad when he pulled in the drive, we got winds and so very minor damage, my heart goes out to those that were in the tornado’s path. 100,000’s of folks without power.

this is climate change in action, we are going to see more and more extreme weather events. Thankfully my friends in the dunrobin area were missed but so many others had damage, had a friend on the Quebec side who was missed by a mear 500 feet in the path and lots more with minor damage..

Posted in At the kitchen table | 10 Comments

Pumpkin Pie Seed Saving


I often save seed from a number of plants in my garden. There are plants that I do not save seed from. An example would be carrots, I do not save carrot seed for a few reason’s, I have wild carrot (queens anne’s Lace) on the farm that it would cross with. I also do not want to overwinter enough carrots to keep my population breeding gene health, nor do I want to give up that much space in my cold cellar to keep carrots that are not going to be eaten as carrots are a bi-annual seed plant.

Some plants are very easy to keep seed back from.. Pea’s and Beans are some of the best starter seed keeping plants..

Squash and or pumpkins fall somewhere in the middle.. They seem like an easy plant to harvest seeds from.  Get ripe squash or pumpkin, cut carefully, split open and take out the seeds, wash/dry them and use the next year..  See simple right?

Lets do that one just a touch over..  Did you plant squash or pumpkins in the same gene, because if you did, they can and most likely did cross-pollinate, which means that pumpkin seed you are saving is going to be a hybrid.  Some hybrid seeds can out produce their parents, I have over the years grown lots of hybrid squash or pumpkins that grows up wild on compost piles that can be very tasty and other crosses that make good food for the critters 🙂

If you only plant one type and you are far enough from the gardens around you, then your seeds will remain pure on their own, but for most of us on homesteads we are growing more than one kind, and for those in towns or in community gardens. There will be other kinds around. This means you need to either use a pollination cage or you can just hand pollinate and then tape the flower closed.

For most folks its just easier on pumpkin or squash to do the hand pollination, pick off a male flower, or male flowers and take it to your new, just ready to open female flower that you have been watching develop, you will need to do this early in the morning, then use the male flower to pollinate the female, once you are done.. take painters tape (or other kind of tape can work) and close up the top of the flower, you must tape the flower so that no bee’s or other bugs brings in other pollen.

The flower and tape will drop off once the fruit starts to grow properly, make sure you know which one of your fruits are the pure vs the ones that are nature pollinated..  you can at certain stage very gently mark the skin of the pumpkin, I prefer to use a different marker, I use certain tiles for pure pumpkins to sit on and a different kind/color for the natural crossed.

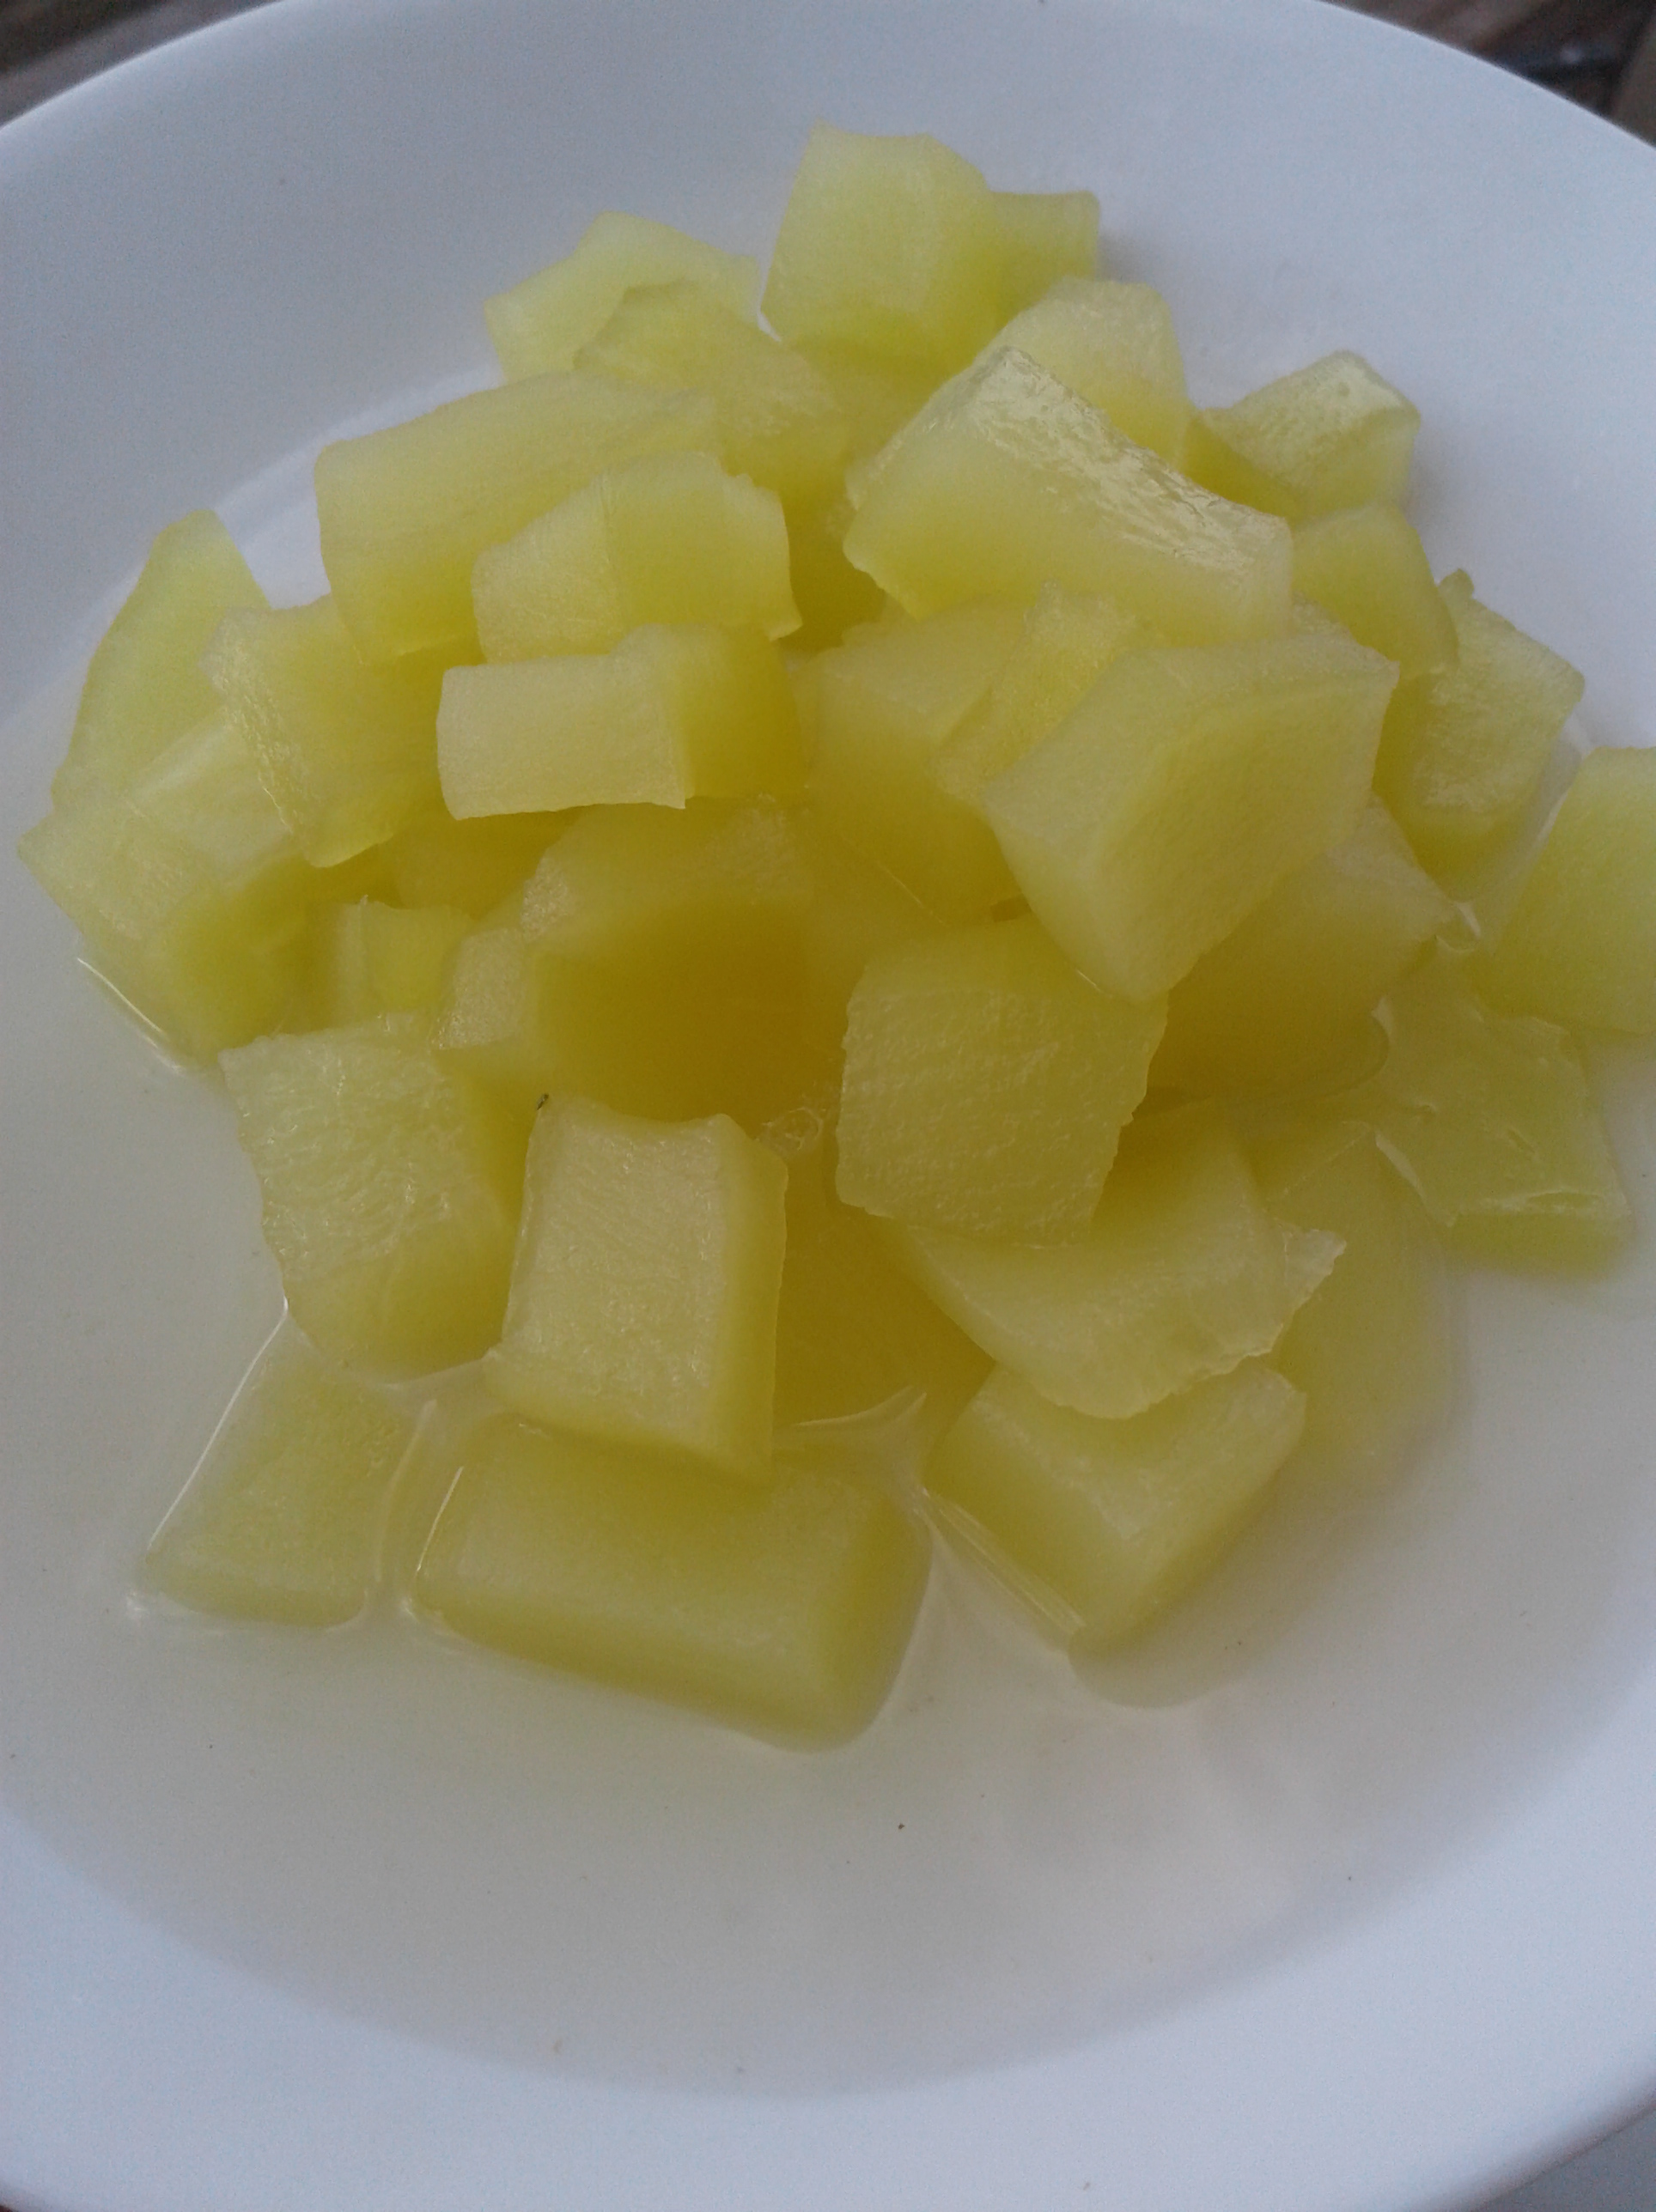
Pick your perfect pumpkins to harvest from, make sure you like the color of the shell, the structure of the pumpkin, the color, texture and taste of the flesh.

Here is where it becomes a touch more interesting.. do you want to save seed from the first pumpkins that are ready? or do you want to save seed from the pumpkins that are at the very end of the harvest season.

Now I am not talking about the difference between when the fruit was set, there are lots of times when you have pumpkins or squash done in the same week that will develop and mature weeks apart even on the same plant.

What you choose on a yearly base will affect your seeds.. if you are always picking and saving seed from the earliest mature pumpkins, you will slowly but surely working gene wise on a shorter season pumpkin of that type. Of course there is a limit on how far you can move something but as we all know on seed packages.. the amount of days can be quite different.. ranging from 90 to 140 days.

If you have something that is normally ready in 120 days, if you are always picking the fruit that is ready as early as possible, you might get one that is ready at 118 days or one that came ready at 122 or the rare one that was ready at 116. and you saved seed from them , then the next year you plant them and breed them together, that year more are ready by day 118 to 121, and then repeat and repeat.. it takes 3 to 5 years to set in a new date typically of one more day. So its possible that your first bought seeds would be ready at 120 but three years later you can have used selection pressure to move that to 119 and three years later to 118 and ten years later you might have pushed it to 115 days.

If you are in growing in a season that is short ended for the type of plants you are growing to have a plant that you like move to a short season by five days can make a big difference depending on your early frost date.

On the flip side.. watching for and breeding for the late side is important as well.. working to see if you can breed in a bit more cold tolerance is a good thing for a number of types of plants.

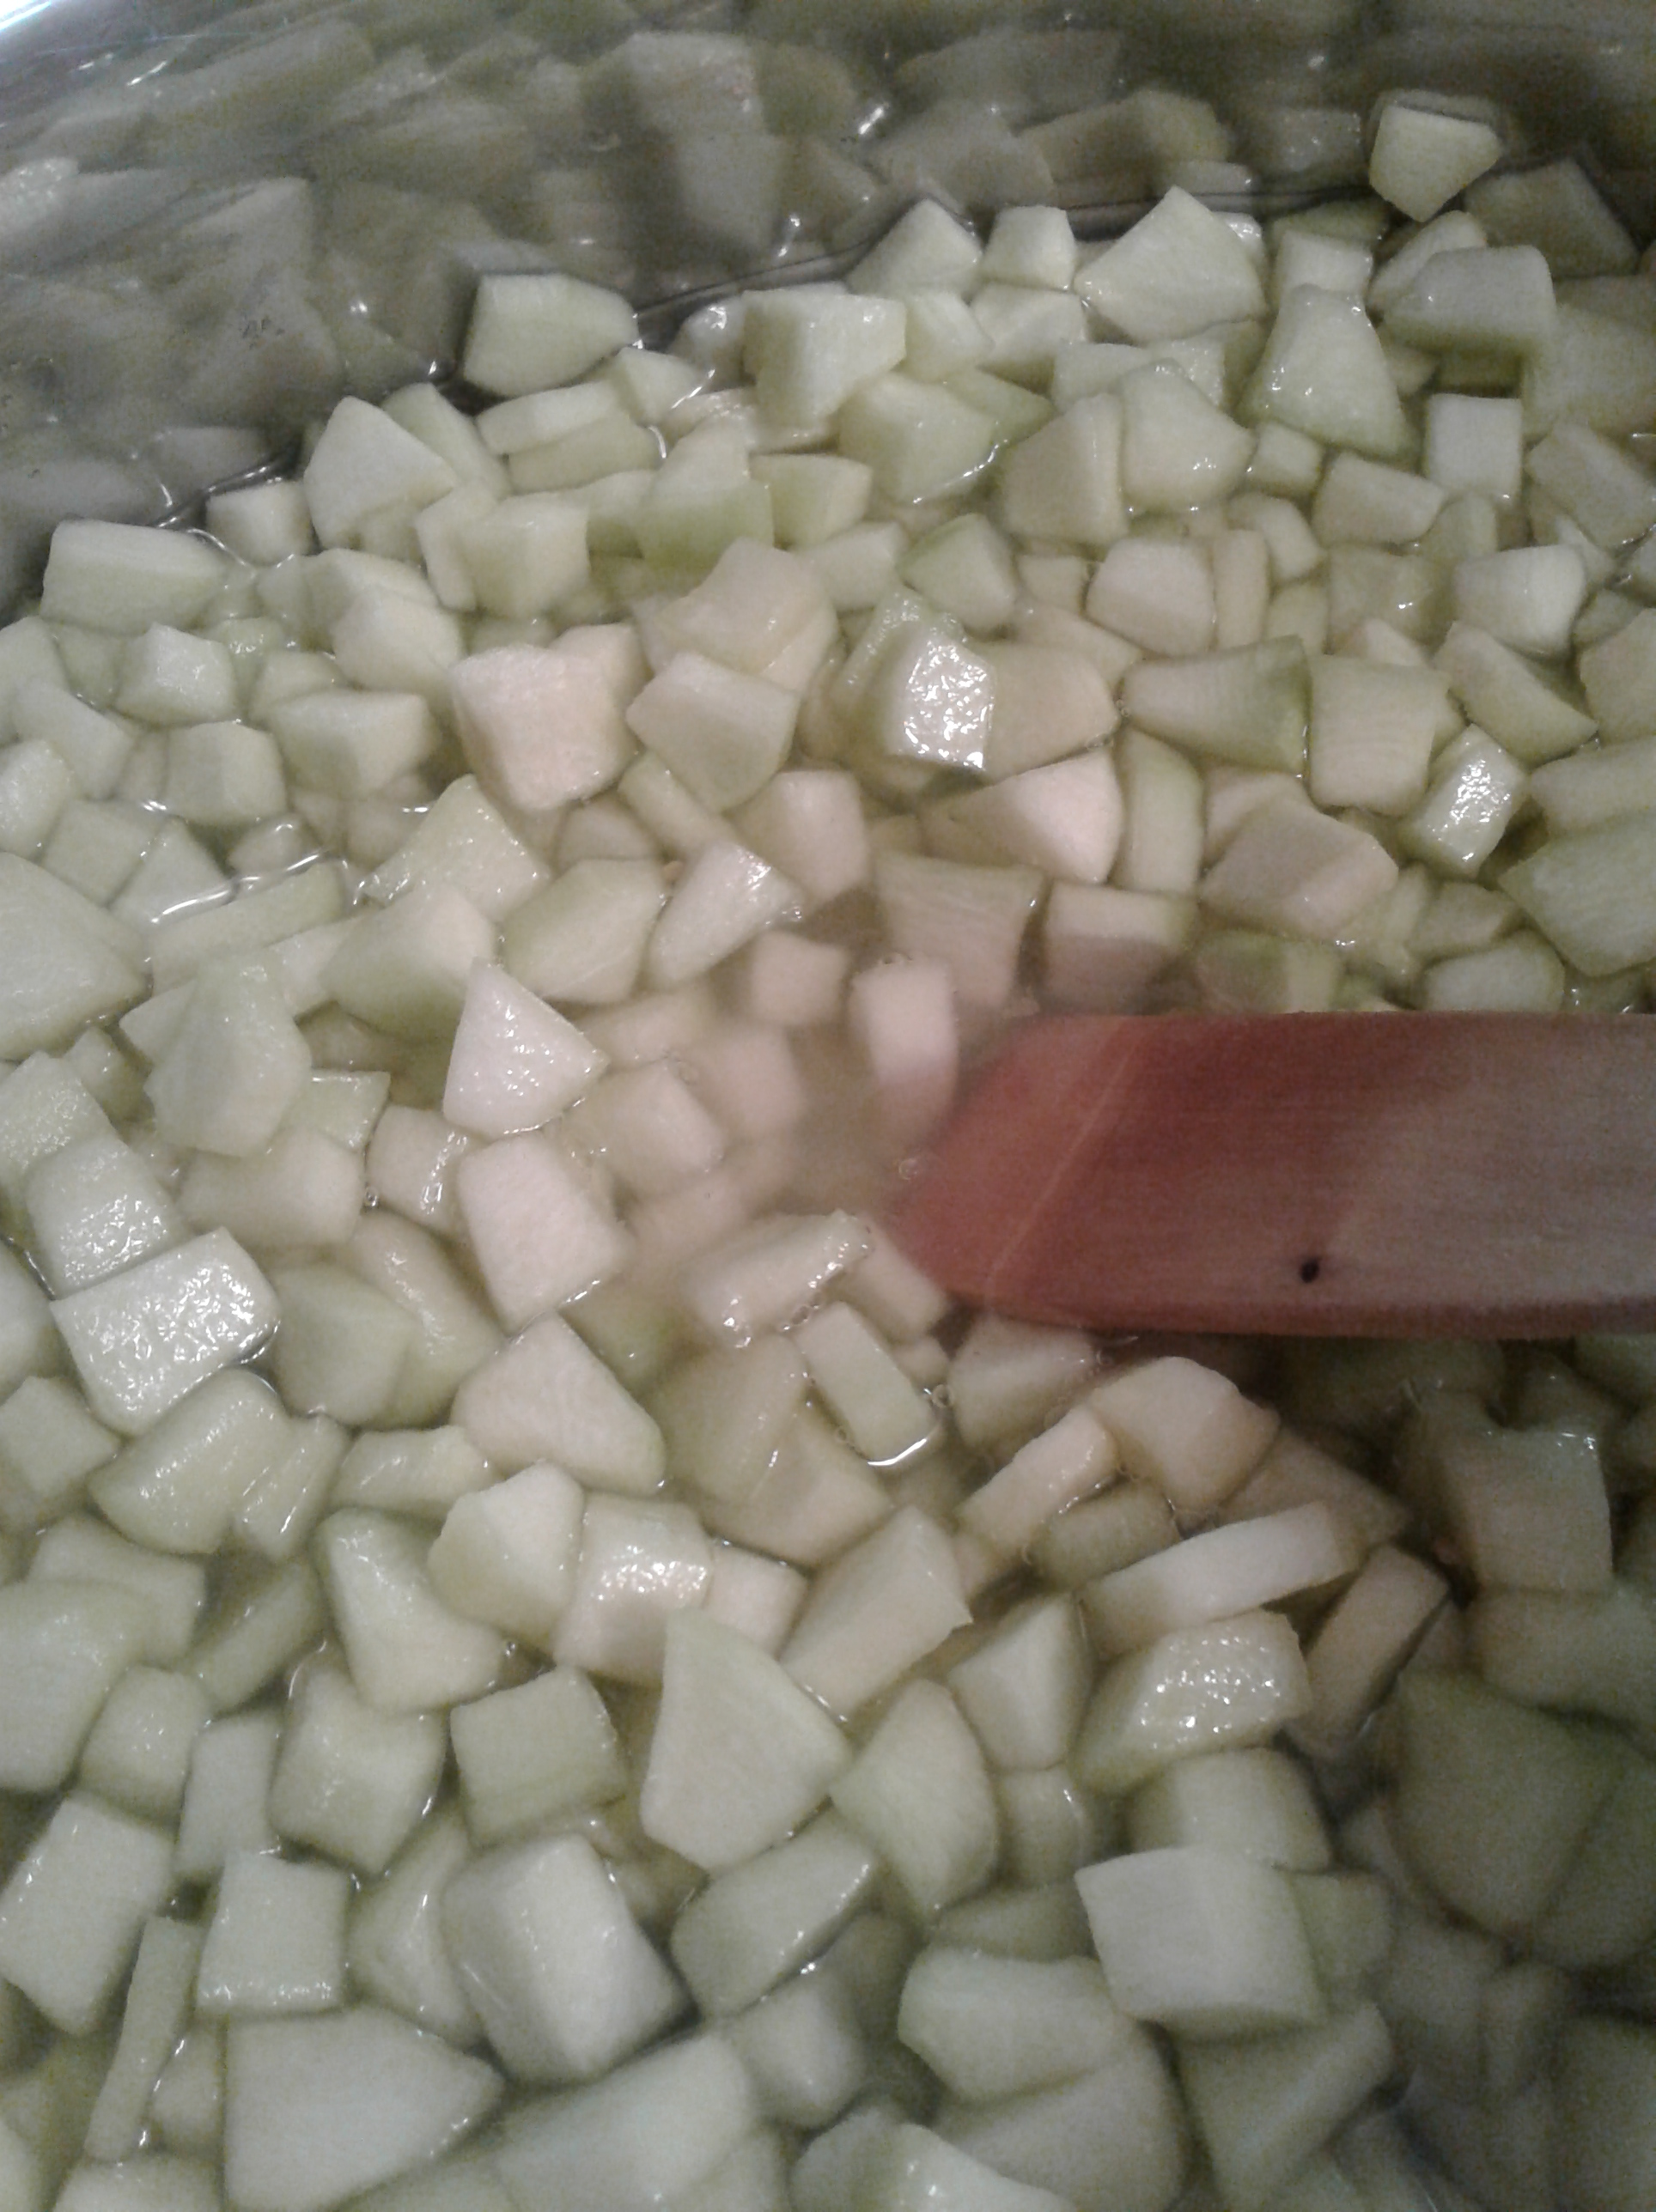
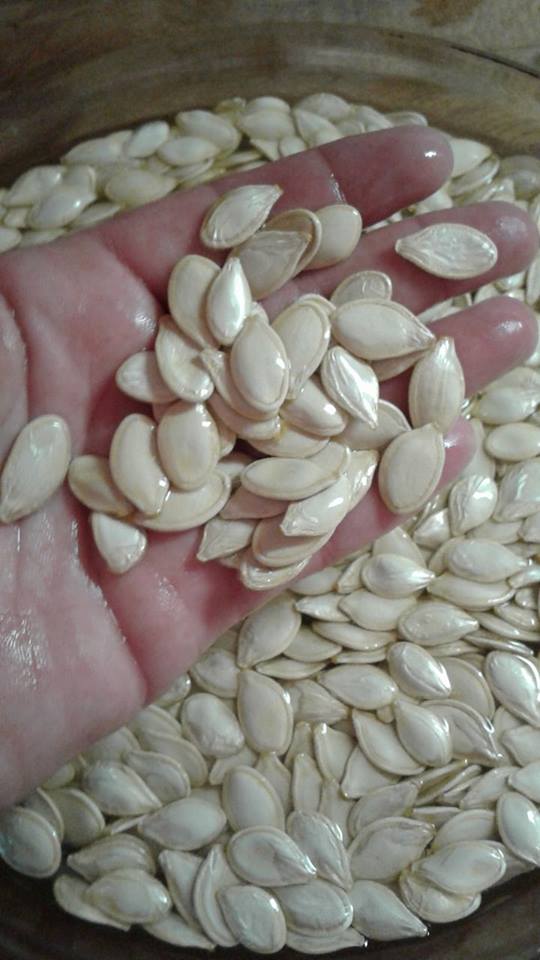
So with the above in mind, I selected the two pure pie pumpkins that were ready first to save seed from. I cleaned the basic seed out of the pumpkin. Then I filled the pan with water and let other bits float to the top, empty seed pods also float, remove them, if anything is stuck to the full seeds, help wash it off.


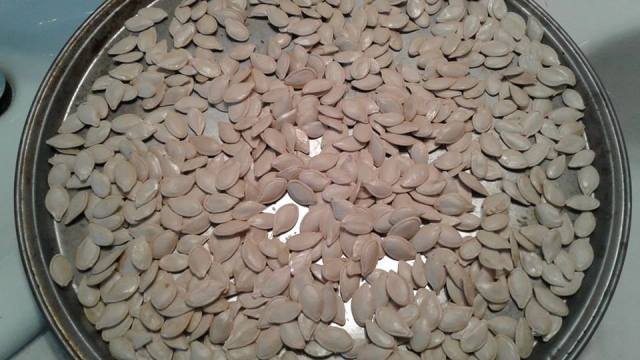
Check the seeds, pick two or three nice full ones and open them.. confirm that you have a mature seed in there. Then look at the rest of the seeds, remove any that odd shapes to them, a dip in the side.. remove it, one that is very narrow compared to the rest, remove it, anything that feels light in weight, remove it.

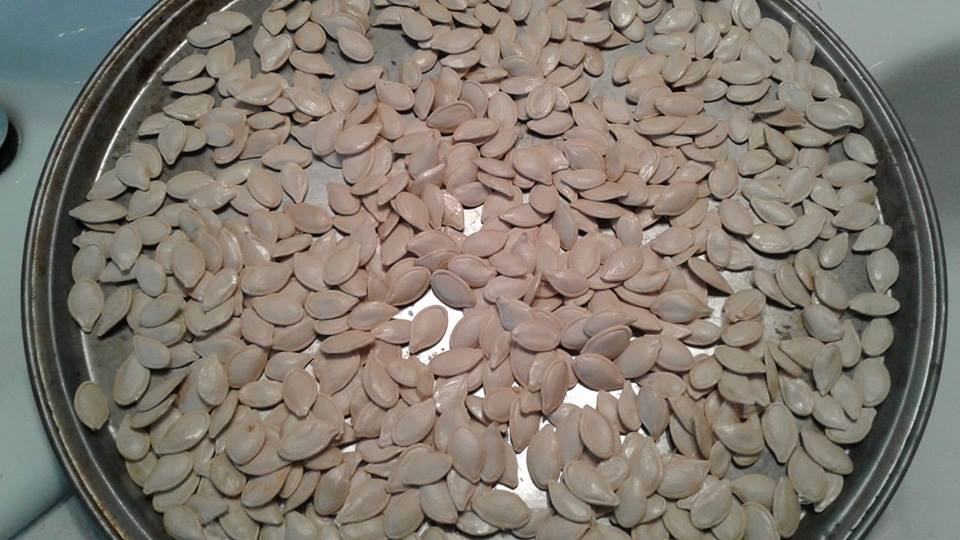
The ones that are left should go on trays or screens to air dry. Do not put your seeds on paper towels, there will be tiny bits of paper left on the seeds when you take them off the paper that can affect them in a negative way.  Allow to dry for 12 hours, then shift them around and continue drying for another 24 to 48 hours.. it could be longer depending on time of year, heat in the house and how humid it is.. clearly a warm sunny day vs a rain day will affect how things dry in your house.

Keep drying them until they lose their sheen and become a duller flat color and they will slip though your fingers in a smooth way, if they catch at all.. they are not dry enough..

Once they are dry.. look at them again.. things that were not visible when they fresh will show now that they are dry, remove any that have broken edges or show large dips in them.. keep only smooth, full seeds.

Move them to a paper bag, label the bag and place in a cool dark cupboard for winter storage.

Thought you were done.. Nope LOL Wait a week and then run a seed test.. take five seeds and use the baggy method and test them, they should sprout quickly and fast.. check your sprout amount.. you are looking for at least 80 to 90 percent sprouting results.

If you have that.. great.. you are good for the year.. keep your seed, remember to do your seed test again in the spring before planting.. this will give you info on how well your seed storage is working for you.

there is no point in keeping seed that will not produce for you when planted and you will also need to know to add that seed to your seed buying list.

However if you have run the seed test, you know you have good seed going into your seed saving box. In my case, I do not need this many pie pumpkin seeds but I am planning on packaging a number of them up for the local seed swaps that happen in my area.

Posted in Garden | Tagged , , | Leave a comment

Beach Rose Hips/Seeds

I think its a beach rose hip, it fits what I have been told.. So a friend of mine went to Nova Scotia this summer and he came home with wild harvested rose hips.. I have never seen rose’s have these size hips..  they are the size of small crab apples.

He used most of them to make a amazing jam/jelly with them. When he shared photos of them with his friends, I asked if there was any chance that I could snag some seed. We meet up on the past weekend and there are here..

He has been keeping the hips and seeds in the fridge, I will continue to do so for a certain length of time and then I will start some of the seeds. I have lots, I will offer a plant or two back to him but most of the ones I plan to grow will go into food hedges and or into one of the layers of my rain garden levels.

I hope that the scale with the standard tsp in the picture will give a idea of just how big these are. I have enough seed that I will start what I need and then prepare the rest of the seed so that in the spring, it will be ready to go out in small lots at our local seed exchange table 🙂

I understand that these row bushes are like most.. fast growing, hardy and tough.. they don’t mind getting their roots damp at times and they help hold sandy soil together. I used to buy rose hips to give the powder to my Brandy girl to help with her hooves.  I have been wanting to get a few hedge roses to add to the farm. These are said to grow 3 to 6 feet in height.

Given they were wild collected hips an seeds, what I will get from the seeds to point is unknown.. it will be fun to be surprised 🙂

Posted in Garden | Tagged , , | 8 Comments